Identify the wall type—stud, poured‑concrete slab, or cinder‑block—then choose the proper fastener: Tapcon or wedge anchors for concrete, toggle bolts for hollow block, and self‑drilling drywall anchors for studs. Mark the cabinet top with a laser level, cut a 45° French cleat, drill pilot holes to match the anchor diameter, and install the anchors at the specified torque. Attach the cleat to the cabinet back, secure the wall cleat to the ledger board, hang and level the unit, and test stability. Continue for detailed steps and bracing options.
Identify the Wall Type (Stud, Concrete, or Cinder Block)
When you first assess a basement wall, determine whether it’s a stud frame, poured concrete, or cinder‑block (CMU) construction, because each material dictates a different anchoring method. For stud walls, the wall material is wood, offering high moisture resistance when the bottom plate sits on a dry slab, and it aligns well with insulation compatibility; reinforcement requirements are minimal, but load capacity hinges on stud spacing and gauge. Poured concrete walls provide superior structural integrity, low permeability, and high load capacity; they demand heavy‑duty installation tools such as hammer drills and concrete anchors, and reinforcement requirements are inherent. Cinder‑block walls present moderate moisture resistance, require steel rebar and grout for reinforcement, and have lower load capacity; they influence cost considerations and may need additional moisture barriers for optimal insulation compatibility. Properly aligning the stud centers to 16 inches on the plate ensures consistent support for the attached cabinets. Anchoring to a solid substrate also reduces the risk of tip‑over hazards during seismic events. Sealing cabinets can further protect their contents from garage moisture and temperature fluctuations. Using a level during installation helps maintain vertical alignment and prevents uneven load distribution.
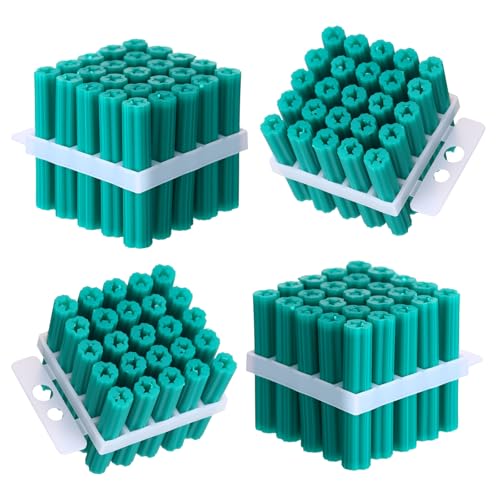
Package Content: including 100 plastic screw anchors in green color, 25 pieces in each group, this allows you plenty of hardware to complete larger projects or replenish your supplies for future tasks, suitable for#10, #11, or #12 Screws
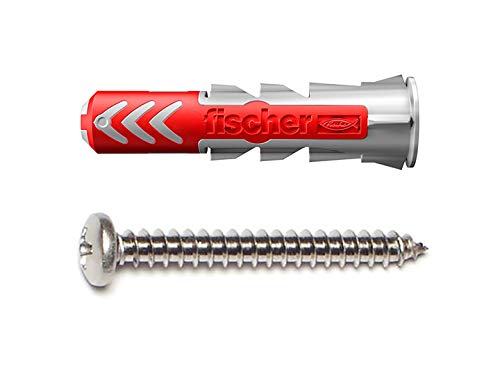
Highest load transfer & intelligent function: The DuoPower is the first plug that adjusts itself automatically to the respective substrate, transfers the highest loads through the three product functions of folding, expanding and knotting and thus enables a wide range of applications in solid, perforated and panel building materials

PACKAGE QUANTITY: 60 pcs #8*1 blue Drywall Plastic Anchors, 20 pcs #8*1 Yellow Zinc Flat Head Wood Screws, 20 pcs #8*1 Black Zinc Flat Head Wood Screws, 20 pcs #8*1 304 Stainless Steel Flat Head Wood Screws, 10 pcs #8*1-1/4 galvanize Pan Head self-Drilling Screws, 10 pcs #8*1-1/4 black Pan Head self-Drilling Screws, 1 pcs drill bit, 1 pcs cross bit
Pick the Best Anchor for Your Wall – Tapcon, Masonry, Toggle, or Self‑Drilling
If you’re anchoring storage cabinets in a basement, the first step is matching the anchor type to the wall material and load requirements. For concrete or brick, Tapcon screws work well; they’re made of hardened steel, need a 1‑inch installation‑depth pilot hole, and require torque‑specs around 10‑15 Nm for secure bite. Wedge anchors, a heavier material, deliver the highest load‑capacity (500 lb + in shear) but demand a deeper hole (1½ in) and precise torque to expand fully. Lag shields with lag bolts suit medium‑duty masonry, offering up to 200 lb load‑capacity; choose short or long shields based on wall hardness. For hollow block or thin walls, toggle bolts provide light‑to‑medium duty; they spring open, distribute load, and need a shallow ½‑inch hole. Self‑drilling anchors are quick for drywall studs, but their load‑capacity rarely exceeds 100 lb, so reserve them for light cabinets. Always clean pilot dust, verify torque‑specs, and stay within 25 % of each anchor’s ultimate capacity. Durability is a key factor when selecting a cabinet material for basement environments. Proper anchoring also helps meet building code requirements and ensures long‑term safety.

Star Recess Design: Eliminates bit slips and increases productivity by preventing cam-out for consistent, reliable fastening every time
ICC-ES Approved for use in Concrete: Tapcon+ is ICC-ES certified (ESR-3699) for use in uncracked and cracked concrete and seismic conditions. Delivers heavy-duty holding power in all concrete conditions for sill plates, ledger boards, and post-cap connectors.

ICC-ES Approved for use in Concrete: Tapcon+ is ICC-ES certified (ESR-3699) for use in uncracked and cracked concrete and seismic conditions. Delivers heavy-duty holding power in all concrete conditions for sill plates, ledger boards, and post-cap connectors.
Mark the Exact Cabinet Height With a Laser Level
Set the laser level on a tripod or a stable surface, then adjust its height until the horizontal beam aligns precisely with the desired cabinet top reference. Guarantee laser safety by wearing protective eyewear and confirming the beam is not directed at eyes. Perform beam calibration: verify the self‑leveling mechanism, then lock the tripod to lock the line. Identify the tallest cabinet, measure its height, and make an initial pencil mark on the wall at that level. Project the continuous horizontal line around the room perimeter, aligning it with the corner mark. Pull each cabinet one inch from the wall, shim the lower units until their tops meet the laser line, and fine‑tune rear levelers for uniform front‑to‑back contact. This method eliminates manual error, saves time, and guarantees consistent cabinet height across uneven basement surfaces. The laser level costs $15 and can be used for many applications beyond cabinet placement. Proper alignment ensures the cabinets function smoothly and look professional. Check floor flatness before beginning to avoid later adjustments.
Cut a 45° French Cleat or Ledger Board for Secure Mounting
Although the wall and cabinet surfaces may be uneven, a 45° French cleat provides a self‑aligning, load‑bearing joint that locks securely without fasteners. Begin with 3/4‑inch plywood; rip it into 7‑1/2‑inch strips, accounting for the 1/8‑inch blade kerf. Set the table saw to a 45° bevel and position the fence at 1‑1/4 inches, producing two identical cleats per strip. Cut the longer strips to 4‑ or 8‑foot lengths for the wall, then cross‑cut to match stud layout and 16‑inch anchor spacing. For the cabinet side, halve the same strips, bevel the edge up, and guarantee the opposing bevel mates precisely. Clamp each piece, verify a flat cleat finish, and shim as needed for level alignment across multiple boxes. The system allows easy rearrangement and strong hold like the original marine cargo applications. Properly securing the cleat to a wall stud using a heavy‑duty anchor ensures the joint can support the cabinet’s full load. Stud locating is essential before drilling to guarantee the cleat is anchored into solid wood. Load distribution must be considered to prevent over‑stress on any single cabinet.
Drill Pilot Holes and Install Wall Cabinet Anchors With the Proper Bit and Torque
When you begin drilling pilot holes for basement cabinets, first verify the wall material and mark each mounting point precisely to guarantee proper spacing and level alignment. Choose a drill bit that matches the anchor diameter; for concrete screws and wedge anchors, the bit should equal the anchor’s shaft, while drywall anchors may need a slightly smaller bit for a snug fit. Drill to a depth that accommodates the full anchor body without protruding, and collect dust to keep the opening clean. Tap the anchor flush with a hammer, ensuring the flange seats against the wall. Apply screws using the torque guidelines: tighten gradually, checking that the anchor holds securely without over‑tightening, which could damage the wall or compromise load capacity. Align the drill with the anchor to confirm the appropriate fit before starting. Use level shims to correct any floor unevenness that could affect cabinet stability. Properly select the appropriate anchor type for the specific floor material to maximize holding strength. Understanding the load capacity of each anchor type helps prevent overloading and ensures long‑term safety.

【𝐄𝐧𝐡𝐚𝐧𝐜𝐞𝐝 𝐆𝐫𝐢𝐩 𝐰𝐢𝐭𝐡 𝐄𝐱𝐩𝐚𝐧𝐝𝐢𝐧𝐠 𝐃𝐞𝐬𝐢𝐠𝐧】 Featuring a unique expansion structure,these wall anchors spread outward as the screw is tightened, creating a secure hold inside the wall.The reinforced ridges increase friction and stability,helping prevent slipping or loosening over time.

Warm tips: Before you anchor your decision, take a moment to measure your space! 📏 Double-check the dimensions to ensure your new anchors are the perfect fit for your project. Avoid the tide of returns by confirming the size today!

STRONG MATERIAL – All the blue concrete anchors and screws are made of selected materials with premium quality just to ensure the best performance. The Philips screws are made of high-strength carbon steel and finished with galvanizing technology, which is highly resistant to rust and corrosion. The concrete anchors are made of new PE material for higher strength and better resistance to rub and aging.
Attach the Cleat to the Cabinet Back and Verify Square Alignment
After drilling the pilot holes and installing the wall anchors, you’ll attach the cleat to the cabinet back. Position the 5‑inch‑wide, 3/4‑inch plywood cleat so its top edge sits flush with the cabinet top. Align the beveled side of the cleat with the recessed back of the box, then pre‑drill the marked holes. Drive 3‑inch structural screws through the cleat into the cabinet body, applying a bead of wood glue for extra cabinet reinforcement. Use a carpenter’s square and a laser level (your alignment tools) to confirm the cleat sits square to the cabinet faces. Verify that the 45‑degree mitred edges interlock tightly, ensuring no gaps before proceeding to the next step. Secure the cleat to the studs before attaching it to the cabinet. When opening a Safety First cabinet lock, always engage the release lever before applying torque to avoid damaging the lock mechanism. Adjust the hinge screws gradually to eliminate any door sag, referencing the guide on hinge alignment for best results. Proper weight distribution across the cabinet reduces the risk of tip‑over.
Secure the Wall Cleat to the Ledger Board, Hang the Cabinet, and Level It
If you’ve already attached the cabinet cleat and verified its square, the next step is to secure the wall cleat to the ledger board, hang the cabinet, and level it. First, locate studs or concrete with a stud finder or hammer drill. Position a pressure‑treated ledger board at the desired height, set a 45‑degree French cleat angle, and run a laser level across the wall. Drill 3/16‑inch pilot holes, then fasten the board with 5/16‑inch hex‑head Tapcon screws and washers for maximum grip, especially where wall moisture may affect adhesion. Attach the matching cabinet cleat, remove doors and shelves to reduce cabinet weight, and lift the unit onto a temporary platform. Hook the cleat onto the ledger, slide it fully into place, and use a 4‑foot level to check front‑to‑back and side‑to‑side. Shim with wood blocks as needed, adjust for plumb, and re‑verify level before adding any final securing screws. Use a circular‑saw to trim the ledger board to exact width before installation. Selecting the proper material type helps ensure long‑term durability and resistance to basement humidity. Properly anchoring cabinets also contributes to meeting building code requirements for workplace safety. Heavy‑duty cabinets provide enhanced durability that protects valuable equipment from damage.
Manufactured in china

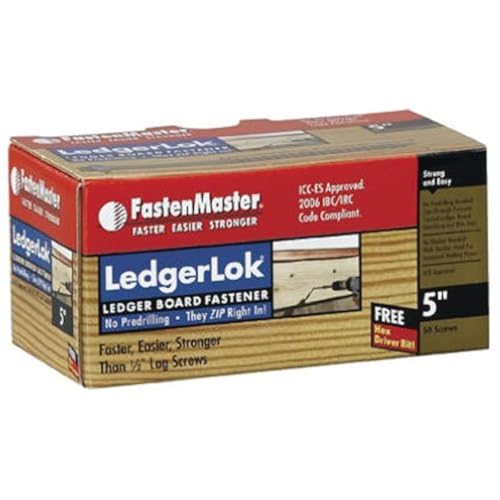
The product is 12PK 5"Ledgertite Screw

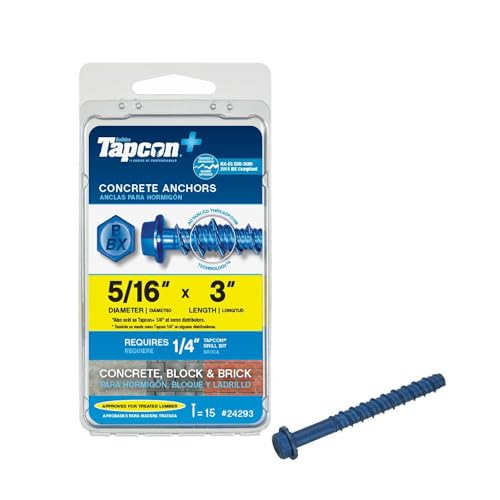
Tapcon anchors are masonry screws designed with Advanced Threadform Technology which cuts threads into all masonry materials including concrete, block and brick
Test Stability, Add Bracing or Straps, and Make Final Adjustments
Now that the cabinet sits level on its ledger board, you must verify its stability before finalizing the installation. Begin stability testing by extending all drawers and loading them per EN 14749:2016; observe any wobble or tip‑over tendency. Check that uprights remain plumb and that beam‑to‑upright bolts are tight. Inspect for bent beams, cracks, rust, or dents that could weaken load capacity. If instability appears, perform brace installation: attach anti‑tilt brackets, secure wall straps, and fasten any required anti‑tilt mechanisms per EN 14073‑2:2004. Tighten all hardware, replace damaged clips, and re‑level the unit. Finally, load shelves to maximum capacity, confirm no shaking, and verify that all connections hold under the applied force. The cabinets have undergone 35,000 cycle durability testing, confirming long‑term reliability. Regular lubrication of hinge pins can prevent wear and corrosion that leads to premature failure.

HEAVY DUTY STAINLESS STEEL L BRACKETS: Engineered for strength and durability, our stainless steel brackets can hold heavy loads securely. Ideal for shelving, cabinets, and furniture, it ensures stability and peace of mind for all your home or office needs.

High quality material: it is made of high quality plastic and made by heart. The material is thick, firm and durable, with good hand feeling, non-toxic and harmless, safe and corrosion-resistant. The surface of the finished product is clear and uniform, free of impurities and smoother.

Material: Work harden cold rolled steel with zinc plated finish for face frame construction.

