First, remove all doors, drawers, and hardware, labeling each piece so you can reinstall them later. Clean every surface with a mild detergent, wipe away grease, and sand from 80‑100 grit up to 220 grit, filling scratches with wood filler and sanding smooth. Apply a thin coat of a suitable primer, sand lightly with 220 grit, then test adhesion with masking tape. Paint using angled brushes for details and a ¼‑inch nap roller for flat areas, keeping strokes wet and feathered; let each coat cure 24‑48 hours. After the final cure, touch up any imperfections, re‑install the hardware, and follow the remaining steps for a durable, professional finish.
Remove Doors, Drawers, and Hardware Before Painting Kitchen Cabinets
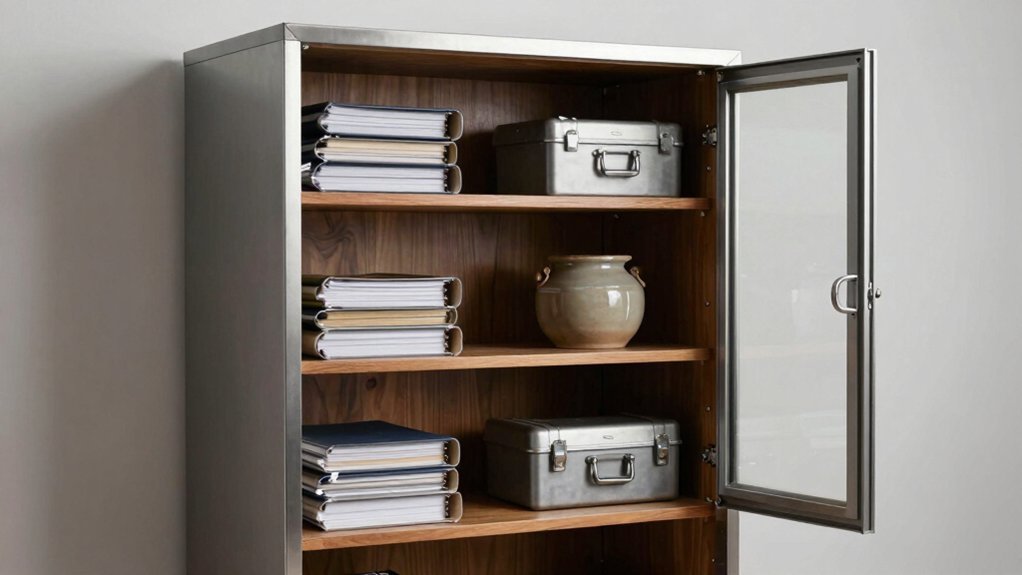
Before you start painting, take everything off the cabinet—doors, drawers, knobs, handles, and hinges. Unscrew hinges with a drill or screwdriver, then pull out drawers or detach fronts. Label each piece with painter’s tape and number the doors and drawers to match original positions; this prevents reinstallation errors and streamlines paint safety checks. Pop off all hardware, tap screws into their original holes, and group them by component. Lay flat pieces on scrap wood to guarantee airflow while drying. Empty the cabinet completely to avoid debris contaminating the surface. This systematic removal yields a smooth, even coat, eliminates edge buildup, and lets you assess color selection without hardware interference. Use a plastic cup to mix the paint, ensuring consistent color and easier handling. Properly cleaning the surfaces with degreasing solvent before sanding helps the primer adhere better. Choosing the right load capacity for your cabinet ensures it will support the weight of stored items after painting. Secure anchoring is essential to prevent the cabinet from tipping once it’s loaded.
WORKS FOR DRAWER & DOOR: Knob and Pulls with 3" (76mm), 3-3/4" (96mm), 5-" (128mm) hole center

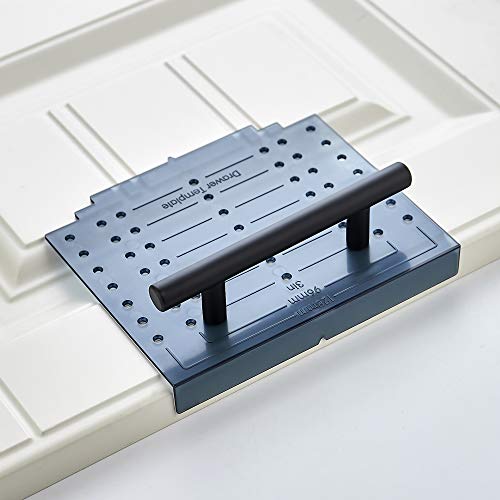
⭐【Unique Advantages】- In order to avoid drilling directly with an electric drill will cause the jig to shake, we provide an "Automatic Center Punch". Use jig finded the location, you just need to use the "hole punch" to directly punch the small holes, and then use the electric drill to punch the big holes on have already been punched small holes. It is a very ingenious way.
Gather Tools & Materials for Painting Kitchen Cabinets
Need you gather every essential tool and material before you start, you’ll eliminate delays and keep the workflow smooth. Begin with a tool storage system that holds a 3‑4 in. square brush, a 2½‑3 in. angled brush, a 1½ in. Purdy ClearCut Dale brush, and a Purdy Wire Mini Roller Frame with cover. Add a foam roller for flat panels, 3M Pro Grade Precision sanding sheets, and tack cloths. Stock primers—Extreme Bond and Extreme Block—and paintable wood filler or Cabinet Mud for gouges. Choose semi‑gloss acrylic enamel, Emerald Urethane Trim Enamel, or hybrid alkyd paint, plus a compatible brush (latex with synthetic bristles, oil‑based with natural). Include safety gear, painter’s tape, drop cloths, a box fan, and a Krud Kutter cleaner. Track each item in a material budgeting sheet to avoid over‑purchase and stay within project limits. Remember to label each door with numeric tags for easy reassembly. Regularly inspect the cabinets for loose hardware to prevent damage during painting. Understanding drying time helps schedule each coat efficiently. The industry’s shift toward modular designs is driving demand for flexible, customizable storage solutions.

COMPLETE 5-PIECE BRUSH SET FOR EVERY PAINTING TASK — Includes 1 Inch Flat, 1.5 Inch Angle, 2 Inch Flat, 2 Inch Angle Stubby, and 2.5 Inch Angle brush giving you every size professional painters use daily. Get all 5 for less than the price of a single brush from hardware store brands — professional grade performance at a fraction of the cost. Perfect for walls, trim, cabinets, doors, furniture, and detailed cutting-in work on any project.

COMPLETE 12-PC PROFESSIONAL SET:Includes 4" tray ×1, snap-fit handle ×1, reusable liners ×2, liner cover ×1, dual-brown microfiber sleeves ×4, white microfiber sleeves ×2, and 1.5" angled brush ×1. Perfect for walls, ceilings, trim, cabinets, and furniture

【Professioanl Household Paint Brushes Kit】3 Pack includes 1x1", 1x1.5" and 1x2" flat paintbrushes. The assortment of sizes makes it handy for several large and small areas of interior and exterior painting projects.
Clean, Repair, and Sand Kitchen Cabinet Surfaces
With your tools and materials already organized, start by removing dust and grease so the surface will accept filler and primer. Perform dust removal first: vacuum or wipe with a dry cloth, then use a soft sponge and mild detergent to cut grease. Rinse, then dry completely with a clean towel to prevent warping. Inspect for scratches; for Scratch repair, sand the area lightly with 120‑grit steel wool, then apply wood filler. After filler dries, sand the patch smooth with 150‑grit paper, blending into surrounding wood. Move to broader sanding: begin with 80‑100 grit to eliminate roughness, progress to 120‑150 grit for polish, and finish with 220 grit for a uniform, primer‑ready surface. Keep a three‑towel system to separate dirty, rinse, and dry stages, and treat high‑touch zones like handles and edges with extra care. Use a 220‑grit sponge for the final cleaning step before priming. Proper ventilation during sanding helps reduce dust exposure and improves overall safety. Additionally, applying a light coat of protective wax after cleaning can help repel future grime and rust. Regular polishing maintains the wood’s natural luster and protects against moisture.


220 Grit: Includes 8 sanding blocks, 220 grit (fine); our sanding sponge is reusable, washable, and suitable for all your sanding needs

NO-SLIP GRIP Durable Backing helps reduce hand fatigue & tearing when sanding
Prime Kitchen Cabinets for Strong Adhesion
If you’ve already cleared dust and grease, the next step is to apply a primer that guarantees strong adhesion for the topcoat. Choose a primer that matches the cabinet material: shellac‑based Zinsser Smart Prime for wood or glazed surfaces, waterborne bonding INSLX Stix for laminate, MDF, or metal, and zinc chromate for bare metal. Apply a thin, even coat, then sand lightly with 220‑grit to smooth the film. Perform adhesion testing on a hidden spot: press a piece of masking tape, pull it off after the primer dries, and inspect for lift. If the tape releases cleanly, the bond is solid; otherwise, re‑prime. This guarantees the topcoat will not peel, chip, or blister. Hybrid primers offer low VOC benefits while maintaining strong adhesion. Proper ventilation during sanding helps prevent dust accumulation that can affect the primer’s finish. Additionally, securing the cabinet with a lock can prevent unauthorized access to freshly painted surfaces. Selecting the right primer also depends on the cabinet material to ensure optimal durability.

Child Safety Assurance: Reliable magnetic cabinet locks designed to ensure the safety of children by preventing their access to cabinets containing potentially harmful items.
[ 20 LOCKS + 2 KEYS ] Baby Child Safety Magnetic Cabinet Locks Work Both for Drawers and Cabinets. Improved Locks Extra Stronger Magnetic enough to keep a house cat or toddles out.Child Proofing Locks with Magnet key control. 3M Adhesive for Cabinets & Drawers - No Tools, No drill, No holes

Vmaisi Adhesive Magnetic Locks for Cabinets & Drawers (10 Locks and 2 Keys) and one set Installation Cradle tool. Easy to install and use.
Paint Kitchen Cabinets in Thin, Even Coats
Although the primer is dry, you should apply the paint in thin, even coats, using angled brushes for recessed details and microfiber rollers for flat surfaces, keeping each stroke wet and feathered to avoid brush marks. Choose a high‑quality vent paint that flows smoothly and resists drips. Employ a brush technique that back‑loads the angled brush, then lightly **“feathers” into the wet surface, maintaining grain direction. For roller selection, use a ¼‑inch nap microfiber roller on doors and panels; switch to a mini roller on flat zones after brushing to eliminate overlap lines. Follow the drying schedule: allow 24–48 hours before the second coat, checking for a dry‑to‑the‑touch feel. Consistent thin layers prevent sagging and guarantee a uniform, durable finish. Deep storage cabinets often feature reinforced door hinges that support the extra weight of multiple paint layers. Consider powder‑coated steel for its superior resistance to scratches, chips, moisture, and UV damage. When stripping the old finish, a chemical stripper** can efficiently remove layers without damaging the wood grain.

PURDY PAINT ROLLER COVERS – Purdy WhiteDove roller covers provides a smooth, lint-free finish. Handcrafted in the USA, this Purdy roller paint cover is ideal for drywall, ceilings, and floors.


【Premium 9" Microfiber Cover Refills】Includes 18 x 9 inch microfiber painting roller covers with 3/4" nap. Fit for US standard 9 inch paint roller brush frames.
Touch‑Ups, Cure, and Re‑install Kitchen Cabinet Hardware
After the thin, even coats have cured, you’ll need to address any imperfections before reinstalling hardware. Clean damaged spots with soapy water or a degreaser, wipe with a damp rag, and dry thoroughly. Lightly sand chips using 320‑grit paper, then buff the surrounding area with a Scotch‑Brite pad to match sheen. Apply a thin primer only to exposed wood, let it dry, then use a touch‑up pen or small brush for scratches, feathering edges for a seamless blend. Allow 1–2 minutes between thin coats; full hardening follows the curing timeline, up to 30 days. Once the surface is fully cured, fill old screw holes, sand smooth, and drill new ones if needed. Clean each knob or pull, then perform hardware installation, confirming alignment and secure fit. Test color on the back of the door before applying to the visible face. Verify that the cabinet’s load capacity is not exceeded by the added hardware and accessories. Properly ventilate the area during drying to ensure moisture resistance of the finish. Surface preparation is critical to prevent peeling and ensure long‑term durability.