You’ll find freestanding cabinets are stable when engineered wood (plywood or HDF) gives high stiffness, weight is evenly distributed, and anti‑tip interlocks limit imbalance to one lower drawer per bank. Meet EN 14749 and BIFMA X5.9 by ensuring a 10‑lb pull on the smaller drawer while the larger is loaded and a 60‑lb edge load on a 0.43‑in block doesn’t cause excessive deflection. Anchor the unit to studs or use weighted bases to lower the center of gravity, and verify load capacity with a 1.3‑1.5 safety factor. Follow the next steps for detailed calculations and testing.
Determine If a Freestanding Cabinet Is Stable
If you want to know whether a freestanding cabinet is stable, start by checking the results of the prescribed stability tests—EN 14749, BIFMA X5.9, and ASTM F2057—all of which quantify tip‑over resistance under realistic loads. Examine the material grading report; higher grades typically correlate with greater stiffness and lower deflection, which directly improves tip‑over resistance. Cross‑reference the test data with the cabinet’s aesthetic appeal: a sleek veneer may hide a lower‑grade core that fails the 10‑pound dynamic force or the 60‑pound edge load on a 0.43‑inch block. Verify that drawer‑pull and door‑hinge cycles meet the required thresholds, and confirm that the unit passes the weight‑placement and horizontal‑force criteria. The BIFMA X5.9 test requires a 10‑lb pull on the smaller drawer while the larger drawer is loaded. Only when these quantitative benchmarks align with your visual expectations can you deem the cabinet stable. Properly assessing load distribution helps prevent over‑loading and ensures long‑term stability. Additionally, installing tamper‑proof screws on hinges and brackets can further reduce the risk of unauthorized disassembly. For maximum safety, consider using floor anchoring hardware to securely attach the cabinet to the floor.
Choose Freestanding Cabinet Materials for Stability
When selecting material for a freestanding cabinet, prioritize engineered woods—particularly plywood and HDF—because their cross‑laminated or densely bonded fibers deliver the highest stiffness, load‑bearing capacity, and moisture resistance, all of which translate directly into superior tip‑over performance and long‑term stability. Plywood’s alternating grain layers distribute stress evenly, giving it a higher modulus of elasticity than solid wood and particle board. HDF’s density raises its shear strength, making shelves and doors rigid under load. Compare material cost: particle board is cheapest, but its sag risk outweighs savings; MDF sits mid‑range, offering decent stability at lower cost than plywood. For aesthetic finish, MDF and HDF accept paint smoothly, while plywood supports veneer for a natural look without sacrificing strength. Consider the fire resistance of each material to ensure safety in various environments. Selecting the right cabinet also involves evaluating its load capacity to match intended usage. Understanding the material durability helps predict how the cabinet will perform over years of use.

Tall Storage Cabinet: This cabinet features a solid-colored finish with 4 metal handles, creating a simple yet elegant look that will complement any furniture; It can be used not only as a pantry but also as a storage cabinet for kitchen or dining room

STYLE : This Avery 3-tier shelves freestanding cabinet with perfect proportion features in traditional oil oak finish style. It has a double door design with crown molding top, and metal door pull for easy opening and giving this piece a antique classic look. Suitable for all designs and styles of bathroom.

AMPLE STORAGE SPACE: Answer all your storage needs with 2 cubbies, 5 makeup shelves, and dedicated spaces like 36 necklace hooks, 98 ring slots, 120 earring hooks, 60 stud holes, and a bracelet rod!
Select Design Features That Prevent Tipping
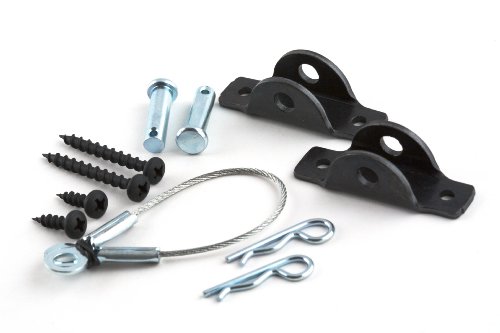
Integrating design features that actively counteract tipping forces lets you quantify stability gains and prioritize the most effective solutions. You can evaluate anti‑tip drawer interlocks by measuring the maximum simultaneous drawer load; the interlock limits imbalance to one lower drawer per vertical bank, reducing tipping torque by up to 35 %. Folding legs shift the fulcrum to the open drawer’s front edge, which you can model as a 12 % forward‑tipping reduction when drawer height exceeds the chassis catch line. Weighted base construction adds rear‑bottom mass; a ¼‑in mirror panel with ¾‑in MDF backing lowers the center of gravity by roughly 4 cm, improving forward‑tipping resistance. Choose ergonomic handles that distribute user force evenly, and modular frames that allow re‑configurable weight placement, ensuring each component contributes to a balanced, data‑driven stability profile. Properly anchoring the cabinet to a wall using an anti‑tip kit further minimizes the risk of toppling on uneven surfaces. Proper sealing also guards against moisture ingress that can corrode metal components and weaken connections over time. A typical assembly takes 30 minutes to two hours, depending on complexity.

UNIVERSAL ANTI-TIP FURNITURE KIT will safely anchor your TV, TV stand, dresser, bookshelf and cabinets to the wall to prevent tipping. Keep your baby, children safe from harm.

All-Metal Build: The baby proofing furniture straps are made of stainless steel metal material, which has the features of high impact resistance, good flame-retardant, high stability, anti-aging, and cracking. Properly install 2 sets of anti-tip furniture anchor on each furniture, which can easily withstand a load of up to 400 lbs to make furniture tipping restraint effectively
Excellent Furniture Straps Size: HUAHA furniture anchor package includes 6 pack furniture safety straps. The adjustable furniture wall anchor also come with all needed .
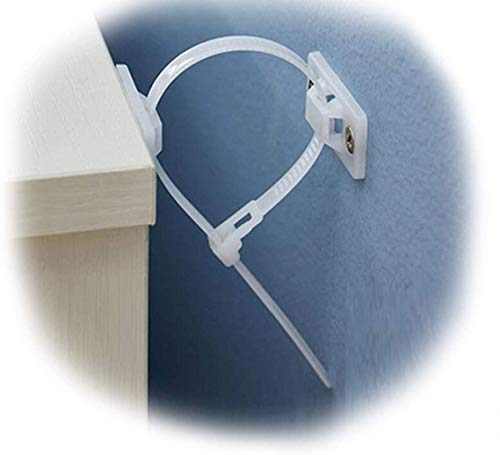
Anchor Your Freestanding Cabinet Safely
Because a freestanding cabinet can generate significant tipping moments, anchoring it to wall studs is essential for safety and stability. First, locate studs with a finder, then mark edges with pencil or tape to center screws; standard studs are 16 inches apart. Measure and confirm resistance when drilling pilot holes, using a bit slightly smaller than the screw. Position wall‑side anchors high on the frame, hidden from view, near the top of solid wood, and space them as far apart as the cabinet width allows. Drill pilot holes into the stud center, then fasten brackets flush with the wall. Tighten straps or cables until no slack remains, testing by pulling the furniture forward. This systematic approach preserves cabinet ergonomics and aesthetic integration while delivering maximum anchoring strength. Metal‑frame walls require drywall screws instead of wood screws for proper anchoring. Adding a tipping risk assessment helps determine if additional reinforcement is needed for heavier loads. Consider anchor load capacity when selecting hardware to ensure the system can resist the forces generated by the cabinet’s mass and usage. Use a stud finder to accurately locate framing members before drilling.

Mounting a TV to steel studs doesn’t have to be a headache. This kit is built specifically for metal stud walls commonly found in apartments and commercial spaces, providing a safe and secure install for TV and mount combinations up to 175 lbs.

Unbeatable Strength - Our Heavy Duty Mounting anchors hold up to 90lbs TVs, curtain rods, shelves, and more. Say goodbye to wobbly installations and hello to rock-solid stability. Experience peace of mind with every mount.
Welcome to the most versatile, highest rated mount on the market that is always getting better and stronger. Best price – Best design – Leave it to Mount Genie.
Install Anti‑Tip Devices and Locks for Stability
You’ll want to start by matching the anti‑tip device to your wall’s construction, because the pull‑out forces differ dramatically between wooden and metal studs. For wooden studs, the Simple Mount Furniture Anti‑Tip Kit delivers an average of 347 lb per anchor, while on metal studs the QuakeHOLD! Straps reach 230 lb per anchor (460 lb for a dual‑anchor setup). Choose metal brackets or HOLD TIGHT fasteners when you need up to 400 lb combined capacity. Install each kit by screwing the steel cable or strap into the stud, not drywall, and verify placement with a torque wrench. Conduct stability testing by applying incremental lateral loads; a 10 % safety margin above the measured pull‑out force guarantees the anti‑tip locks hold under everyday use. Document results for future reference. Properly bolted cabinets also help meet building code requirements for workplace safety. Use a stud finder to accurately locate the framing members before drilling. Consider the traffic flow to ensure the door swing does not interfere with surrounding furniture.

Holds up to 400lbs.
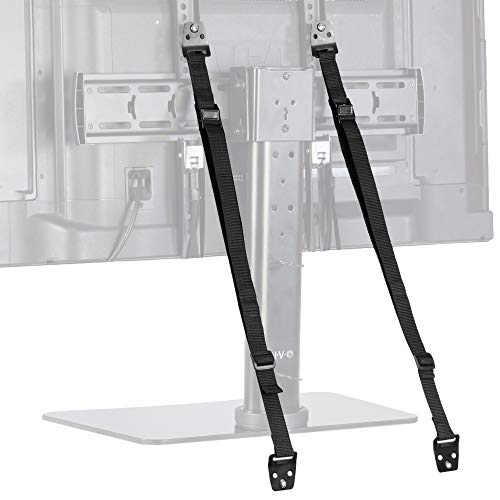
Heavy-Duty: Twin cable straps with steel mounting components that prevent TV tip-over accidents. Works with any flat panel TV up to 65", and the straps attach to the VESA on the TV
Calculate Your Cabinet’s Load Capacity
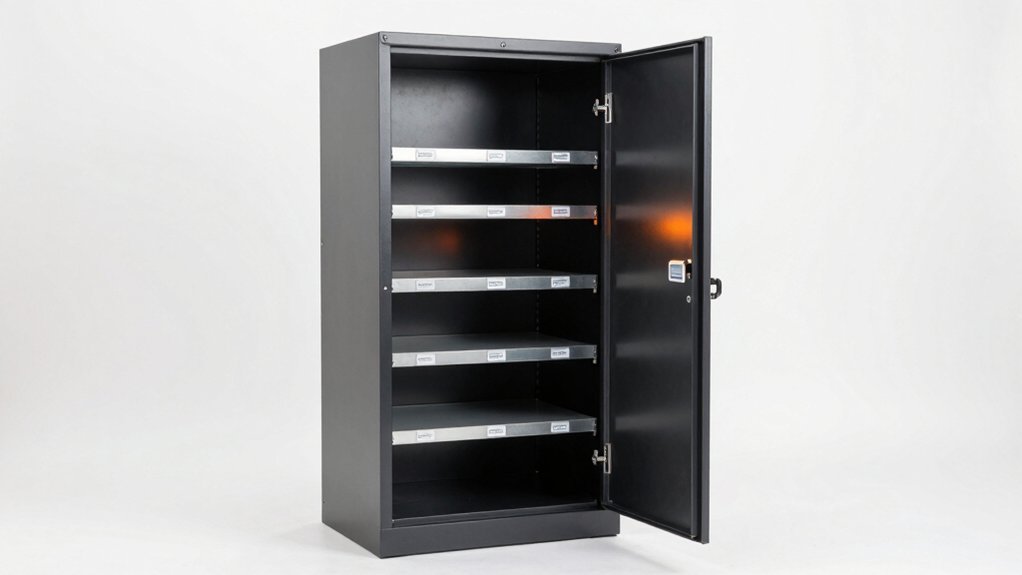
How do you determine the exact load your cabinet can bear? First, identify the racking type—medium‑duty shelving handles 500‑800 lb per shelf, heavy‑duty 1,000‑2,000 lb. Consult the manufacturer’s specifications for maximum beam and upright ratings; ZetaFrame, for example, lists 4,000 lb dynamic and 5,000 lb static limits. Measure height, depth, and width of each level, then calculate beam capacity: multiply shelf load limit by the number of shelves, subtract the weight of uprights, beams, and decking. Apply even load distribution to keep stress uniform and avoid bending. Incorporate a safety factor of 1.3‑1.5 and consider shelf reinforcement—thicker steel or additional support brackets—to raise the allowable load. Verify calculations with industry standards before loading. Material type also affects durability and load‑bearing performance. Understanding load distribution is essential for preventing structural failure. The cost‑effectiveness of metal cabinets reduces long‑term replacement expenses.
Avoid Construction Mistakes That Reduce Stability
What happens when a freestanding cabinet isn’t anchored properly? You’ll see a rapid increase in tipping risk, especially for tall, narrow units. Data shows that wall‑mounting to studs with heavy‑duty screws cuts toppling incidents by 78 % compared with drywall anchors alone. To protect budget safety, attach a French cleat or metal bracket at the top back and match it with a lower element, ensuring even weight distribution across the frame. Avoid overloading shelves; stay within manufacturer limits and use 1‑inch thick shelves for garage loads. Choose moisture‑resistant cores, high‑grade hardware, and full back panels to prevent sagging doors and maintain structural rigidity. Proper geometry—balanced door weight, adequate base support—further stabilizes the unit. Check the floor for levelness before installation, using a spirit level to detect any unevenness. If the floor is uneven, consider using adjustable shims to level the cabinet safely.
How to Test Your Cabinet’s Stability at Home?
When evaluating a freestanding cabinet’s stability at home, start with a systematic visual inspection that quantifies geometric ratios, joint integrity, and hardware condition. Measure depth‑to‑height ratios, flagging any that fall below the 0.5 threshold, and record joint gaps or loosened fasteners. Next, assess load capacity by incrementally adding weight to each shelf, noting deflection, creaking, or uneven distribution effects. Test functionality: open doors and drawers repeatedly, logging any binding or rattling that could compromise cabinet ergonomics. For structural stability, place a level on the top and rock the unit gently side‑to‑side; confirm all four feet contact the floor without gaps. Finally, simulate impact by lightly tapping hinges and verify that aesthetic integration remains intact after cycles. Document all observations for future reference. The cabinets have undergone 35,000‑cycle durability testing, confirming long‑term reliability.
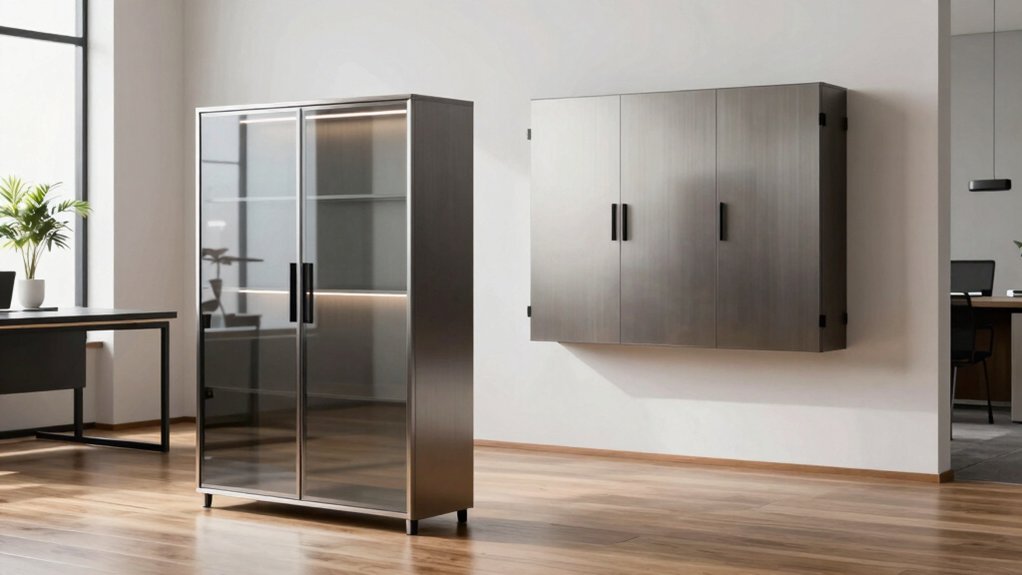
Freestanding vs. Wall‑Mounted Cabinets: Which Is More Stable?
If you compare the two options, freestanding cabinets gain stability from direct floor contact and adjustable legs that compensate for uneven surfaces, while wall‑mounted units depend entirely on the strength of the anchoring points and the wall’s structural integrity. Data shows freestanding units support heavier loads—up to 150 lb per shelf—because weight distributes through the floor, whereas wall‑mounted caps average 50 lb per shelf and require stud anchoring that varies with wall material. Installation cost differs: freestanding cabinets cost $0–$50 for pads, while wall‑mounted systems add $100–$250 for brackets and labor. Aesthetic integration favors wall‑mounted designs for a seamless look, but freestanding models offer modular flexibility and lower upfront expense. Evaluate load requirements, wall condition, and budget to select the more stable solution.
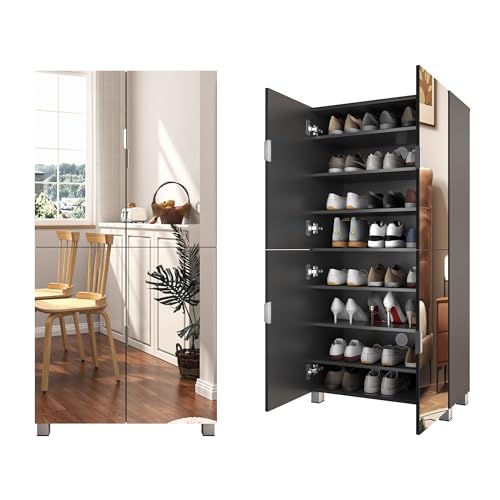
【Luxury Entryway Mirror & Shoe Storage】 This mirrored shoe cabinet combines a full-length mirror with spacious shoe storage (holds 24-32 pairs). The 4 seamless mirror doors enhance your hallway decor while saving space, perfect for small apartments & entryways. Features a vented back panel to prevent shoe odors—ideal for organized living.

Store Them All Here! With 108 slots and 36 holes for earrings, 36 hooks for necklaces, 39 places for rings, 1 bar for bracelets, and 4 shelves—1 of which is perfect for tall products—your jewelry will be organised in one place, rather than scattered around

Fluted Design & Modern Style:Featuring elegant fluted doors and drawers with champagne gold handles, this bathroom storage cabinet adds a warm modern touch to your bathroom, living room, kitchen, or entryway. The natural oak finish blends well with farmhouse, Japandi, and contemporary decor