Gather a screwdriver, pliers, wire cutter, low‑speed drill, and the replacement Bauer T501L lock parts. Clear the area of firearms, wear gloves and eye protection, and anchor the cabinet to prevent tipping. Remove the back panel by unscrewing the tapered corner screws, extract the spline key with pliers, and drill out the four lock‑body screws. Mount the new lock, secure it with the 1/4‑20 screws, reconnect the wiring, insert the battery, and test the code for three‑beep confirmation. Finish by reassembling the panels, tightening all bolts, and checking door flushness—continue for detailed steps.
What You’ll Need Before You Start
Need the right tools before you start, and you’ll save time and avoid damage. First, gather your hand set: a small screwdriver, pliers, a wire cutter, and an adjustable wrench or a 7/8‑inch open‑end wrench. Add a cordless drill set to low speed, a drill bit for stuck cylinders, and a screw gun with a low‑torque setting. Keep a backup manual screwdriver handy. Lay out the replacement lock parts—Bauer T501L T‑handle, appropriate cylinder, lock washer, hex nut, and spline key—then perform Parts verification to confirm dimensions match your cabinet. Include fasteners: taper screws, front mounting screws, and screw caps. Finally, organize specialized accessories—L‑shaped skinny tool, pin‑pusher, cable plug‑in, and replacement keys—so each item is within reach and clearly labeled. Low‑speed drilling helps prevent widening self‑tapping screw holes. Always wear protective gloves to safeguard your hands while handling sharp components. Choosing a lock with a higher load capacity ensures long‑term durability and security. Understanding security ratings helps you select a lock that meets both residential and commercial safety standards.
Safety Checklist: Preparing the Safe for Lock Removal
Before you start removing the lock, make sure the safe is completely cleared of firearms, the work area is secured, and you have all safety gear ready. Conduct a brief Safety briefing with anyone nearby, outlining the steps and emergency contacts. Perform a Lock inspection: verify the lock is engaged, check for tension, and note spline key visibility. Clear the surrounding space of unauthorized persons, especially children, and position the cabinet on a stable surface with adequate lighting. Lay a protective sheet underneath to catch dropped parts and anchor the cabinet if it could tip. Wear eye protection and gloves, keep a first‑aid kit within reach, and have pliers, a screwdriver, and low‑speed drill ready. Guarantee all components are organized before you begin. Use a torque wrench to ensure the new lock is tightened to the manufacturer’s specifications. Biometric access can provide an additional layer of security when upgrading the lock. High‑quality locks are essential for preventing forced entry and ensuring long‑term durability.
Step‑by‑Step Lock Removal Without Damaging the Cabinet
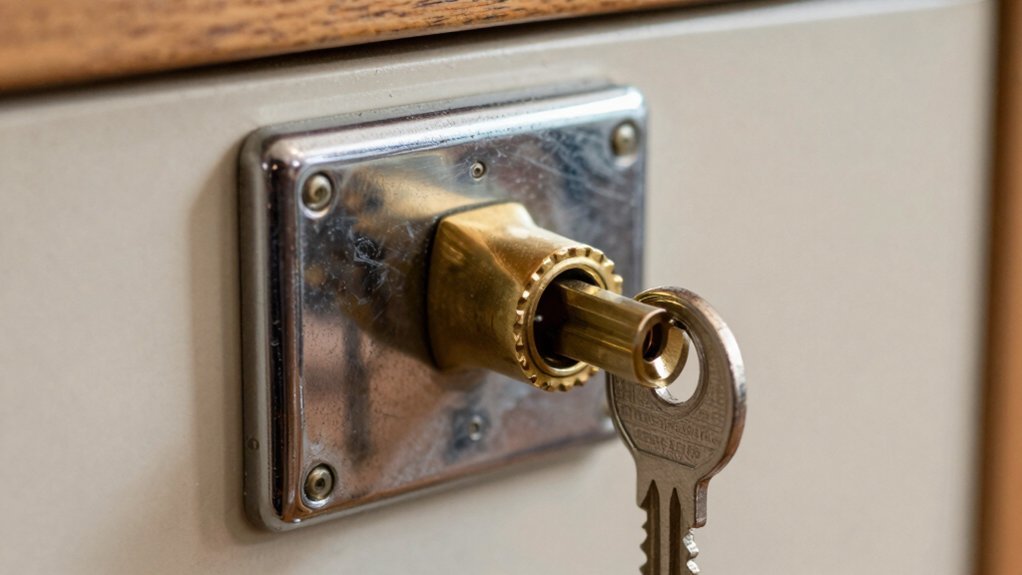
With the safety checklist complete, you’re ready to remove the lock without harming the cabinet. Begin by opening the door and positioning the bolts in the locked state, then prop the springed element aside. Use a screwdriver to strip the screw caps on the back panel, keeping the tool alignment straight. Switch the cordless drill to low speed and apply torque control while unscrewing the four tapered corner screws; slide the panel off gently, checking for any missed caps. Prop the backplate, remove its screws, and extract the spline key with pliers, maintaining proper tool alignment to avoid bending. Drill out the four lock‑body screws, unthread the front dial, and pry the trim just enough to expose the internal latch, preserving the cabinet’s finish. The Bauer T501LT handle fits the original threaded barrel without the need for grinding. Proper torque control prevents damage to the hinge during removal. Selecting the appropriate lock type based on security level and material durability ensures long‑term reliability. Always wear protective gloves to safeguard your hands while handling sharp edges.
Installing the New Safe Lock and Verifying Operation
Installing the new safe lock starts with aligning the fresh components to the existing holes left by the old lock, then tightening the front screws to secure the base plate. Next, mount the lock body with four 1/4‑20 (or M6) screws, ensuring the backplate bolts through the cover to preserve warranty. Position the entry pad base so the up‑mark faces upward, then feed the keypad through its hole and route the wiring through the back channel, keeping the cable uncrimped and free of pinch points. Plug the connector, leaving excess wire outside the safe for clean wiring ergonomics. Reinstall the springed relocker, insert the battery, and finally connect the power cable. Test the new code several times, retracting bolts for three cycles, listening for three beeps, and confirming the lock withdraws smoothly while maintaining lock aesthetics. The installation instructions also recommend verifying that the door remains open throughout the process to avoid accidental re‑locking. Before drilling any holes, double‑check that the surface is level and free of debris, and use a drill guide to ensure precise alignment. Selecting a lock with a smooth sliding mechanism can reduce wear and improve long‑term reliability. Choosing a lock with high key control helps prevent unauthorized duplication and enhances overall security.
Reassembling the Safe and Final Safety Checks
Once the cabinet is fully reassembled, you’ll perform a series of final safety checks to guarantee the safe is secure and functional. Begin with reassembly timing: tighten the 13‑mm socket bolts on the top panel, then flip the cabinet and secure the bottom panel, pressing protruding bolts to seat it. Attach doors, aligning hinges, inserting lag or machine screws, and tap lightly if needed. Verify door flushness. Install interior EVA foam, barrel‑rest brackets, shelves, and adjustable feet, then move the unit with a dolly to its final spot. Anchor to wall studs with lag bolts, secure bottom holes to the floor, and reinforce for stability. Conduct the final inspection by opening and closing the door repeatedly, applying pressure to test anchor stability, and confirming all fasteners are tight and interior padding protects firearms. Ensure the EVA foam pieces are properly seated on the brackets for added protection. Check the floor for levelness before final placement.