First, identify the wall—use a stud finder to locate wooden studs behind plasterboard or a hammer drill with a masonry bit for concrete/brick. Choose anchors that match the material and cabinet weight: ribbed plastic expansion anchors for light loads, toggle or molly bolts for heavier cabinets, and sleeve anchors for solid masonry. Drill pilot holes sized for the anchor, insert the anchor, then attach the cabinet brackets with #8‑#10 screws, tightening each to the manufacturer’s torque spec. Verify level, distribute screws evenly across studs, and perform a pull‑test to confirm hold. Continue for and you’ll uncover detailed load‑testing methods.
Determine Wall Material for Secure Cabinet Mounting
When you determine the wall material, you’ll know whether to rely on studs, masonry anchors, or supplemental blocking for a secure cabinet mount. Begin with wall material detection: use a stud finder to scan plasterboard; if you locate wooden studs at 16‑ or 24‑inch intervals, plan to pre‑drill through the cabinet back panel and fasten directly into those studs. In non‑stud zones, select heavy‑duty toggle bolts or cavity wall anchors, checking each product’s anchor load rating to meet the cabinet’s weight. For solid masonry, switch to a hammer drill with a masonry bit, insert plastic wall plugs, and use masonry anchors rated for the same load. Always verify that the chosen fastener’s rating exceeds the cabinet’s expected load before proceeding. It is advisable to use coarse drywall screws when the cabinet is positioned near a stud to ensure a secure attachment. Proper anchoring also helps meet building code requirements for safety and stability. Weight distribution should be considered when positioning the cabinet to avoid overloading a single anchor point. Understanding load path principles ensures the forces are transferred safely to the wall structure.

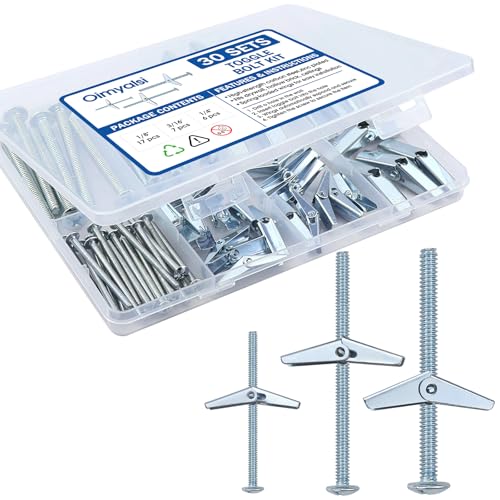
Toggle bolts quantity:100pcs(25sets)1/8 inch-13pcs Toggle Bolt,13pcs Wing Nut,13pcs nuts ,13pcs spacers. 3/16 inch-8pcs Toggle Bolt,8pcs Wing Nut,8pcs nuts ,8pcs spacers. 1/4 inch-4pcs Toggle Bolt,4pcs Wing Nut,4pcs nuts ,4pcs spacers. After installation, the wall is neat and beautiful.Different sizes and enough quantities can meet your different needs in your daily life.

Strength & Stability:Our heavy-duty drywall anchors support up to 260 pounds vertically and 160 pounds horizontally on 1/2-inch drywall - keeping your TVs, shelves, and heavy décor rock-solid and safe

TOGGLER SNAPTOGGLE Drywall Anchor – 1/4"-20 UNC Zinc-Plated Snaptoggle Anchors – Holds 265 lbs on Drywall, 802 lbs on Concrete Block – Toggle Bolts for Mounting Cabinets and TV – 20 Pack (With Bolts)
Select Required Tools (Drill, Screwdriver, Stud Finder)
If you’re ready to mount the cabinet, start by gathering three essential tools: a cordless drill (18‑20 V) with the appropriate bits, a Phillips screwdriver, and a stud finder. Choose a drill whose power source selection matches battery availability and torque requirements; an 18‑20 V unit balances runtime and impact force for pilot holes without splitting wood. Prioritize tool ergonomics—lightweight grip, balanced weight distribution, and adjustable speed settings reduce fatigue during repetitive drilling. Equip the drill with 1/8‑inch, 3/16‑inch, and countersink bits sized to the 2 ½‑inch washer‑head screws and anchor specifications. Use the Phillips screwdriver for precise post‑drill adjustments and to tighten anchors snugly. Finally, operate the stud finder to locate studs 16 inches apart, marking each spot before drilling to guarantee screws engage solid framing. Check floor level before anchoring to ensure the cabinet remains perfectly aligned. For optimal stability, consider using floor anchors to secure the cabinet directly to the concrete or wooden floor. Make sure to pre‑drill pilot holes to prevent wood splitting and ensure a tight fit for the screws.

EASY TO USE - The perfect cordless electric screwdriver for everyday needs and DIY projects.
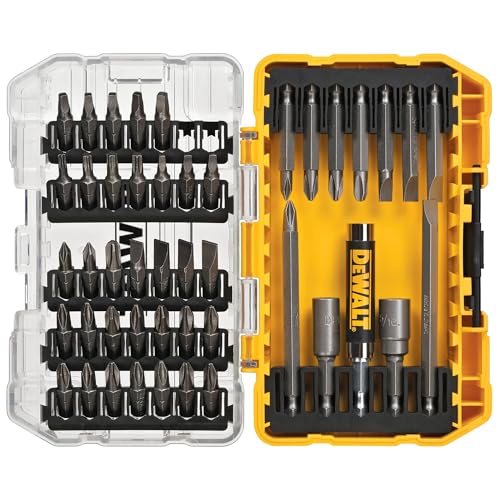
Connectable accessory storage system to optimize storage space of the drill bits set

Part of the 20V* MAX System - A System that Demands Attention, this small drill is designed for versatility and convenience
Choose Anchor Type That Matches Your Wall
After you’ve gathered the drill, screwdriver, and stud finder, the next step is selecting an anchor that suits the wall material and load. Identify the wall finish—drywall, plaster, concrete, brick, or tile—because each requires a specific anchor design and corresponding load rating. For light finishes **(up to 25 lb) use ribbed plastic expansion anchors; they fit drywall and cinder block and need a pilot hole just under the anchor diameter. When the cabinet exceeds that weight, opt for metal solutions: toggle bolts (100 lb+), molly bolts (25‑95 lb), or self‑drilling anchors (up to 150 lb per pair). For solid masonry, choose sleeve anchors, which expand inside concrete or brick and deliver the highest load rating. Snap toggle anchors have been shown to perform very close to their rated capacity under optimal conditions, making them a reliable choice for heavy cabinets. Match the anchor to the wall finish and the cabinet’s weight to guarantee a secure, code‑compliant installation. Properly assessing the cabinet’s load capacity helps prevent over‑stress on the wall and ensures long‑term safety. Selecting the right anchor type can also improve the overall aesthetic by minimizing visible hardware. Consider the space‑saving design** of the cabinet to ensure the anchoring method does not interfere with its functional layout.

TOGGLER SNAPTOGGLE Drywall Anchor – 1/2"-13 UNC Zinc-Plated Snaptoggle Anchors – Holds 265 lbs on Drywall, 802 lbs on Concrete Block – Toggle Bolts for Mounting Cabinets and TV – 10 Pack (With Bolts)

MULTIPLE SIZE OPTIONS – This toggle bolt assortment includes 3 sizes (1/8 in, 3/16 in, 1/4 in) to help you choose the appropriate size for drywall anchor applications based on wall type and intended use. Suitable for selected hanging projects such as hanging pictures, curtain rods, and plants when used correctly. Please refer to the size chart and installation guidance before use.

Size--1/8x2-inch,includes:50 packs 1/8x2-inch toggle bolt and 50packs wing nut.
Locate Studs and Plan Bracket Placement
Before you start drilling, locate the studs and map out the bracket positions so the cabinet will be anchored to solid wood. Use a calibrated stud finder at the intended mounting height, swipe horizontally, and mark both edge and center detections. Verify each mark by measuring 16 inches or 24 inches from the previous one to confirm standard stud spacing; irregular gaps suggest pipes or other obstacles. Tap the wall to hear a solid thump, and double‑check with a finishing‑nail probe for resistance at half‑inch depth. Once you’ve identified the full stud line, draw pencil lines 54 inches from the floor to align with the cabinet’s bracket layout. Guarantee at least two top and two bottom marks per cabinet section for precise bracket alignment. Ensure the batteries are fully charged for optimal stud finder performance. Adding a reinforced hinge plate can further deter forced entry. Use toggle bolts when mounting into drywall without stud support to distribute load safely. Properly anchoring cabinets also helps meet building code requirements for workplace safety.

Accurate and Rapid: The wall stud finder adopts an intelligent micro-sensor chip with the highest sensitivity which can accurately and quickly find edges and center of metal, studs, joists, pipes, and live AC wire behind walls, floors, and ceilings. Fast detection saves users time and effort, making task completion easier. It must be ultimate gifts for professionals, homeowner,s and DIY enthusiasts

COMPACT 12V DRILL: Tackle hanging, mounting, and fastening projects small and large with the 12V brushless motor.

EASY TO USE: The StudBuddy is the world's simplest magnetic stud finder tool. The StudBuddy works with all drywall construction by using powerful magnets to locate the screws in the studs.
Drill Pilot Holes for the Chosen Anchors
With the stud line marked and bracket locations sketched, you now drill pilot holes that match the chosen anchors. Choose a drill bit whose diameter equals the screw shank; this keeps the bit hidden behind the shank for visual confirmation. Set a depth stop or wrap painter’s tape on the bit to achieve the exact pilot hole depth required for the anchor size, preventing over‑drilling. Hold the drill perpendicular, engage the highest clutch setting, and start with a small starter bit to avoid slippage. Switch to the shank‑matched bit, align each hole with the stud line, and use a jig or template for consistent anchor alignment. Wear safety goggles and keep the cabinet door open to protect the frame. Ensuring proper torque helps prevent wood splitting. Consider the load capacity of the cabinet to select anchors that can support its weight. Properly anchoring cabinets also mitigates the risk of tip‑over accidents on uneven floor surfaces. Medical storage cabinets must also comply with relevant health and safety regulations.
Install Anchors (Toggle, Molly, Plastic, Metal)
Wondering how to secure your cabinet once the pilot holes are ready? Begin with anchor material selection, matching each wall type to the appropriate fastener. For solid concrete, drill a 1/2‑in hole and install a heavy‑duty metal toggle; its reusable channel holds up to 1,080 lbs, but only 265 lbs in ½‑in drywall, so run load rating calculations before deciding. In hollow walls, a Molly anchor’s front flange expands on tightening, offering medium‑duty strength ideal for cabinets without studs. Choose plastic toggles for light loads; their snap‑in wings distribute shock without damaging drywall. Metal strap toggles deliver the highest pull‑out resistance for heavy cabinets—ensure a washer covers the bolt head when the hole exceeds the bolt diameter. Tighten each bolt until the toggle self‑holds, confirming the installation meets the calculated load rating. Fender washers are recommended when the hole size is small to provide extra support. Selecting the right lock type, such as a keyed entry lock, further enhances overall security. Secure wall mounting is essential for preventing cabinet tip‑over during accidental impacts.
【Multiple Sizes Available】This drywall toggle bolt kit includes 1/4", 3/16", and 1/8" anchors—ideal for different wall types and weight requirements. Choose the right size for your drywall, hollow brick, or ceiling installation.

HEAVY DUTY WALL ANCHORS FOR DRYWALL Our toggle anchors are designed for serious holding power. Made of durable zinc and stainless steel, these heavy duty toggle bolts hold up to 100 lbs in 3/8", 1/2" or 5/8" drywall — no wall damage, no mess.

COMPLETE SET FOR VARIOUS MOUNTING NEEDS: This Heavy Duty Toggle Bolts Assortment Kit includes 164 pieces of drywall anchors, toggle bolts, and screws in multiple sizes to fit different installation requirements. The set contains 40pcs #6×1", 40pcs #5×1", 40pcs #7×1", 20pcs #6×1-1/5", 12pcs #8×1-3/5", and 20pcs black #8×1-1/4" wall anchors, along with toggle bolts in 1/4" (4pcs), 3/16" (12pcs), and 1/8" (16pcs). Ideal for mounting shelves, mirrors, or curtain rods.
Mount the Cabinet and Secure Brackets
Once you’ve identified and marked the stud locations, you’ll hold each bracket against its designated spot, level it perfectly horizontal, and mark the screw‑hole positions through the pre‑drilled bracket openings. Drill pilot holes using a bit slightly smaller than the screw diameter, ensuring you hit the stud core to avoid splitting. Insert wood screws into the pilot holes, tightening each just enough to hold the bracket without stripping. Fasten one screw per bracket first, checking the level to maintain cabinet alignment, then fully tighten for bracket reinforcement. Use multiple brackets for especially heavy cabinets to distribute the load evenly. With all brackets securely attached, lift the cabinet onto the supports, using a partner for heavy units. Align the cabinet’s pre‑drilled holes with the brackets, insert fasteners, and tighten just enough to lock the cabinet in place while preserving structural integrity. Properly sand the surface before priming ensures better paint adhesion and a smoother finish. Check drawer slide alignment before installing the cabinet to avoid interference with drawer movement. Secure hazardous items by storing them out of reach to maintain a safe garage environment.
Perform a Pull Test to Verify Anchor Hold
Before you trust the cabinet’s attachment, you must verify each anchor’s holding capacity by performing a pull test. Identify the exact anchor point, then secure a calibrated load cell and hydraulic tester to the exposed head. Position the test frame so the force aligns with the anchor’s axis, avoiding side loads. Apply tension gradually, watching the load‑cell readout as you increase force. Record the moment the anchor material begins to move or reaches its ultimate load capacity. Calculate pull‑out strength using Load Applied ÷ Surface Area, then compare the result to required safety thresholds. If the measured load falls short, reinforce or replace the anchor before proceeding.
Check Even Weight Distribution Across All Fasteners
After confirming each anchor’s pull‑out strength, verify that the load is shared evenly among all fasteners. Align the top‑rail screws directly opposite the bottom‑rail screws on each stud, then torque each #8‑#10 screw to the manufacturer’s specification. Use a torque wrench to achieve uniform tension, ensuring weight distribution across the cabinet’s height. For a 30‑inch unit with 16‑inch stud spacing, install at least two screws per stud, adding a third on heavy cabinets for enhanced load balancing. Pre‑drill through the mounting rail to avoid splitting, and confirm each screw penetrates at least 1‑½ in. the stud. Check that adjacent cabinet joins have matching screw patterns, creating a continuous load path that prevents twisting and concentrates stress on any single point. Properly seal the backer board before installing the stone backsplash to prevent moisture damage.
Complete Final Safety Inspection Before Use
If you’ve finished mounting and sealing the cabinet, conduct a thorough final safety inspection before putting it into service. Follow a final safety checklist that includes pre‑use verification of regulatory compliance, structural integrity, and operational functionality. Confirm that OSHA 29 CFR 1910.106 and NFPA 30 requirements are documented in your inspection record. Examine the exterior for rust, dents, or corrosion; replace any compromised panels. Test self‑closing doors, seals, and latches for smooth, unobstructed operation, ensuring they stay latched when idle. Verify interior cleanliness, sealed containers, and absence of spills; clean any residue with appropriate sorbents. Check labeling, distance from ignition sources, ventilation clearance, and grounding. Record findings to satisfy UFC 79 and future audit demands.

