Gather a small vacuum, damp microfiber cloth, label maker, and uniform containers, then set up clear sorting zones for glass cleaners, sprays, and sponges. Empty the cabinet, inventory each item on a spreadsheet, and label boxes with QR codes. Dry‑dust surfaces, vacuum with a soft‑brush attachment, and wipe with the appropriate cleaner—eco‑friendly soap for wood, pH‑neutral solution for metal, and mild soap for plastic. Scrub handles, tackle stubborn stains with a baking‑soda paste, rinse, dry thoroughly, and apply a protective sealant. Re‑organize using lined shelves and labeled bins, and you’ll keep the cabinet spotless longer.
Gather Tools & Set Up Sorting Zones
Where do you start? First, grab a small vacuum like a Dust Buster and run it through the cabinet to pull out loose debris. Follow with a damp microfiber cloth to wipe each shelf. While you clean, sort tools by function: place glass cleaners in clear plastic bins, group sprays together, and keep sponges in a refill‑station bin. Apply Tool categorization by using a label maker on each bin and on cabinet doors. Designate zones—mirrors with glass products, a vertical zone for tall items, and a refill zone for cloths and sponges. Use shelf liner paper for spill protection, then label each zone clearly. This systematic approach read the cabinet ready for efficient use. Consider material durability when choosing shelf liners to ensure long‑lasting protection. Incorporate decluttering strategies to keep only the items you actually need and maintain an organized space.

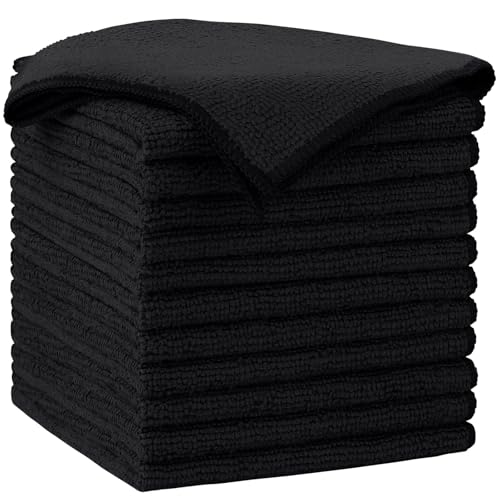
Microfiber 16 x 12-inch cleaning cloth (24-pack); ideal for cleaning cars, trucks, boats, and more

ULTRA SOFT MATERIAL & SCRATCH FREE - Ultra soft and highly absorbent microfiber cleaning cloths, great for cleaning windows, kitchenware, car or other delicate surfaces.

ULTRA SOFT MATERIAL & SCRATCH FREE - Ultra soft and highly absorbent microfiber cleaning cloths, great for cleaning windows, kitchenware, car or other delicate surfaces.
Empty Cabinets and Inventory Every Item
After you’ve set up sorting zones and labeled everything, pull each cabinet empty and start a quick scan to note the number of boxes, any high‑value or fragile items, and the overall layout. Begin with a top‑down sweep, counting boxes and snapping a photo or jotting a brief list for each cabinet. Record valuable or delicate pieces separately to guide handling later. Then, move to detailed inventory: open unlabeled boxes, jot contents, and skip already labeled ones. Use a spreadsheet or inventory‑labeling app to capture item name, supplier, and condition, adding QR codes for fast identification. Group items by type, flag obsolete pieces, and note space‑planning constraints for re‑storing. Set hour‑long timers per section to stay focused and keep pathways clear for easy access. Consider adding uniform containers to streamline stacking and protect items while maximizing space efficiency. Incorporate clear labeling to make future retrieval faster and reduce visual clutter. Regularly apply a high‑quality wood finish to the cabinet interior to guard against moisture and scratches.
Dust, Vacuum, and Remove Loose Debris From Cabinets
When you start cleaning a cabinet, dry‑dust the surfaces first so the dust stays loose and doesn’t turn sticky when you later introduce moisture. Begin with a top‑to‑bottom sweep, using an extendable duster or a vacuum extension hose to capture loose particles. Tap the duster on your ankle after each pass to drop dust onto the floor, then move to a crevice‑tool attachment on a pole for tight edges. Perform dust mapping by noting areas that retain grit, then vacuum slowly at varied angles, employing a shop vac with a soft brush or HEPA filter for heavy loads. Finish by vacuum sealing the interior to prevent re‑contamination, and empty the collection hopper regularly. Microfiber cloth is highly absorbent and picks up dust without a heavy feel. Regularly check for loose hinges to avoid damage and maintain cabinet stability. Consider the door swing direction when planning your cleaning route to ensure all surfaces are accessible without obstruction. Understanding the load capacity of a cabinet helps you avoid over‑loading and preserves its structural integrity.

【FLEX-AND-STAY - BENDABLE TO ADAPT ANY CLEANING SURFACE】- The 25” Long flexible microfiber ceiling fan brush duster can be bent to any shape. Finally, you can clean your high ceiling fans, no matter what type of fan blades you have! Ideal for cleaning ceiling fans as well as other hard-to-reach indoor and outdoor spots: high ceilings, tight corners, walls, blinds, shelves, fan and light fixtures, window screens, baseboards and any other area that’s a struggle to clean!

【More Than Just A Ceiling Fan Blade Duster Tool】Qaestfy ceiling fan cleaner kit equipped with unique cleaning head, designed to clean ceiling fan without using ladder, walls, baseboards, moldings, windows, blinds, tile, floor etc.

Universal attachment picks up dust like no other!
Pick the Right Cleaner for Cabinet Wood, Metal, and Plastic
Now that the dust and debris are gone, you can focus on the material‑specific cleaners. For wood, pick gentle, eco‑friendly cleaners that condition the surface and preserve finish protection. Murphy’s Oil Soap or a mild dish‑soap‑water mix works well; test on a hidden spot, then apply with a non‑abrasive sponge, using a two‑bucket system and wiping with a clean water rag before drying. Metal cabinets need a pH‑neutral, non‑abrasive solution—mild dish soap or vinegar for sticky residue—avoid acidic cleaners on aluminum. Finish a stainless‑steel polish for shine and protection. Plastic parts respond best to mild soap and warm water or a non‑toxic spray; use microfiber cloths, test for discoloration, and dry promptly. Dust removal should be performed first to prevent sticky residue during cleaning. Powder‑coated surfaces also benefit from a gentle, pH‑neutral cleaner to maintain their scratch‑resistant coating. When stripping old paint, a heat gun can quickly soften layers for easy scraping. Proper ventilation is essential when using spray primers to avoid inhalation hazards.

CABINET & FURNITURE CLEANER: Removes dirt, grime & grease buildup

Each spray, in all its lovely non-toxic glory delivers a mighty cleaning punch

40 YEARS OF FINISHING EXPERTISE – Created by second-generation kitchen specialists who understand the science of wood finishes. Our professional kitchen cabinet cleaner is specially designed as a safe wood cabinet cleaner that protects finishes while cleaning.
Scrub Handles, Pulls, and Stubborn Stains
Start by wiping down each handle and pull with a soft, damp cloth soaked in a mild dish‑soap‑and‑warm‑water solution; this removes surface grime and prepares the hardware for deeper cleaning. Next, mix equal parts vinegar and water, apply with a non‑abrasive sponge, and let sit two minutes to dissolve grease. For stubborn stains, create a baking‑soda‑and‑water paste, spread it on the affected area, and let it sit two to three minutes. Then, scrub handles gently using an old toothbrush or soft cloth, focusing on crevices. Rinse the paste off with a clean, damp cloth, and dry each piece thoroughly to prevent water spots. Repeat only if needed, escalating from vinegar to baking‑soda paste for tougher discoloration. Boil the hardware in a vinegar‑water solution for ten minutes before cleaning. Apply a thin coat of protective sealant to the hardware after it is completely dry to prevent future moisture damage. Use a drill guide to ensure new holes are perfectly aligned with the cabinet’s edge. Use a microfiber cloth to gently polish the wood after cleaning, restoring its natural sheen.

SIX SCRUBBING SPONGE: This pack of Scotch-Brite Zero Scratch Scrub Sponges includes 6 sponges

SIX SCRUBBING SPONGES: This pack of Scotch-Brite Odor Resist Non-Scratch Scrub Sponges includes 1 pack of six sponges.

SHIPMENT CONTAINS: 6 non-scratch cleaning sponges for kitchen, bathroom and household cleaning tasks
Rinse, Dry, and Protect Cabinet Surfaces
If you’ve finished scrubbing, rinse the cabinet surfaces with a 50/50 vinegar‑water spray (add a few drops of dish detergent for greasy spots), let it sit a minute, then wipe with a damp cloth soaked in plain warm water to remove any residue. Next, use a clean, soft microfiber towel to dry each panel completely, moving in the grain direction to avoid streaks and protect the finish. Follow with a second, lint‑free cloth to buff the surface, ensuring no moisture remains. Apply a thin, water‑repellent moisture barrier—such as a natural oil or wax—while the wood is still warm, spreading it along the grain. Keep the barrier thin, even, and reapply only when the surface feels dry to maintain protection without buildup. This systematic drying and sealing prevents warping, rot, and future stains. Tighten loose hinges and check for any misalignment before the final sealing step. Use a level to confirm the cabinet sits evenly on the floor.

Super Absorbent:With a high quality short-pile microfiber design, these microfiber cleaning cloths are ultra Absorbent, They can easily absorb large amounts of liquid and wring out spills easily, perfect for wiping surfaces without leaving marks, Even after repeated cleaning, they retain water absorption and softness, ensuring lasting durability
Ultra-soft, Scratch-free, Lint-free, and Streak-free: These soft and non-abrasive microfiber cloths won’t scratch surfaces, paints, coatings, or any other delicate surface, including stainless steel appliances, can be used to clean all surfaces, including stainless steel appliances
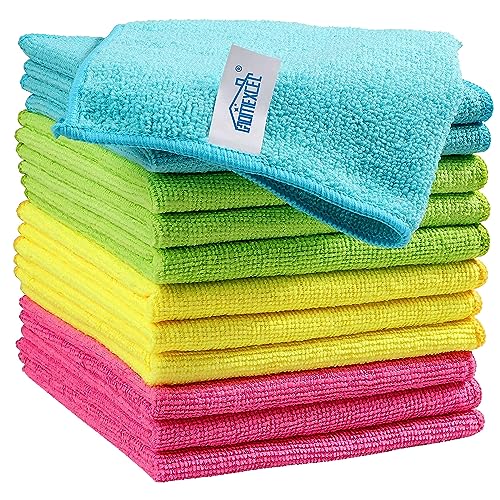
Effective Streak-Free Cleaning: Clean kitchen countertops, windows, mirrors, bathroom surfaces, stainless steel, car interiors, glass, and other delicate surfaces with just water or your favorite cleaner—these microfiber cloths deliver streak-free, neat results with minimal effort, making daily cleanup fast and simple
Re‑Organize and Line Shelves for Long‑Lasting Cleanliness
After the cabinet surfaces are dry and sealed, clear every shelf completely so you can inspect and clean them without obstruction. Remove all items, dust with a soft cloth, then wipe with mild detergent. While removing, perform Inventory categorization: separate expired, unnecessary, and frequently used items. For Shelf liner selection, choose grip liners for heavy pots, Smooth Top for drawers, and wipeable, removable liners for pantry shelves. Measure each shelf, cut liners precisely, and press them into place to prevent slipping. Place baskets or clear bins on the lined shelves, grouping similar items for easy access. Adjust shelf heights if needed, and install pull‑out tracks for back‑item reach. Finally, vacuum and wipe the liners regularly to maintain long‑lasting cleanliness. A freestanding storage cabinet offers self‑supporting design that allows flexible placement without wall mounting. Consider the door mechanism type when selecting a cabinet to ensure smooth operation and durability. Selecting a cabinet with a compact footprint can further enhance space‑saving efficiency in smaller bathrooms.

