Start by measuring your garage, marking the vehicle outline, and keeping a 36‑inch walk path and 62‑inch door clearance. Choose modular cabinets for flexibility, stackable units to use height, or freestanding pieces if you need mobility. Pick steel or powder‑coated metal for heavy loads, and install adjustable shelves with shelf‑pin jigs, keeping brackets no more than 16 inches apart. Add pegboard walls at waist height, lock high‑risk zones, and fit LED strips or puck lights for bright, energy‑saving illumination—continue for detailed installation steps.
Why Proper Garage Cabinet Planning Matters
When you plan your garage cabinets carefully, you create a safer, more efficient space that eliminates tripping hazards and keeps dangerous tools out of reach of kids and pets. Start with budget selection and budget planning; set a realistic cap and allocate funds to high‑impact units first. Choose larger, vertical cabinets to maximize wall space, reducing floor clutter and the need for extra shelves. Install locks on hazardous‑material storage to prevent accidental access. Design workflow zones near workbenches so you retrieve tools quickly, cutting search time. Custom configurations let you fit bulky items and small parts without sacrificing stability. By aligning your layout with budget constraints, you secure safety, improve efficiency, and protect both belongings and property value. Assessing space early helps you determine the optimal cabinet dimensions for your garage layout. Incorporate modular shelving to adapt to changing storage needs and keep the space organized over time. Selecting the right heavy‑duty metal cabinet can dramatically increase durability for frequent tool use.
How to Assess Your Garage Layout for Optimal Cabinet Placement
A well‑planned layout lets you place cabinets where they’re most useful without blocking your car or work zones. Start with a budget flow assessment: tape the garage floor, mark the vehicle’s outline, and sketch a clearance mapping for door swings, windows, and utility fixtures. Measure wall lengths, ceiling height, and depth; subtract the vehicle’s length to guarantee at least 36‑inch walking paths and a 62‑inch clearance behind doors. Identify fixed obstacles—water heater, panels, steps—and note their positions on your sketch. Prioritize traffic flow by allocating zones for storage, work, and open space, keeping back‑wall cabinets within the 15‑20‑foot span. Use symmetry for efficiency, placing larger units where they reduce search time and preserve a clean, flexible layout. Properly organizing tools and seasonal items in cabinets also protects belongings from dust and moisture. Consider the load‑bearing capacity of the floor before installing heavy cabinets to avoid structural issues. Choosing cabinets with a high load capacity ensures they can support heavy tools without warping.
Choose the Right Cabinet Type: Modular, Stackable, or Freestanding
If you want a garage that adapts as your needs change, start by comparing modular, stackable, and freestanding cabinets. Modular units like Montezuma or WorkSpace let you reconfigure sections anytime, giving you budget aesthetics and flexible layout. Stackable systems, such as Performax tall cabinets or the Masterforce 8‑piece set, exploit ceiling height, turning vertical space into storage without sacrificing floor area. Freestanding options—Gladiator steel, Moduline aluminum, or IKEA customizable shelving—offer mobility and easy relocation, perfect for renters or seasonal rearrangements. Choose modular if you anticipate frequent layout shifts, stackable if you need to maximize height, and freestanding if you prioritize portability and simple DIY assembly. Each type supports budget options and can match your garage’s visual style. Modular storage cabinets provide customizable designs that efficiently utilize space across residential, commercial, and industrial settings. Their flexible configuration allows users to adapt storage solutions as needs evolve. Scalable design ensures the system can grow with changing storage requirements.

Modular 3-in-1 Design: Integrates a spacious workbench, side storage cabinets, and a pegboard into a single, space-efficient system. The perfect solution for maximizing functionality in any garage or workshop.

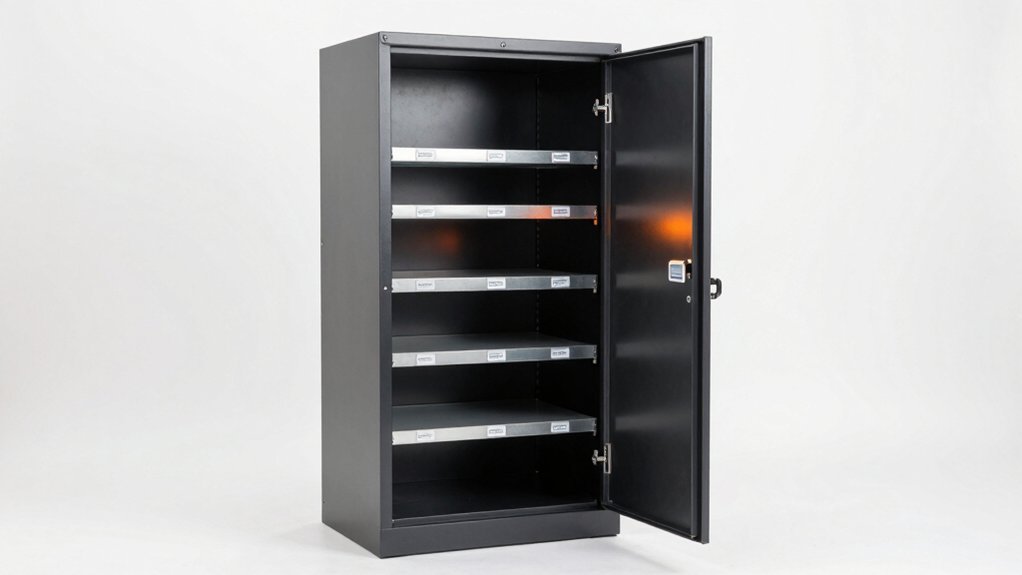
【Versatile 2-in-1 Design】 This professional tool chest combo integrates a portable top toolbox with a large-capacity rolling bottom tool cabinet. Use them together as a mobile workstation or detach them for independent use, offering maximum flexibility for your garage, workshop, or repair shop.

9 large transparent drawers for high content visibility
What Material Is Best for Durable Garage Shelving?
Choosing the right material determines how long your garage shelves will hold up under heavy tools, chemicals, and fluctuating temperatures. Steel offers the highest durability, supporting up to 1800 lb per shelf and resisting moisture when powder‑coated or galvanized. If you prioritize eco‑friendly steel, look for recycled‑content options that still deliver industrial‑grade strength. Aluminum provides a lighter alternative; modular aluminum units are easy to reconfigure, won’t rust, and perform well in humid environments. For a balance of strength and weight, military‑grade aluminum rivals steel without the heft. Plywood is a solid choice for heavy loads if you need a wooden look, but it demands sealing against moisture. MDF and plastic suit lighter items but lack the load‑bearing capacity of metal. Choose based on weight, exposure, and flexibility needs. Metal cabinets also offer enhanced security with lockable doors and reinforced panels, protecting valuable assets and meeting compliance standards. Understanding the load‑capacity limits of each material helps prevent over‑loading and extends the lifespan of your storage system. Proper coating selection can further protect against corrosion and extend the cabinet’s service life.

Load Up Your Life: Transform your cluttered garage into a neat and organized space with our storage shelving unit. With a 2000 lbs total load capacity, you're free to pile on tools, supplies, or whatever you need in your garage or warehouse. Remember, each shelf is a sturdy 400 lbs carrying companion.
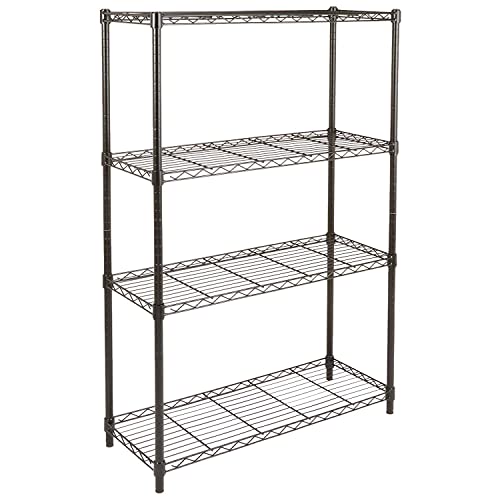
4 shelf wire rack offers handy storage space and easy access to tools and supplies

Load Up Your Life: Transform your cluttered garage into a neat and organized space with our storage shelving unit. With a 2000 lbs total load capacity, you're free to pile on tools, supplies, or whatever you need in your garage or warehouse. Remember, each shelf is a sturdy 400 lbs carrying companion!
Design Zones for Tools, Sports Gear & Seasonal Items
Since you’ll be juggling tools, sports gear, and seasonal items, carve your garage into three clear zones—Tools, Sports Gear, and Seasonal—so each category has its own dedicated wall space, shelving, and storage accessories. In the Tools zone, mount pegboards or slatwall at waist height for power tools, add heavy‑duty shelves for bulk items, and keep a workbench with cleaning supplies separate from main storage. For Sports compartmentalization, group equipment by sport, use color‑coded bins and locker‑style cabinets, hang rackets on wall racks, and suspend water‑sports gear from ceiling mounts. Seasonal zoning calls for rotating current‑season items to eye level, storing off‑season gear on overhead racks or attic lifts, and labeling everything for quick identification. Maintain checklists, dehumidify, and declutter regularly. Regularly dust and wipe cabinets with mild cleaners to prevent buildup and warping over time. Ensure the floor’s load‑bearing capacity meets the weight of heavy cabinets and stored items. A proper seal can also guard against moisture damage that leads to rust and mold.

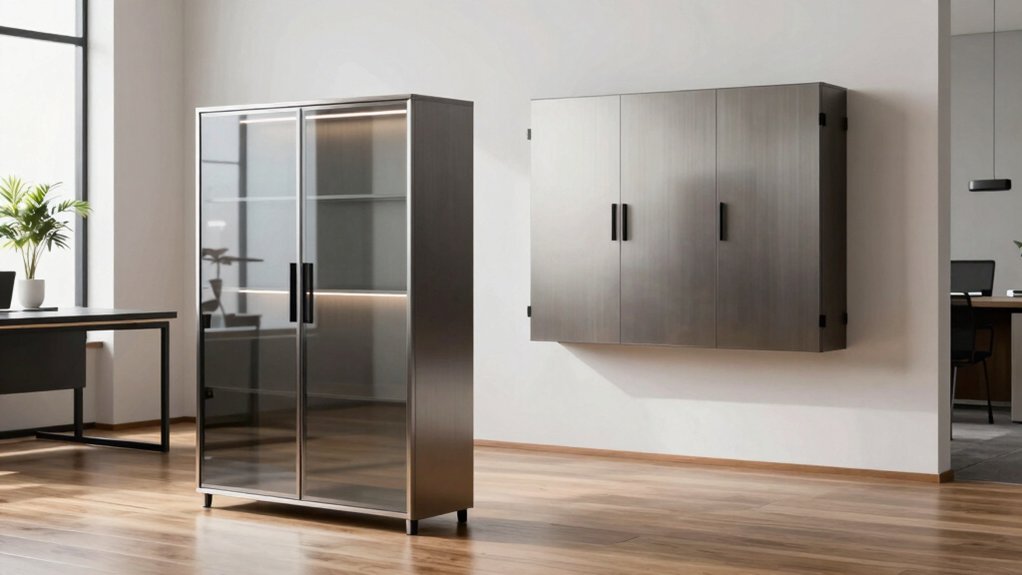
Space-saving Storage: This 30 x 12.2 x 30 inch metal wall cabinet makes the most of wall space, holding up to 120 lbs per shelf. Four adjustable levels let you store tools and supplies of different heights with ease

Neat Storage: This metal storage cabinet provides you with plenty of secure storage space to organize tools, household items, office supplies, etc, It can be mounted on the wall in the garage, office, utility room, or anywhere needs to get de-cluttered. VEVOR storage cabinets keep your garage neat and organized. No mess anymore

【High Quality Wall Cabinet for Garage】This locking garage wall cabinet is made of thickened alloy steel plate, built to last with strong and durable structure for tools
Choose a Storage Layout That Fits Your Lifestyle
What layout best matches the way you use your garage? If you need maximum capacity and have floor space, choose freestanding cabinets; they hold more items and let you rearrange as needs change. When you prefer open floor for larger tools or a workbench, go wall‑mounted. This preserves walking paths, keeps items elevated, and lets you paint in budget‑friendly colors that hide dust. For a hybrid approach, combine cabinets with a dedicated work zone, positioning units so they never block the bench or traffic flow. Use modular or dual‑purpose cabinets to adapt to seasonal gear swaps—swap out bins, relabel, and keep the layout functional year‑round. Prioritize accessibility, keep pathways clear, and align storage with your daily garage rhythm. Consider the weight capacity of each cabinet to ensure it can support your heaviest tools. Properly bolting the panels together with reinforced brackets enhances structural stability and prolongs the cabinet’s lifespan. When installing wall‑mounted units, be sure to locate studs to provide the strongest anchor points.
Maximize Vertical Space With Ceiling‑Mounted Racks & Stackable Lockers
After arranging cabinets to suit your workflow, turn your attention upward: ceiling‑mounted racks and stackable lockers let you capture otherwise wasted overhead space. Choose a heavy‑duty steel rack that holds up to 1,500 lb and fits your garage’s 4 × 8‑ft footprint. Align the adjustable brackets with joists, use EZ Connect for quick height changes, and set the rack between 22‑40 inches for easy reach. Pick a locker color that matches your ceiling aesthetics; the modular stackable bins stay level, resist sagging, and can be stacked to the ceiling for tools, sports gear, or holiday décor. Incorporate accessory hooks for smaller items, and consider retractable options from Ceiling Sam for extra accessibility. This system frees floor space while keeping everything organized and visually cohesive. Ensure the brackets are properly pre‑drilled into the joists for secure mounting. Check for moisture before installation to prevent long‑term damage. Proper anchoring also prevents tip‑overs and meets building code safety requirements.

1200 lbs Tested, 750 lbs Rated: Our overhead garage storage rack undergoes rigorous 1.6 times load testing (1200 lbs) to ensure unmatched safety and durability, supporting up to 750 lbs for your tools and equipment.

900 lbs Tested, 450 lbs Rated Weight Capacity: Our overhead garage storage rack undergoes rigorous double load testing (900 lbs) to ensure unmatched safety and durability, supporting up to 450 lbs for your tools and equipment.

NOTE: The 71-inch axle length exceeds the dimensions of the 4'x4' deck. Please ensure the supporting beam has adequate length. The rack is compatible with 12'', 16'', or 24'' ceiling joist spacing (note: not compatible with 18-inch joist spacing). The wire deck reaches its highest point at approximately 10 inches below the ceiling.
Step‑by‑Step Guide to Installing Adjustable Shelves & Pegboard Doors
Need to make your garage shelves and pegboard doors stay level and secure? First, measure 6 inches up from the cabinet bottom and draw a line for consistent shelf pin spacing. Clamp the shelf‑pin jig to the side, drill pilot holes, and sand any rough edges. Insert rawl plugs or masonry screws if you’re on brick; use stud‑type anchors for framed walls. Mount the first bracket plumb with a spirit level, then position the second bracket so both tops are level; keep brackets no more than 16 inches apart. Slide each shelf onto four shelf pins or secure it with brackets, then verify the shelf is level before tightening. Attach pegboard doors using pegboard hinges, aligning the hinges with the same drilled holes for a flush, stable fit. Adjust pin positions as needed for future re‑configuration. Consistent spacing enhances organization and versatility.

Shelf peg pin diameter Φ: 5mm. Pegs pin length: 8.7mm. Total length:18.9mm

Made of high-strength steel, galvanized coating

These pegs are used by many furniture manufacturers to support cabinet shelves
Safety First: Locking Cabinets & Child‑Friendly Height Guidelines
When you install garage storage cabinets, prioritize safety by choosing locks that keep hazardous items out of reach and placing the units at a child‑friendly height. Mount cabinets no higher than 48 inches so kids can’t climb them, and keep frequently used tools at waist level for easy adult access. Use child‑proof placement guidelines: keep chemicals, gasoline, and paint thinners in locked sections, and label each compartment clearly. Magnetic lock safety works well because the latch resists child manipulation while allowing quick adult entry. For high‑risk zones, install a keypad entry system and post warning signs. Regularly test locks, replace worn parts, and the cabinet doors close fully to maintain a secure, organized garage.
LED Lighting Ideas: Brighten Your Garage Cabinets & Power‑Tool Stations
How can you make your garage cabinets and power‑tool stations instantly brighter and more efficient? Start with flexible LED strips under each shelf; the adhesive backs let you tape them on without wiring. Add puck lights along rows for instant full illumination, and use clamp‑type task lights on power‑tool stations for directional shine. If your ceiling is high, install 4‑foot overhead LED fixtures—each delivers about 4,100 lumens at 5,000‑6,000 K, and you can chain‑drop them to workbench height. Connect everything to smart switches and dimmable controls so you adjust brightness on the fly and save energy. Motion‑sensor modules further cut power use when the garage is idle, while the long LED lifespan means fewer replacements. The UFO LED High Bay light provides adjustable beam settings for customizable illumination.