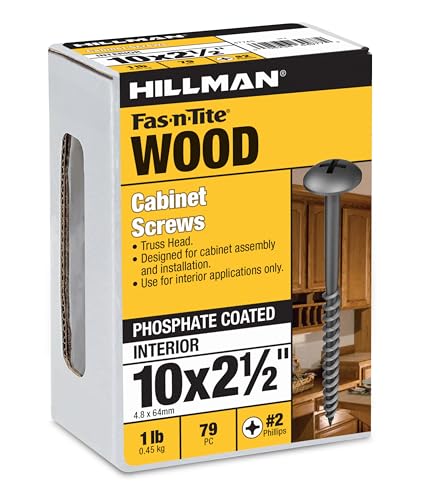
Use a cordless drill with a right‑angle attachment to pre‑drill pilot holes, then drive 2½‑inch washer‑head wood screws into studs located with an electronic stud finder; if a stud isn’t available, install #10 molly anchors or toggle bolts. Build a temporary 1×4 ledger, lift the cabinet onto it, shim the front and back with moisture‑resistant composite shims until a long level shows no more than a 2 mm deviation, and secure the unit. Cut precise outlet openings, install hinges with a jig, add trim, and finish with putty and caulk. The next steps will guide you through detailed hardware installation and maintenance.
How to Hang Wall Cabinets: Choose the Right Tools
Ever wondered which tools actually make wall‑cabinet installation both safe and efficient? Start with proper tool selection: a cordless drill drives screws into studs, while an impact driver supplies torque for heavy fasteners. Use a right‑angle drill for tight behind‑cabinet spaces and a brad nail gun to secure ledger boards. Measure with a tape, and laser level; a 4‑6‑foot level guarantees plumb placement, and a chalk line snaps consistent guidelines. Locate studs using a stud finder, then verify with a hammer test. Keep budget constraints in mind—opt for a multi‑tool that combines drilling, driving, and cutting functions, and prioritize a reliable laser level over cheaper, less accurate options. This balanced kit guarantees precise, cost‑effective installation. Properly assess the wall type before drilling to ensure you select the correct anchors, such as studs or toggle bolts. Material durability should also be considered when choosing the appropriate wall anchors. For added security, use heavy‑duty toggle bolts to distribute load across the drywall.

【MULTIFUNCTION LASER LEVEL】Laser level tool cool gadgets for men Works For Indoor Designed for any situation where accurate measurements are needed, such as hang shelves, cabinets, tiles and picture frames with accuracy. All The Job That Requires A Straight Line Or Accurate Measurement.

MULTIFUNCTION LASER LEVEL: Laser level tool With triangle bracket Works For Indoor Designed for any situation where accurate measurements are needed, such as hang shelves, cabinets, tiles and picture frames with accuracy. IDEAL For The Job That Requires A Straight Line Or Accurate Measurement.(Ideal for building some Thanksgiving decorations and Christmas decorations)
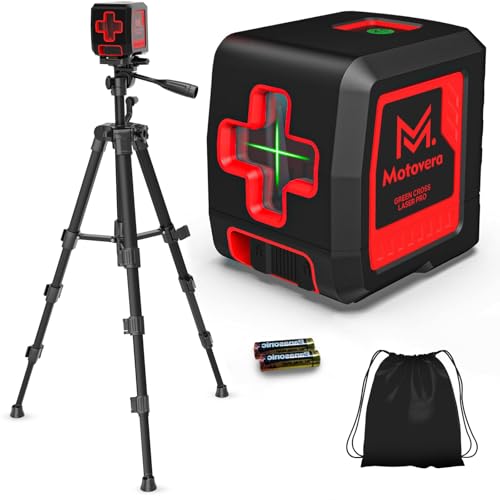
【Ultra-Bright Green Beam & High-Precision Accuracy】Powered by an advanced green laser diode, this tool delivers 4X the brightness of standard red lasers (laser level 360 self leveling). The vivid green cross-line remains clearly visible indoors up to 100ft, even in well-lit conditions. Enjoy professional-grade precision with ±1/9 inch accuracy at 33ft (±3mm @10m) and a wide 110° projection angle. Whether tiling a wall or installing shelving, achieve perfect alignment with zero guesswork. (Class II <5mW, IP54 dust/water resistant),
How to Hang Wall Cabinets: Locate Wall Studs and Mark Cabinet Height
One of the first steps in hanging a wall cabinet is locating the studs and marking the cabinet height. Power on an electronic stud finder, sweep it horizontally, and pause where the device signals a stud up to 1½ inches deep. Perform magnet verification by dragging a strong magnet across the same spot; the magnet will cling to any nail or screw embedded in the framing, confirming the stud’s presence. Record the point with a pencil above the intended cabinet top line. Continue horizontally, noting each detection; standard stud spacing of 16 or 24 inches center‑center lets you map the next studies. Verify each mark with the magnet again, then draw a continuous reference line at the cabinet height to guide drilling. Use a hammer to feel resistance as a clue that a stud is present. Proper anchoring enhances safety by preventing tip‑overs and complying with building codes. Selecting the correct anchor type ensures the cabinet remains stable under load. Secure fastening also reduces vibration, extending the life of both the cabinet and the wall.
How to Hang Wall Cabinets: Build a Temporary Ledger for Hoisting
Need to need a temporary ledger before you lift the cabinet, and a straight 1×4 (or 2×4 for heavier units) works perfectly for that purpose. Choose ledger material that spans the cabinet width and extends at least a foot onto adjacent walls for alignment. Mark stud locations, then pre‑drill pilot holes at each stud. Position the board along the bottom edge of the intended placement, level it, and secure it with screws into at least three studs—ends and center—every 16 inches. Wear safety gear, including gloves and eye protection, while drilling. Lift the cabinet onto the ledger, align it with wall marks, and push it flush. Verify horizontal level, insert shims as needed, then tighten all wall screws before carefully removing the temporary ledger. Use a ledger board to keep the cabinet stable while you work. Also, consider placing any hazardous items out of children’s reach to maintain a safe environment. Remember to verify the weight capacity of your chosen anchors before final tightening.

American Wood Common Board

Strong Magnetic Fridge Whiteboard: This flexible roll up magnetic refrigerator cover with full magnetic back could be firmly stick to any flat or curved magnetic surface automatically and never falling off even if you slam the fridge door.(Notice: these dry erase magnets maybe not work with some stainless steel refrigerators. If a regular magnet can attract to your refrigerator, these kitchen whiteboard will too, please test before purchase.)
How to Hang Wall Cabinets: Fasten Cabinets to Studs or Drywall With the Proper Anchors
When you’re ready to secure the cabinet, start by locating the studs with a finder, marking their centers, and transferring those marks onto the cabinet’s back panel. Verify each mark by scanning from the opposite side, then map the stud spacing—typically 16 inches—along the wall. Drill 3/16‑inch pilot holes through the mounting rails, aligning them with the transferred stud lines. Drive 2 ½‑inch washer‑head wood screws into each stud, using at least two screws per stud and three for larger units. If a stud is unavailable, select appropriate anchors: install #10 molly anchors or toggle screws in the drywall, then fasten the cabinet with 2‑inch screws that engage the anchors. For gaps, insert plywood backing or a 2×4 cleat, secure it to adjacent studs, and attach the cabinet to this reinforcement. This method guarantees a sturdy, level‑ready installation. A stud finder is essential for accurately locating the studs before marking. Adding a lock to the cabinet can further protect the contents and comply with safety regulations. Ensure the cabinet’s total weight does not exceed the floor load capacity of the installation surface. Using tamper‑proof screws helps prevent unauthorized removal of the mounting hardware.
SIZE AND CAPACITY: Truss head Phillips coarse cabinet screws in #10 x 2-1/2 in size; 79 pieces per pack; one pound bulk quantity for large projects

【Quantity and Size】: There are 200 flat head wood screws in total, metric size is M3 x 8 mm, British and American size is #4 x 5/16 inch.

【Premium Materials】: The M3 flat-head wood screws are made of high-quality 304 stainless steel, capable of functioning normally in harsh environments such as high temperatures and high humidity. They offer superior corrosion resistance and rust prevention compared to ordinary screws, ensuring a longer lifespan, durability, and stronger fixation.
How to Hang Wall Cabinets: Level, Plumb, and Shim for a Flawless Fit
If you start by locating the wall’s high spot with a long level or straightedge, you can quickly establish a reference line for a perfectly level and plumb cabinet run. Mark the spot, measure 34½ inches upward, and snap a chalk or laser line across the wall. Lay out each cabinet’s position, draw a dotted screw‑height line about 2 inches from the top and bottom, and locate studs at those intersections. Fasten a 1×3 ledger to the line, checking plumb before loading weight. Shim the cabinet faces front‑and‑back with moisture‑resistant composite shims, starting with ¼‑inch pieces and adjusting until the string line follows the wall without gaps. Clamp, pin, or glue shims, then verify level and plumb every two cabinets. This method preserves cabinet ergonomics and improves acoustic damping by eliminating resonance caused by uneven mounting. Adding proper anchoring ensures the cabinet remains secure during seismic events. Locate studs at each marked screw point to ensure secure anchoring. Incorporate vertical storage solutions such as tall shelving units to maximize space efficiency.

🧰 24 Waterproof Composite Plastic Shims – Stronger & Smarter Leveling: 24 premium 8-inch composite shims made from a mix of plastic & wood fiber. Engineered for indoor & outdoor leveling, they offer superior strength, clean snapping & are waterproof

ECOFRIENDLY: The shims within this bundle are made of solely recycled materials.

BUILT FOR ALL CONDITIONS: Made from a strong blend of wood fiber and polypropylene, these composite shims for leveling resist splintering, cracking, and rotting. Their moisture-resistant design makes them perfect for both indoor and outdoor use
How to Hang Wall Cabinets: Cut and Install Outlet and Wiring Openings
Start by turning off the breaker and confirming the power is dead with a voltage detector before you even touch the wall. Apply four dabs of toothpaste to the outlet front plate, press the cabinet against the wall, then remove it to transfer the marks onto the back panel. Drill four pilot holes within the outline, then enlarge them with a 3/8‑inch spade bit until the junction box fits snugly. Use a jigsaw, guided by the pilot holes, to cut the outlet routing opening, and an oscillating tool for clean crosscuts along the drywall. For wiring concealment, cut a precise access hole in the cabinet back, feed the Romex through a fish puller, and trim the sheath to expose four inches for connections. Test‑fit the box repeatedly, secure the wires with pigtails, and reinstall the faceplate. Use a fine regular cutting blade to avoid pushing material outward during the jigsaw cut. The powder‑coated finish provides UV resistance that helps maintain the cabinet’s appearance over time. Heavy‑duty cabinets offer enhanced durability that protects valuable equipment from damage.
How to Hang Wall Cabinets: Attach Doors and Hardware Securely
Before you attach the doors, set up a hinge jig on each door so the hinge cups sit exactly three inches from the top edge; this guarantees uniform mortise placement and eliminates guesswork when you later align the hinge arms with the cabinet frame. Secure the jig’s base plate, drill pilot holes through the jig, and fasten the hinge cups with the provided screws, avoiding overtightening. Position each door in its final orientation, align the hinge arm with the cabinet frame edge, and mark pilot holes on the frame. Pre‑drill, then attach the hinges, starting with one side and checking door alignment by opening and closing several times. Install cabinet hardware using putty for temporary placement, align to the top rail, and tighten screws just enough to hold without stripping. Verify smooth operation and consistent spacing before final tightening. Use shims to ensure the cabinet remains plumb and level during installation. Properly tighten hinge screws to prevent sagging and maintain alignment over time. Invisible hinges provide a clean aesthetic while delivering strong, reliable support for wall cabinets. Measure drawer slide before cutting to ensure a perfect fit.
How to Hang Wall Cabinets: Add Trim and Patch Holes for a Professional Finish
After securing the doors and hardware, turn your attention to the trim and hole‑patching stage to achieve a seamless, professional look. Begin with trim selection: cut filler strips or moulding to the exact cabinet length, then notch the sides with a chisel for a flush fit. Stain and finish the moulding to match the cabinet surface, ensuring finish matching across all pieces. Secure the trim using a brad gun, then apply manufacturer‑matched putty to fill nail holes. Remove any temporary ledger, fill drilled holes with matching wood putty, sand smooth, and caulk gaps. Finally, touch up joints and scribes with paint or stain, confirming the repaired area blends indistinguishably from the original finish. Use a level and shims to ensure the trim sits perfectly flush with the cabinet edges. For optimal durability, choose high‑grade steel brackets that can support heavier loads without sagging. Always verify that the lock mechanism is fully disengaged before applying pressure to avoid damaging the safety latch.
How to Hang Wall Cabinets: Do a Final Safety Check and Learn Maintenance Tips
While the cabinet feels securely mounted, run a final safety check to verify level, plumb, and bracket stability before you consider the job complete. Perform a Safety inspection by placing a long level on the top, middle, and bottom of the unit; adjust with shims if any edge deviates more than 2 mm. Gently press on each bracket to confirm no movement, then tighten screws incrementally, avoiding over‑tightening. Verify that all screws engage studs at the prescribed spacing and that shims sit behind the cabinet back. After the inspection, document any adjustments and establish a Maintenance schedule: inspect brackets and screw tightness quarterly, re‑level annually, and replace shims if the wall settles. This routine preserves alignment and load‑bearing integrity. Glue shims over stud lines where mounting screws will be secured to prevent the cabinet back from bowing when driven.

[ What You Get ] : 2 pairs 2 Inch french cleat picture hanger X 4 pieces self-tapping screws X 4 pieces self drilling screw X 4 pieces expansion rubber plugs X 4 pieces clear bumpers

【Heavy Duty & Invisible Z Hanger】: This z hanger have 2 mounts to ensure your artwork on the wall more steady ( Up to 50 pounds ). And the hardware remains are concealed completely. Make your favorite decoration more beautiful, no blemish

8-Foot Cabinet Installation System: Designed for installing shorter cabinet runs and compact wall layouts with precise positioning

