Measure your space accurately, then cut ¾‑inch plywood for the carcass and ½‑inch stock for drawer bottoms to those dimensions. Route dados and rabbets for shelves, drill pocket‑hole joints for the sides, and assemble with wood glue and screws. Add vertical supports, diagonal braces, and a face‑frame for rigidity, then sand, prime, and apply paint or stain. Finally, locate studs, install French cleats, and secure the cabinet to the wall. Continue for detailed hardware lists and finishing tips.
Plan Your DIY Cabinet Build: Size, Materials & Cut List
When you start planning your DIY cabinet, first measure the space exactly—account for baseboards, beams, and any obstacles—then translate those dimensions into a cut list that respects standard cabinet proportions: base cabinets **34.5 in. tall, 24 in. deep, and widths in 3‑inch increments (minimum 15 in.), while upper cabinets sit 12 in. deep and 30‑36 in. tall. Next, decide on budget selection: allocate funds for 3/4‑inch plywood sides, 1/2‑inch drawer boxes, and 1×12 lumber for panels, ensuring the total stays within your target. For hardware budgeting, list hinges, drawer slides, and shelf pins, assigning a cost per item and adding a contingency. Draft a cut list that matches plywood sheet dimensions, noting side panel strips, top/bottom panels, and shelf depths, then verify each piece fits the planned widths and heights before cutting. Remember that edge‑banding can be applied after cutting the long rib first, which helps maintain clean, square edges throughout the build. Consider the load capacity of each shelf to ensure it can support the intended items without sagging. Choose a material based on its durability profile to match the intended use and environment. Also, evaluate the fire resistance** of the selected material to ensure compliance with safety standards.

Premium Quality Baltic Birch Plywood: Made from high-quality B/BB grade Baltic Birch, offering superior strength, durability, and a smooth surface for all your crafting needs.
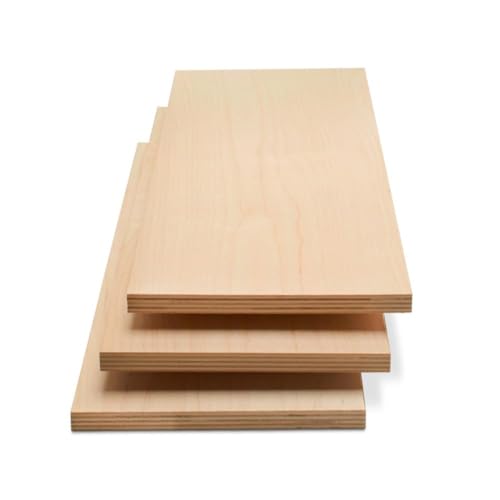
STRONG, DURABLE, HEAVY-DUTY - These craft wood pieces of multi-coated Baltic Birch plywood offer exceptional durability, rigidity, and stability for all your woodworking needs. The surfaces provide excellent holding power for glue and screws and the birch edges create cleaner joinery.

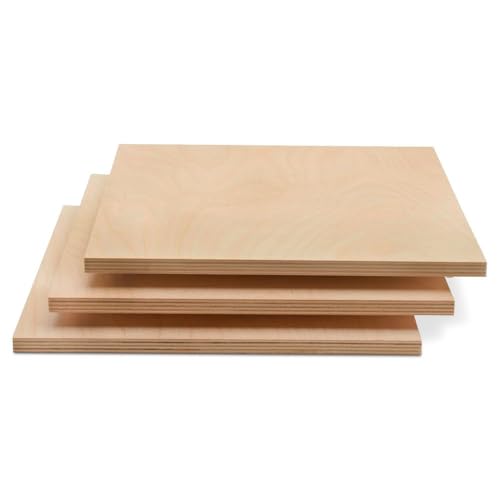
STRONG, DURABLE, HEAVY-DUTY - These craft wood pieces of multi-coated Baltic Birch plywood offer exceptional durability, rigidity, and stability for all your woodworking needs. The surfaces provide excellent holding power for glue and screws and the birch edges create cleaner joinery.
Cut and Prepare Plywood, Lumber, and Hardware
Before you start cutting, gather all plywood, lumber, and hardware, then organize them by thickness and purpose so each piece knows exactly where it belongs in the workflow. Begin with material selection: choose ¾” birch plywood for visible carcasses, ½” for drawer bottoms, and ¼” MDF for backing. Break sheets into rough panels using a track saw or table saw, then trim ragged edges with the same saw for clean lines. Cut stretchers to 4″ and toe kicks to 4½” in one setup to guarantee uniformity. Sand edges 120‑ then 220 grit, then round‑over visible edges on a palm router. For hardware prep, pre‑drill pocket‑hole locations, separate 1¼” screws for standard joints, and set aside 2‑inch screws for thicker joins. Apply wood glue to all mating surfaces before fastening. All panels are cut from the same sheet to maximize material efficiency. Ensure the cabinet is properly primed before painting to achieve a smooth, durable finish. Check the packaging for a flat‑pack label to confirm that assembly is required. Properly align the hinge plates to avoid mis‑, which can cause the door to swing unevenly.
STRONG, DURABLE, HEAVY-DUTY - These craft wood pieces of multi-coated Baltic Birch plywood offer exceptional durability, rigidity, and stability for all your woodworking needs. The surfaces provide excellent holding power for glue and screws and the birch edges create cleaner joinery.

3/4" / 18mm Black Phenolic Baltic Birch Plywood - Enjoy the stacked ply look of Baltic Birch with the added benefit of the phenolic overlay.
3/4" / 18mm Black Phenolic Baltic Birch Plywood - Enjoy the stacked ply look of Baltic Birch with the added benefit of the phenolic overlay.
Create Dados, Rabbets, and Pocket‑Hole Joinery for the Box
If you’ve already cut and sanded the panels, the next step is to create the dados, rabbets, and pocket‑hole joints that will lock the box together. Set the table saw with a dado blade set matching the plywood thickness, then run each side‑panel edge through the setup for a snug fit. Test with a scrap piece, sand the edges, and verify joint‑edge alignment before gluing. For rabbets, adjust the router table with a bearing‑guided bit and cut a 3/4‑inch deep groove along the board’s face, differentiating it from the dado by its edge position. Secure the pocket‑hole jig to a solid board, clamp it, and set the bit depth just shy of the base. Mark rail centers, drill angled holes, and clamp pieces tight—two screws per joint provide pocket‑hole reinforcement without intruding into dado zones. Combine all three methods with glue for a rigid, precisely aligned box. Use a step bit for flat‑bottom holes to ensure clean pocket‑hole cuts. Also, remember to tighten loose screws regularly to prevent misalignment over time.

Route dados and straight cuts sized to receive dressed plywood

This is the very first Dado ever deemed UNI EN847 COMPLIANT

Specs: Arbor 5/8", Chippers (4)1/8",(1)3/32",(1)1/16", Diameter 8", Teeth 24
Add Structural Supports, Dividers, and Face‑Frame Rails
Although the box is already mortised, you still need to reinforce it with structural supports, dividers, and face‑frame rails before the cabinet can bear real loads. Start by cutting high‑grade plywood or hardwood blocks for vertical supports; attach them to the base with long wood screws and metal corner brackets to spread vertical and lateral forces. Add diagonal wood or steel braces across each corner for rigidity, then install Shelf dividers—either spoon‑shaped or L‑shaped—at the desired heights, securing them with self‑tapping screws. For the face frame, mount stainless‑steel L‑brackets or a rail brace kit along the top and sides, using washers for extra pull‑down. Verify that each joint sits flush, then double‑check screw torque before moving to the next step. Ensure the pisters are mounted securely to the wall using drywall anchors for added stability. If you notice overloaded shelves, consider adding extra vertical supports to distribute the weight more evenly. Properly spaced metal brackets can significantly increase the load‑bearing capacity of each shelf.
![2 Packs [Upgraded] Qrity Cabinet Cupborad Furniture Door Lift Stay Support Hinge Damper - Support Up to 20KG - Opening Angle 75°/90°/110° - Come with Hex Key](https://m.media-amazon.com/images/I/511YkdkgYLL._SL500_.jpg)
Each Lid Stay can be used for Right or Left Hand Mounting.

UNIVERSAL COMPATIBILITY: 5mm brown shelf supports are the most common insert size and fit standard cabinet holes for easy installation in kitchen, bathroom, or storage cabinets

High quality material: it is made of high quality plastic and made by heart. The material is thick, firm and durable, with good hand feeling, non-toxic and harmless, safe and corrosion-resistant. The surface of the finished product is clear and uniform, free of impurities and smoother.
Sand, Paint or Stain, and Mount the Cabinet on the Wall
Once the structural supports, dividers, and face‑frame rails are firmly in place, you can move on to preparing the surfaces for their final finish and securing the cabinet to the wall. Sand each face with 120‑grit sponge, following the grain, then step up to 180‑220 grit for a smooth base. Wipe with a tack cloth and vacuum the area. If you’re staining, apply wood conditioner, let it sit 15 minutes, then spread the gel stain with a brush, wiping excess after a few minutes. For paint, use 320‑plus grit, then apply a primer and two satin coats, sanding lightly between coats. Locate studs, pre‑drill 1/4‑inch holes 16 inches apart, and install a French cleat. Choose sturdy lag screws for hardware selection, then level the cabinet and secure it with the cleat, ensuring a flush wall finish. Use a FES tool with sanders connected to vacuums for efficient dust extraction during sanding. Proper ventilation is essential when working with oil‑based primers to maintain air quality and safety. Applying a clear topcoat after the final paint layer adds extra protection and enhances durability. For industrial settings, a powder‑coated finish provides superior resistance to scratches, chips, moisture, and UV damage.

RICH INCLUSIONS: This wooden filler set comprises 12 unique colors of resin repair fillers, offering a hassle-free solution for repairing wood furniture stains and scratches. Please note that the wooden furniture repair kit serves as a touch-up set, helping to blend colors to minimize the visibility of scratches or scuffs. It can also be used to repair small dents or cracks. After application, dry the area with a hair dryer and allow it to air dry for 2-3 days (away from water).

Real Wood Stain Repair: Four brush-on wood stain bottles designed to penetrate scratches and worn areas, blending into the wood grain instead of sitting on the surface like paint or markers

PRODUCT DETAILS - This 13 piece kit includes 6 Repair Markers, 6 paper wrapped wax sticks and 1 wax stick sharpener packaged in a blister card.

