First, gather a drill with a 3/16‑inch bit, a Phillips screwdriver, tape measure, pencil, painter’s tape, level, and the pulls with matching 8/32‑inch screws. Measure the drawer width, apply the 1/3 rule to pick pull length, and mark vertical guides using tape as a straight reference. Clamp a scrap board behind the front, drill a pilot hole with a 5/64‑inch bit, then finish the hole from the opposite side to avoid blowout. Align the pull, insert the screw ¼ in longer than the panel depth, hand‑tighten, then finish with the screwdriver, alternating points to keep the wood flush. Check spacing, avoid over‑tightening, and you’ll have a secure, aligned pull—more details await if you keep going.
Gather Tools & Materials for Cabinet Pull Installation
Start by laying out every tool and material you’ll need so you won’t waste time searching mid‑project. Grab a drill with a 3/16‑inch bit for pilot holes, a 5/64‑inch or smaller bit for precise openings, and a power drill for efficiency. Have a Phillips‑head screwdriver ready, along with a tape measure, pencil, and painter’s tape to protect wood. Select your cabinet pulls and knobs, then choose screws that match the material selection and desired screw finish—standard 8/32‑inch machine‑type screws work for most finishes. Keep Loctite threadlocker, a level, and a hardware template or jig on hand for repeatable alignment. Make sure you also have mounting putty for temporary placement testing before final tightening. Verify cabinet measurements to ensure the correct knob or handle size before you begin. Consider the load capacity of the cabinet to ensure the pulls can support the intended weight. Follow the guide’s recommendation to pre‑drill pilot holes for smoother installation and to prevent wood splitting. Choose the appropriate slide type to match the drawer’s design and weight requirements.

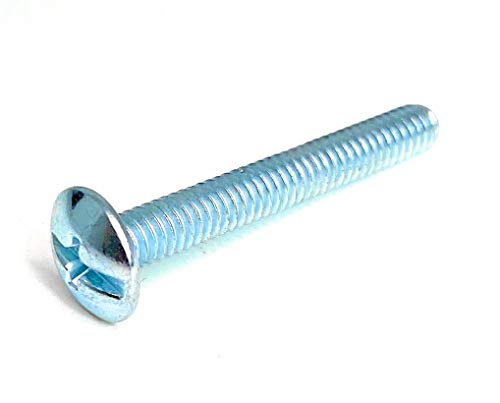
Standard #8-32 machine screws used for knobs, pulls & cabinet door decorative hardware

UPGRADED UNBREAKABLE STORAGE CASE - NO MORE BROKEN PACKAGING Upgraded case with built-in latch, thickened material to 0.084" (2x thicker than old 0.04"), weighs 102g (double the old 51g). Solves the pain of broken screw boxes during shipping and keeps screws organized - moisture-proof for long-term storage at home/office.

Sturdy Construction: Made from durable steel, these screws ensure long-lasting performance for various applications.
Choose Pull Size and Screw Length for a Secure Fit
Now that you’ve gathered tools and materials, pick a pull that follows the 1/3 rule: its length should be roughly one‑third the drawer’s width for a balanced look. Measure the drawer interior, then consult the reference chart—3 in for 9‑12 in drawers, 5 in for 12‑30 in, 7 in for 18‑36 in, and so on. For drawers over 30 in, opt for a double‑pull layout, spacing each center‑to‑center about 1/6 in from the edges. Next, assess pull aesthetics; a longer bar adds sleekness, while a shorter bar offers a tighter profile. Choose screw length based on material thickness: ½‑in screws for ¾‑in panels, ¾‑in for 1‑in panels, and longer screws for deep cabinets. Verify that the screw head matches the pull’s mounting type to guarantee a secure fit. Proper hinge placement can also affect overall drawer stability standard 24‑inch doors typically use two hinges. Consider the finish durability when selecting pulls to ensure they stand up to daily use. Before drilling, always double‑check the lock’s alignment tolerance to avoid mis‑fitting the hardware.

Dimensions: Cabinet handle has a length of 5-3/8 inches a hole center of 3 inches and extends 1.38 inches from the cabinet door or drawer front.

SIZE and TIPS: Please double-check the SIZE of the cabinet handles you need before purchasing.

365-Day Evaluation: We believe you'll find value in your Ravinte handles. Use them for a full year, and if they don't meet your needs, we're here to help
Prepare the Surface and Mark Precise Hole Locations
Before you drill, clean the drawer front thoroughly—degrease with a TSP solution or synthetic steel wool, rinse, wipe with a vinegar‑water mix, and dry completely—so no residue interferes with marking. Lay down a tarp to protect the work area, then gather a tape measure, pencil, painter’s tape, level, and a pre‑made jig or template. Your template design should match the pull’s screw spacing; punch guide holes in the template if needed. Align the template on the drawer’s top edge, slide until the inner edge meets the outer face, and secure it with painter’s tape. Use the pencil to mark through the guide holes, then double‑check alignment with the level. Guarantee marks are clear, straight, and evenly spaced before proceeding. The tape also creates reference lines that help ensure the marks are precisely aligned with the drawer’s edges. Properly tightened hinge screws prevent door sag and keep the alignment consistent over time. Selecting a cabinet made of weather‑resistant material will further protect the hardware from moisture and temperature fluctuations.
WORKS FOR DRAWER & DOOR: Knob and Pulls with 3" (76mm), 3-3/4" (96mm), 5-" (128mm) hole center

Precise Positioning: Equipped with both metric and imperial dual scales, the precision of the cabinet hardware jig reaches 1mm/0.1 inch. Both drill guides are equipped with pointers, and the perpendicularity accuracy of the horizontal and vertical rulers meets the 1‰ standard, effectively ensuring drilling precision
Align Sizes: 2.5"(64mm) 3"(76mm) 3.5"(90mm) 3.75"(96mm) 4"(102mm) 4.5"(115mm) 5"(128mm) 6.25"(160mm) handle; The wide size scope of application can satisfied what you different needs
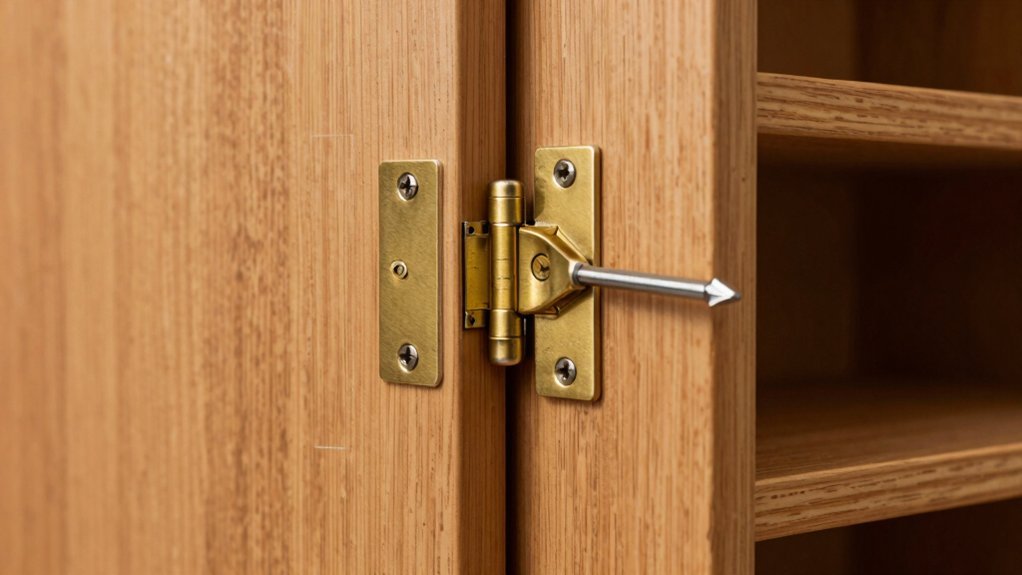
Drill Clean Holes Without Splintering the Wood
When you drill a hole for a drawer pull, the key is to keep the wood from splintering at both entry and exit points. First, clamp a scrap board behind the cabinet as splinter reinforcement; strong clamps prevent movement while you drill. Choose a Forstner or brad‑point bit that matches the screw size, and set the drill to a moderate speed. Begin with a pilot hole, then drill halfway through from the front side. When the bit’s tip appears on the back, stop and switch to the opposite side, drilling the remaining depth. Maintain steady pressure, avoid forcing the bit, and keep the speed consistent to minimize tearout. Test on a scrap piece of the same thickness before proceeding to the final location. Adequate clamping further reduces the risk of blowout. Additionally, installing a child‑proof latch on any cabinet doors can prevent accidental access to hazardous items.

Easily drills high-quality flat-bottomed and pocket holes

Drills flat-bottomed and pocket holes in significantly less time than traditional Forstner bits

Easily Drills High-Quality Flat-Bottomed And Pocket Holes
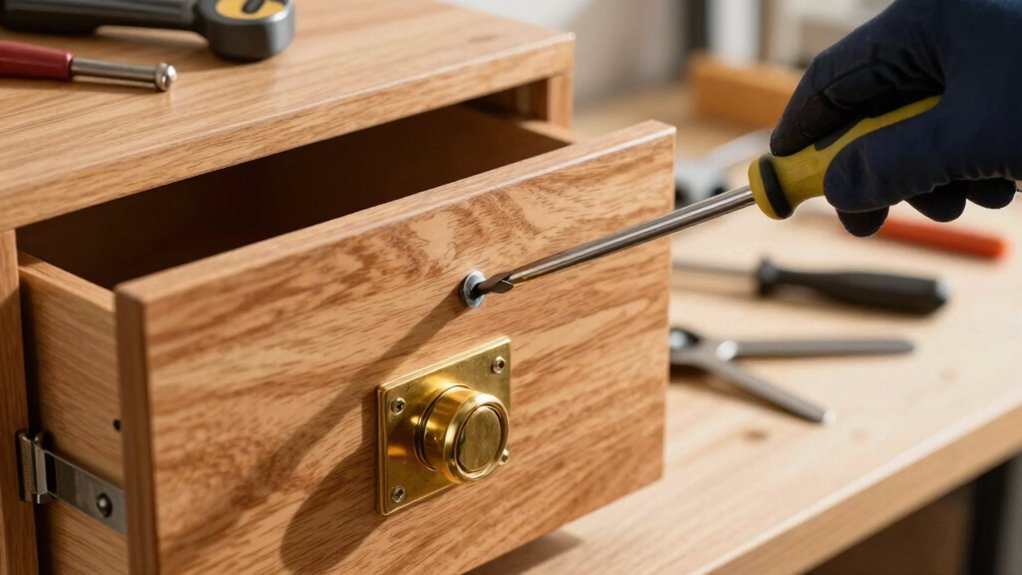
Install Pulls: Align, Secure, and Avoid Overtightening
After drilling clean, splinter‑free holes, you’ll focus on aligning the pull, securing it with screws, and preventing over‑tightening. First, place the template on the drawer face, line its center with the pencil‑marked center, and verify the 2.5‑in, 3‑in, 4‑in, 96‑mm, or 128‑mm center‑to‑center spacing. Tape the template, then mark the base holes from a consistent reference corner. Double‑check measurements, then drill the mounting holes with a 3/16‑in bit. Thread the mounting screws from inside the drawer, choosing a length equal to panel depth plus ¼ in. Position the pull, hand‑tighten each screw, and finish with a screwdriver, alternating points for even pressure. Stop when the screw sits flush; over‑tightening can crack the wood and ruin finish matching. This method preserves pull ergonomics and guarantees a professional look. Use the right‑aligned cabinet door template to ensure consistent knob placement across multiple doors. Always wear protective gloves when handling tools to reduce the risk of hand injuries. Different latch mechanisms, such as magnetic catches, can affect the drawer’s closing force and overall feel. Properly install the magnetic cabinet lock to enhance security and convenience.
QUALITY: Knob and Pull Screws are zinc-plated steel construction. Zinc-Plated Truss Head Combo Drive Cabinet and Knob Screws will provide durability and corrosion resistance. Attach knobs or pulls to cabinet doors or drawer faces

Full Size Coverage: Includes multiple sizes M4×25/30/35/40/45/50mm, suitable for various thicknesses of furniture, cabinets, and drawers, making it an ideal choice for DIY home improvement and furniture repair.

【M4 Screw Assortment】This set includes 120PCS M4 screws, available in M4×25/30/35/40/45/50mm sizes. Each size is adequately supplied, ensuring you have the right length for any task. which are the common sizes used at home for cabinet drawer cupboard and closet. Notes: if the screws are too long to lock tightly, we suggest you use some washers through the screws to make it lock well.
Handle Multiple Pulls on Wide Drawers Correctly
Even on the widest drawers, you can keep multiple pulls perfectly aligned by first locating the drawer’s horizontal center, then using that point as a reference to plot each pull’s hole pattern with a ruler or template; this guarantees symmetry, consistent spacing, and a clean, professional finish. Measure the full width, mark the center on the top edge, and set a centering ruler so its zero aligns with that mark. From the center, measure the on‑center distance between screw holes for each pull, then mark left and right points using a template to preserve uniform spacing. Apply painter’s tape across the front for a straight reference line, draw vertical guides, and drill with a level‑checked bit. Install each pull, checking that the sym aesthetics and ergonomic ergonomics remain consistent before final tightening. For optimal organization, consider using clear bins to keep drawer contents visible and easily accessible. Before drilling, verify the floor’s level with a spirit level to ensure the cabinet sits evenly. When adjusting the hinge, ensure the screw tension is balanced to prevent door sag.
Common Installation Mistakes and Quick Fixes
If you skip the template and eyeball the placement, you’ll end up with misaligned holes, uneven spacing, and a sloppy look. First, verify that each pull sits 2.5–3 inches from the corner for upper cabinets or from the top for lower ones; this guarantees aesthetic alignment and functional reach. Use a cabinet jig or template to duplicate spacing; without it, holes drift and look unprofessional. Pre‑drill with a bit slightly smaller than the screw to avoid wood cracking and to maintain material compatibility. Clamp the door securely before drilling to prevent slippage. Match screw length and type to the cabinet material; over‑tightening or wrong screws strip wood and warp hardware. Finally, choose pull size proportional to door width—large handles on small doors look bulky, while tiny knobs on wide drawers disappear. Properly securing the cabinet also helps prevent unauthorized entry, especially when combined with high‑quality locks and reinforcement hardware such as tamper‑proof screws. Regularly inspect hinges for looseness, as a quickly loose screw can cause the door to sag and misalign over time.
Final Checks, Testing, and Touch‑Up Tips
When you finish installing the pulls, run a quick visual inspection, a low‑angle light test, and a tactile check to confirm that all holes are clean, the hardware sits flush, and no surface irregularities remain before you move on to touch‑up. Next, conduct a Final inspection across the cabinet face: shine a flashlight at a shallow angle to reveal high or low spots, feel the surface with eyes closed for roughness, and verify uniform spacing using your template. If you spot scratches or scuffs, apply Touch‑up tips: shake a touch‑up pen with the cap on, press the tip on cardboard until saturated, then blend light strokes with a fingertip. Allow 1‑2 minutes to dry, test color on a hidden area, and, if needed, seal with a clear coat for a professional finish. Use a white lint‑free cloth to buff the wax after applying the crayon for a seamless blend. Consider using a magnetic catch to keep cabinet doors securely closed while you work. Ergonomic height ensures comfortable access and consistent operation across all cabinet doors. Proper alignment is crucial to prevent binding and ensure smooth drawer operation.