Choose a lock that fits your cabinet’s use and environment: a mechanical camlock gives low‑maintenance, power‑free reliability for occasional access, while a smart/electronic lock offers rapid entry, audit trails, and remote control for frequent use. Measure the door edge to the lock’s center, mark the key‑pin distance (2.5–3 in.), and drill straight pilot holes using a template to keep the face level. Install the cylinder, washer, and nut, tighten securely, then test the full lock‑unlock cycle. For outdoor units, pick stainless‑steel bodies, add weather‑seal gaskets, and reinforce the shackle. Regularly clean, lubricate with graphite, and inspect for wear; replace worn cylinders before failure. Follow these steps and you’ll have a robust, long‑lasting lock, and the next sections will show you how to fine‑tune installation, maintenance, and troubleshooting.
Pick the Best Lock Type for Your Cabinet (Mechanical vs. Smart)
When you weigh mechanical versus smart locks, start by mapping your usage patterns and maintenance appetite. Compare cost vs. convenience: mechanical locks have low upfront cost and negligible upkeep, while smart locks demand higher purchase price and periodic battery replacement. Assess durability vs. tech: a mechanical dial end decades without power, resisting weather and tampering, whereas a smart lock offers seconds‑quick entry, audit trails, and remote control but can fail if electronics or batteries die. Choose mechanical if the cabinet stores infrequently accessed items, you value long‑term reliability, and you prefer a set‑and‑forget solution. Opt for smart if you need rapid, multi‑user access, tracking, and integration with other systems, accepting the extra maintenance and cost. Relocker mechanisms add an extra layer of protection by preventing the bolt from retracting after forced entry. For high‑traffic environments, consider a tamper‑resistant design to further deter forced entry attempts. Evaluating lock resistance to drilling and picking helps ensure the chosen lock meets high‑security standards. Ensuring compliance with regulatory requirements can also dictate the appropriate lock type for specific industries.
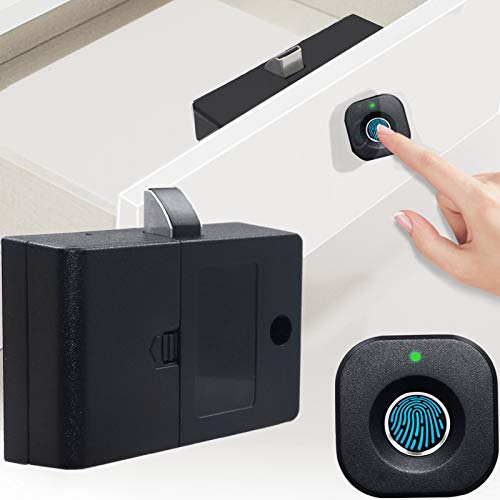
Quick Unlock: Advanced fingerprint lock tech with better response and sensitivity. 0.5 S reaction time, unlock just in a blink. Don't need any extra cards, keys, APP or bluetooth connection. Your fingerprints are the only keys

🔏【3 Sizes Latches】Smart Drawer Lock with 3 sizes latches, you can change the latches of different sizes according to your needs, just a few steps for easily installing, suitable for the drawer of which the thickness is below 27mm.
How to Measure and Mark Your Cabinet for a Secure Cabinet Lock Installation
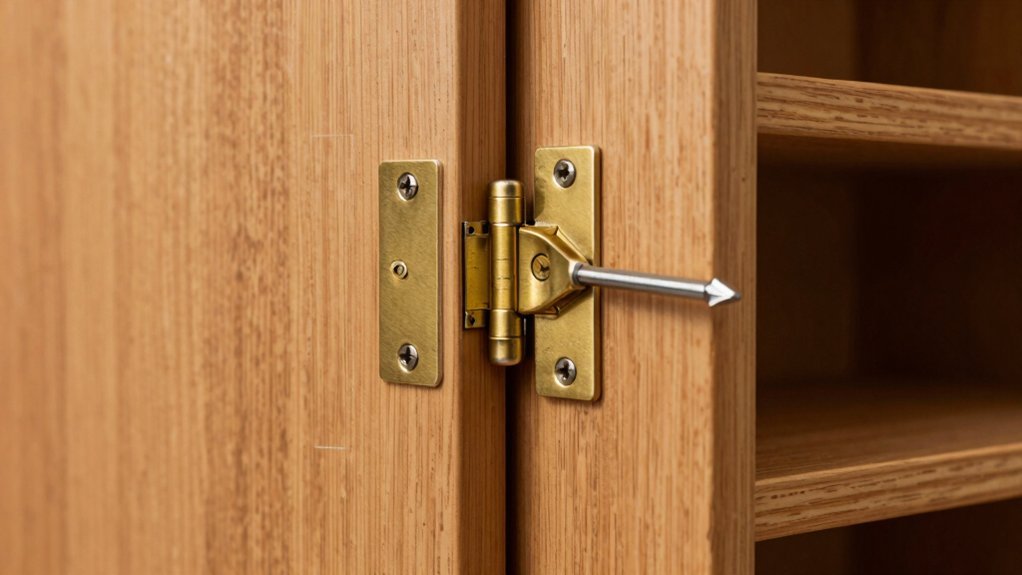
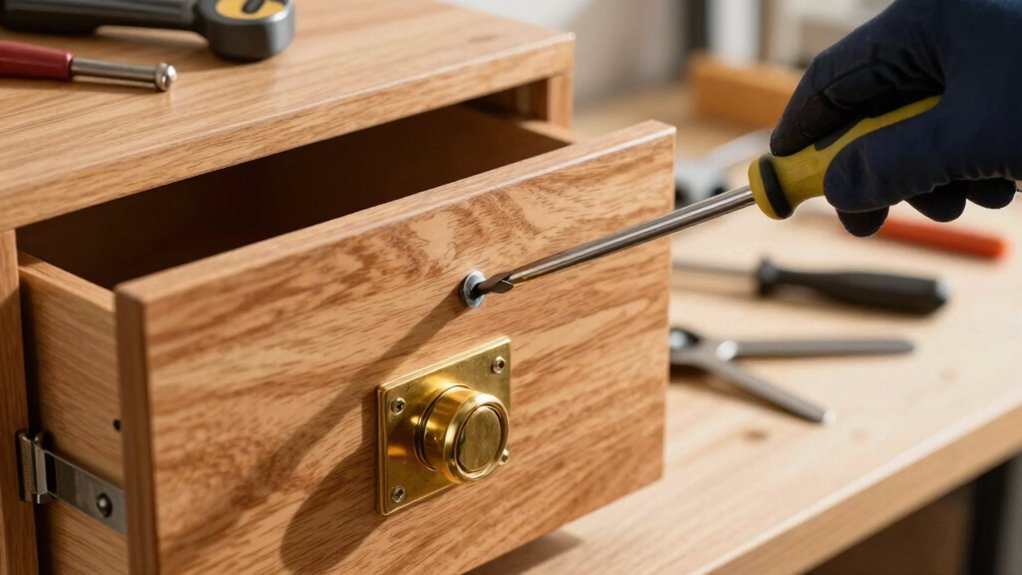
Choosing the right lock type already gave you a clear picture of your needs; now you need to translate that choice into a precise installation. First, use a measuring tape to locate the center placement on the cabinet face. Measure from the top and both sides, then mark the midpoint with a pencil. Set a marking gauge to the key‑pin distance—typically 2.5–3 inches from the edge—and draw a square line across the face. Verify the line with a level, then transfer it to the edge using a square. Clamp a cabinet hardware template, align it with the center line, and mark the lock’s bolt socket and backset. Double‑check every measurement before drilling pilot holes to guarantee the lock operates smoothly. Clamp the template on each door for consistent positioning. Use a drill press for consistent accurate hole depth and avoid splintering the wood. Consider the cabinet’s load capacity to ensure the lock can withstand the weight of stored items. Follow the manufacturer’s recommended torque specifications to achieve optimal magnetic holding force and prevent premature wear.
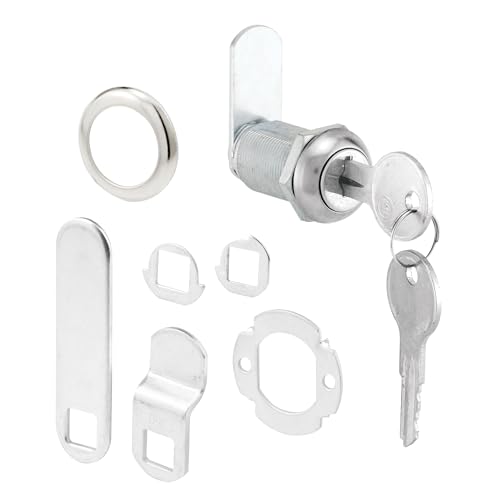
Step‑by‑Step Guide to Installing Mechanical Cabinet Locks
If you follow the preparation steps meticulously, the lock will fit and operate without binding. First, measure from the door edge to the lock’s center, mark level level, and tape over the spot to protect the finish. Drill straight, confirming material compatibility and enough clearance for the cylinder and cam. Insert the cylinder from the front, slide the washer and threaded nut inside, then hand‑tighten before using a wrench to snug it, keeping the lock face level. Secure the locking plate with all manufacturer screws, ensuring it’s level to the frame edge. Test the full lock‑unlock cycle, verify the magnetic key engages cleanly, and tighten all fasteners periodically to maintain reliable operation. Use the provided magnetic lock to ensure a secure hold. Remember to disable power before beginning any work to avoid accidental discharge. Choosing a lock with a high security rating can further protect valuable items stored inside.

1.The rotating mechanical password lock adopts a complex mechanical structure, ensuring extremely high anti technical opening ability of the lock. Password setting is achieved by rotating the mechanical digital scroll wheel, which can set up to millions of different password combinations, effectively improving the practicality of places such as safes, barn doors, and office filing cabinets.

Keyless Security: YogePote Newest 90/ 180 degree password door latch provides advanced security without the hassle of keys or pad locks

【READ SIZE GUIDANCE BEFORE PURCHASE】Please measure the locking distance & your storage door thickness before purchase, Correct Lock Size is equal to the locking distance (measure from the front of the door face to the latch locking-up position). Cabinet lock with keys come as full set with 3 different thickened lock arms per lock (1 pcs standard& 2 pcs for free) for your different installation need.
Step‑by‑Step Guide to Installing Electronic and Smart Cabinet Locks
Before you start installing an electronic or smart cabinet lock, make sure the cabinet surface is clean, the battery is in place, and you have the Yale Home App ready for configuration. First, download the app, insert a CR2 battery, and let the surface dry for 24 hours. Use the mounting template to mark upper and lower holes, applying masking tape to protect finished wood and improve battery aesthetics. Drill straight, ensuring clearance for cam movement. Slide the cylinder into the hole, add the washer or plate, and hand‑tighten the nut before finishing with a wrench; keep the tool angle optimal for installation ergonomics. Attach the cam, align the latch strike, and secure with Loctite. Test code entry, QR scan, or RFID swipe, then verify alignment and tighten all screws. Remove batteries before storage to prevent corrosion and ensure longevity. Consider the cabinet’s steel construction for enhanced durability and security. Selecting a lock with a tamper‑resistant design further reduces the risk of forced entry. Choosing a lock with high‑quality material ensures long‑term durability and resistance to wear.

SUITABLE FOR MOST WOODEN CABINETS – Works with most wooden cabinets, cupboards and drawers. Cabinet door thickness must be less than 1.2" (30mm). RFID signal performance may vary depending on cabinet material and construction. Testing before final installation is recommended.

ONE KEY FOR MULTIPLE LOCKS – These RFID cabinet locks are fully programmable, allowing you to unlock multiple locks with a single key card or fob. Simply program your key to the desired locks and test functionality before installation. Need help with programming? Contact us for detailed instructional videos.
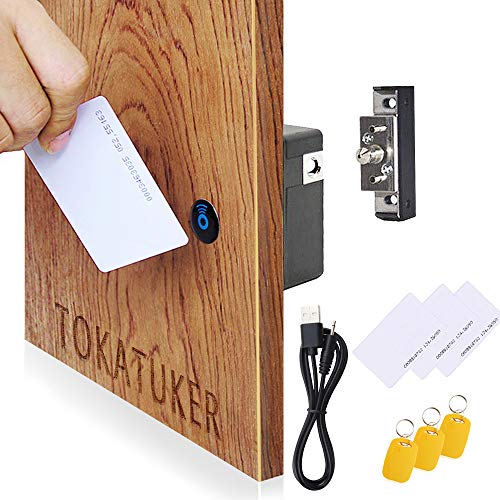
NFC Supported and RFID Lock. NFC function is only available at the locks which you bought after Nov,2021.Make sure batteries are inserted and test the keys before mounting. If the keys can't open, please read the manual and program the keys firstly & test.
How to Weather‑Proof & Reinforce Outdoor Cabinet Locks
When you expose a cabinet lock to rain, dust, and temperature swings, the key to longevity is picking materials and designs that repel moisture and guarantee corrosion. Choose a lock with a zinc‑coated steel or stainless‑steel body and a corrosion‑resistant coating; pair it with a weather‑seal gasket to block water ingress. Opt for a covered keyway and an IP65‑rated diecast camlock, which prevents dust and rain from reaching the cylinder. Reinforce the shackle with octon‑carbide or hardened steel, and select a 2‑inch laminated steel body for strength. Install a reinforced bumper to guard the lock housing against impacts and scratches. These steps guarantee the lock stays functional and secure despite harsh outdoor conditions. Consider modular shelving to adapt the cabinet interior for varying storage needs while maintaining moisture resistance. Select a lock that matches the cabinet’s material to avoid galvanic corrosion. Ensure the cabinet meets fire‑rating duration requirements to maintain safety standards under extreme heat.
SECURE CABINET DOORS AND DRAWERS – This U 9945 lock can be used to secure cabinet doors, drawers and much morewith the securing hex nut.

SECURE FILE CABINET DOORS AND DRAWERS – This drawer and cabinet lock makes it easy to secure your drawers, important files, and small items; the drawer lock is keyed alike with a Yale Y-11 keyway

COMPATIBILITY:TOKDOOT Drawer and Cabinet cam Lock U 9945 with keys fits drawer and cabinet panels up to 13/16 inches thick, perfect for desk drawers and cabinet replacement needs
Maintenance Tips to Keep Your Cabinet Lock Working Long‑Term
Even after you’ve chosen a weather‑proof lock, its long‑term reliability hinges on a disciplined maintenance routine. Begin each six‑month residential check (or three‑month commercial check) by wiping the exterior with a soft, damp cloth, then use a small brush to clear dust from the inner mechanism. Blow gentle air through the keyway, never spraying water. Apply a graphite‑based lubricant according to your lubric schedule; reserve silicone for high‑dust areas. Avoid oil‑based products that gum up pins. Inspect the three‑point latch, tighten screws, and verify fusible links yearly. Test the lock with the correct key—never force it—and keep keys clean to prevent grit transfer. When you need extra copies, use professional key duplication services that guarantee precise cuts. This analytical, pragmatic approach keeps the lock functional for years. Replacing a metal cabinet lock requires careful removal of the existing hardware before installing the new mechanism. Incorporate a regular inspection schedule to catch wear before it compromises security. Consider the holding strength of the lock when selecting a replacement to ensure it meets the cabinet’s security needs.
Troubleshooting Common Cabinet Lock Issues and When to Upgrade
If you notice a lock that won’t turn, sticks, or leaves a misaligned door, start by isolating the symptom—whether it’s a spinning barrel, a bent cam arm, or key jamming—because each issue points to a specific cause and a clear upgrade path. Perform diagn diagnostics on the retaining nut torque; a loosened nut lets the barrel spin, while over‑tightening wears threads. Inspect the cam arm for bends or incorrect length, and replace with a heavy‑duty cam if the cabinet endures high force. Clean the keyway regularly to prevent debris‑induced jamming, and swap worn cylinders before failure escalates. When misalignment persists after leveling, or corrosion appears, consider stainless steel models. Review lock warranties to guarantee replacements are covered and plan upgrades before recurring problems compromise security. Identify the lock before ordering a replacement key to ensure compatibility. For added protection, consider cabinets with a tamper‑resistant design that deters forced entry. Understanding the cam lock mechanism helps diagnose why a bolt may fail to retract. Selecting the appropriate lock type early can simplify future maintenance and enhance overall security.

【Check Before Purchase】Please read size guidance before purchase, choose correct lock size according to both your latching distance & door thickness. Make sure both measurement fits. Latching distance measure from the front of the door face to the latch locking-up position. Toolbox locks work for a standard mounting hole of 3/4 inch diameter. Installation is quick and easy with Installation Guide Included, opens with a 90 degree turn, key is removable at unlocked position.

IDEAL SUBSTITUTE: These cam lock wheels are designed to be fully interchangeable with IKEA part number 114670. If your assembly instructions specify IKEA part #114670, these wheels are precisely what you need.
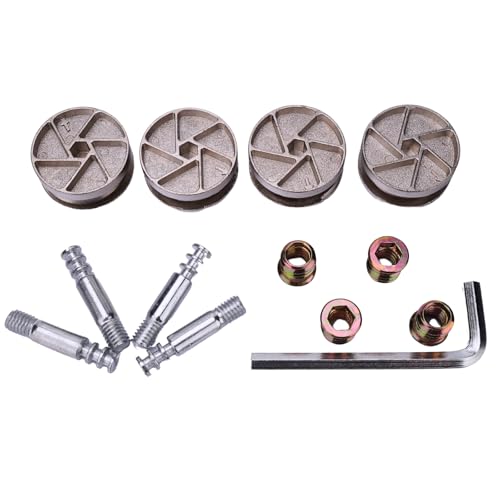
IDEAL SUBSTITUTE: These twin-spiral cam lock wheels are designed to be fully interchangeable with IKEA part number 114670. If your assembly instructions specify IKEA part #114670, these wheels are precisely what you need.