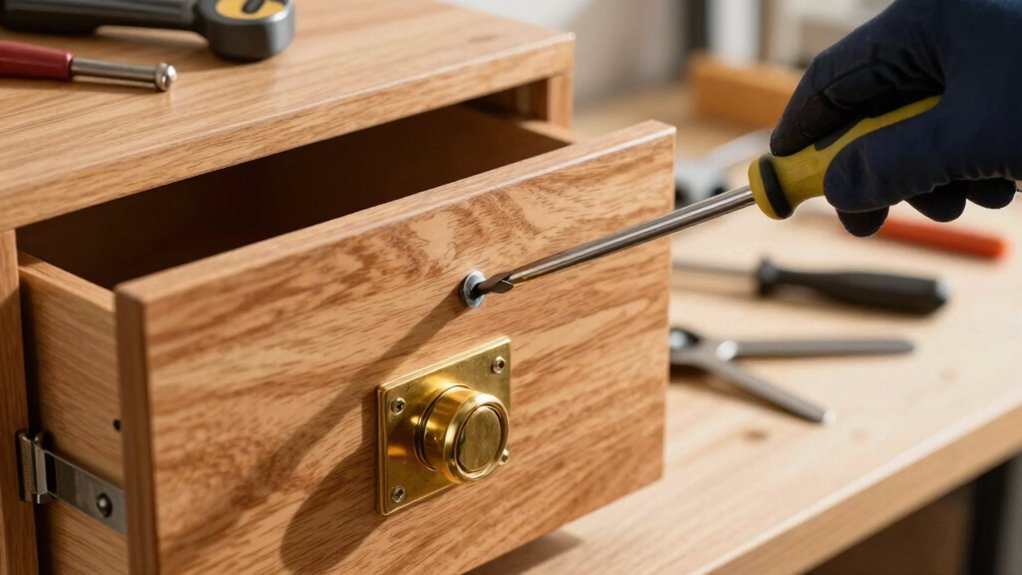
Grab a 2.5 mm Allen wrench and the correct Phillips or Pozidriv driver, then loosen the mounting‑plate screws just enough to move the door. Turn the vertical‑adjustment screw clockwise to raise the door or counter‑clockwise to lower it, using a level to keep the edge flush. For side‑to‑side tweaks, rotate the lateral screw clockwise to pull the door inward or counter‑clockwise to push it outward, checking gaps at top, middle, and bottom. Finally, fine‑tune depth with the rear eccentric screw, tightening uniformly across all hinges; the next steps will show you how to troubleshoot common problems and verify the adjustment.
Concealed Hinge Adjustment – Gather Required Tools
One of the essential tools you’ll need is a 2.5 mm Allen wrench, which serves as the primary adjustment instrument for most 3‑D adjustable concealed hinges. This tool wrench fits the hex socket on the hinge’s adjustment screw, letting you make micro‑shifts without removing the door or loosening screws. Pair it with a hinge tweaker, a lever‑style device that snaps over the hinge body and lets you push the pivot point outward to close gaps or re‑weight the door. For larger cabinets, keep a 4‑in‑1 multi‑size wrench set handy; the double‑ended design covers 14 mm‑25 mm bolts and eliminates the need for extra tools. Guarantee the wrench and tweaker are steel‑grade for durability, and store them in a magnetic tray to avoid loss during the adjustment process. The jig’s built‑in measuring scales ensure precise placement for each hinge cup. Understanding the differences between concealed hinge types helps you select the right hardware for smooth operation and durability. Using the correct hinge count per door is crucial for structural stability. Properly aligning the door also reduces wear on the adjustment screws over time.

MADE IN AMERICA- High quality, Industrial Grade Professional Tools made in the U.S.A

【Ergonomics T-handle Grip】:High-strength nylon mix with fiberglass makes handle working durable but comfortable.You could save strength by using WISEUP t-handle wrench without slip

【Package & Size】Package comes with 4pcs green ball end allen wrenches.Ball end tip dia:2.5mm.Short side length:0.79 "/20mm, Overall height: 3.39" /86mm.Sufficient quantity to meet your different needs.
Concealed Hinge Adjustment – Choose the Right Phillips or Posidrive Screwdriver?
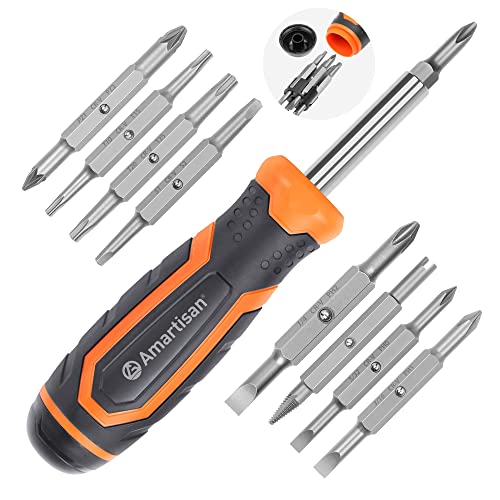
After securing the 2.5 mm Allen wrench and hinge tweaker, you’ll need the correct screwdriver to tighten or loosen the adjustment screws without stripping them. Identify whether the hinge uses a Phillips or a Pozidriv screwhead; the former has a simple cross recess, the latter adds four splines and a “PZ” stamp. Choose a Phillips driver only for Phillips heads—its cam‑out design limits torque and protects the recession. For Pozidriv heads, select a matching PZ‑marked bit; its extra ribs increase surface contact, giving you better torque control and preventing cam‑out. Never substitute a Phillips bit for a Pozidriv screw, as it will cam out early and strip the screwhead, compromising hinge stability. Use a magnetized holder to keep the bit seated while you adjust. Coarse‑thread screws often use Pozidriv heads for a more secure fit. Properly aligning the door after adjustment prevents door sag and ensures smooth operation. When evaluating cabinet options, consider the material durability to ensure long‑term performance.
[High-end Handle Design]: Multi position screwdriver has ergonomic handle, anti-skid grip to reduce hand fatigue.

[Versatility Unleashed] Includes PZ1, PZ2, PZ3 bits for electricians, plus #1, #2, #3 Phillips and SL4–SL6 slotted sizes. Tackle panels, terminals, and breaker boxes without guesswork.

【PREMIUM MATERIALS】: Screwdriver bar made of 6150 chromium vanadium steel, stronger and tougher than most carbon steel;it is chromium plating treated for corrosion resisted and nice appearance.
Concealed Hinge Adjustment – Vertical Positioning (Raise or Lower the Door)
When you locate the vertical‑adjustment screw on the hinge’s mounting plate—usually centered or near the lower edge—you can raise the door by turning it clockwise and lower it by turning it counter‑clockwise. First, loosen the screw just enough to let the door move freely; then lift or press the door to the desired height. Use a level against the door edge to confirm that the top is even and that door clearance remains uniform. Tighten the screw with appropriate hinge torque, checking that the frame gap stays consistent along the entire edge. Repeat the process on each side hinge, making only small increments, and verify smooth closing without binding before finalizing the adjustment. A Philips screwdriver is required to turn the adjustment screws. If the screw strips, consider using a longer screw to ensure a secure hold. Properly aligning the hinge plates prevents uneven door swing and extends the hardware’s lifespan. Different hinge types, such as soft‑close hinges, may require additional adjustment steps to maintain their specialized functionality.

3-Piece Offset Screwdriver Set - Includes 3 right angle screwdrivers in Phillips and flat head designs, perfect for reaching tight spaces and hard-to-reach areas.
[Package Includes] – 1 x 3.0 Flathead Screwdriver, 1 x 2.0 Flathead Screwdriver, 1 x 1.5 Flathead Screwdriver, 1 x 3.0 Phillips Screwdriver, 1 x 2.0 Phillips Screwdriver, 1 x 1.5 Phillips Screwdriver, 1 x Pentalobe 2 Screwdriver, 1 x Pentalobe 5 Screwdriver, 1 x Helper Stick, 2 x Tweezers, 1 x Magnetizer & Demagnetizer Tool

STRENGTH AND DURABILITY: Made of heat-treated alloy steel
Concealed Hinge Adjustment – Side‑to‑Side Alignment (Shift Door Left or Right)
How do you shift a cabinet door left or right with a concealed hinge? Locate the middle lateral screw on the hinge’s horizontal arm, closest to the door. Turn it clockwise to move the door rightward, counter‑clockwise to pull it left. Each quarter‑turn changes the door‑to‑side position by roughly 0.5 mm; the total range is about 2 mm (3/32 in). Adjust the top and bottom hinges alternately, checking the door after each turn. Guarantee the gaps on both sides stay within the alignment‑tolerance, typically ±0.5 mm. When the door sits plumb and the gaps are symmetrical, tighten the screws securely. This side‑to‑side tweak compensates for uneven gaps in double‑door installations and guarantees a clean, flush appearance. Vertical adjustment allows up to 5/32 in movement to align the door’s bottom edge precisely. Properly securing the hinge can also enhance the overall fire resistance of the cabinet by preventing accidental misalignment that could expose vulnerable points. Selecting the correct latch type can further improve door stability and overall cabinet performance. Using high‑quality load‑capacity hinges ensures the door remains stable under frequent use.

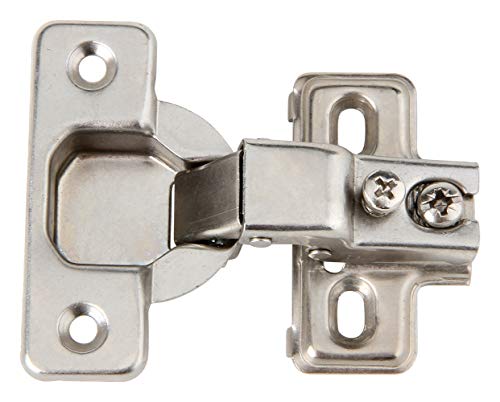
✅ 135° Concealed Hinge for Corner Kitchen Cabinet.
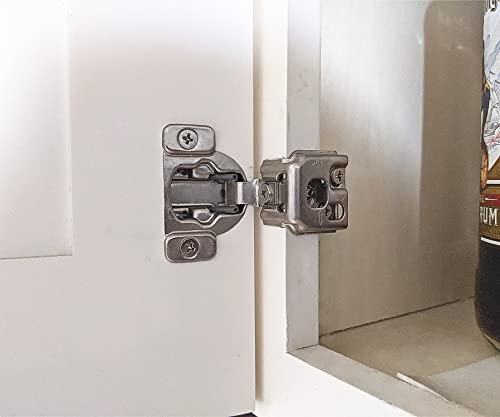
🏘️ Overlay: 1-1/4 Inch Opening, Angle: 105 Degree, Adjustment: 3-cam Vertical, Horizontal And Depth Adjustment

Installation specification: Cup diameter is 35mm; Cup depth is 11.6mm, Screw holes distance is 45mm; Opening angle is 105 degrees
Concealed Hinge Adjustment – Depth Tuning (Pull Door Closer or Push It Away)
Ever need the cabinet door to sit flush with the frame? Locate the rear depth screw or eccentric on each concealed hinge. Using a Phillips screwdriver, turn the screw clockwise to pull the door inward, reducing hinge clearance; turn it counter‑clockwise to push the door outward, increasing the gap. Keep the rotation uniform across all hinges to stay within the depth tolerance, typically ±2 mm. First, tighten the mounting screws, then fine‑tune the depth. After each half‑turn, close the door and check that the gap remains consistent and the door closes smoothly. If you have a multi‑hinge door, adjust both eccentrics equally. Stop when the door aligns perfectly with the cabinet face and the hinge clearance meets the desired specification. The vertical adjustment screw can also be used to raise or lower the door for precise alignment. Properly aligning the hinges helps prevent excessive wear on the cabinet hardware. Selecting hinges with a high load capacity ensures long‑term durability for both residential and commercial cabinetry.

5/8" INCH FULL OVERLAY KITCHEN CABINET HINGES : Adjustable to 1/2" with a gap. Come with Clip-on Plates, matching screws, and 3-D adjustability to ensure a perfect fit for your kitchen and bathroom.
Made from steel with a steel nickel plated finish
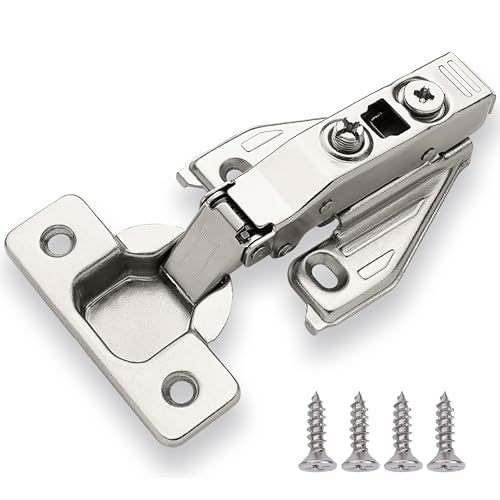
5/8" INCH FULL OVERLAY KITCHEN CABINET HINGES : Adjustable to 1/2" with a gap. Come with Clip-on Plates, matching screws, and 3-D adjustability to ensure a perfect fit for your kitchen and bathroom.
Concealed Hinge Adjustment – Troubleshoot Common Issues & Final Checklist
If your cabinet doors are misbehaving after the depth tune‑up, start by pinpointing the symptom—crooked alignment, uneven gaps, squeaks, or doors that won’t stay closed—and then follow a systematic troubleshooting sequence that covers side‑to‑side, height, and hinge integrity checks before confirming the final checklist. First, examine the side‑to‑side screws: turn clockwise to pull the door toward the frame, counter‑clockwise to push it away, measuring gaps at top, middle, and bottom. Next, address height by loosening the mounting plate screws, sliding the hinge up or down, and retightening after each micro‑adjustment. Inspect the spring hinge for worn tension; replace if necessary. Apply hinge lubrication to eliminate squeaks and guarantee smooth motion. Finally, verify even gaps, flush fit, and proper soft‑close operation, then re‑check after 24 hours for settlement. If the hinge screws keep loosening, consider using a thread‑locking adhesive to secure them. Choosing the right hinge material can also affect durability and load capacity.