First spot any gaps or floor unevenness, then run a spirit or laser level across the cabinet tops and mark the low spots. Use adjustable leg levelers or shims, turning each front leg clockwise until the bubble centers, and fine‑tune the back legs the same way. Check that the cabinet sits flush against the wall cleat, then secure it to studs with screws or anchors, adding a plywood backer if studs are far apart. Follow these steps and you’ll get perfect alignment, and the next section shows how to level an entire row.
Identify Cabinets That Need Leveling
How can you tell which cabinets need leveling? Begin with visual detection: look for gaps between cabinet bases and the floor, daylight spilling under edges, or sloped countertops. Notice doors and drawers that won’t close fully, and check if water pools on the surface. These signs trigger a leveling assessment. Next, identify the floor’s highest point along the wall and use a level to measure height at several spots. Record each measurement to spot variances; a consistent 34½‑inch reference line signals proper base height. If gaps appear between adjacent cabinets or the toe kick isn’t flush, the cabinets are out of level. Conduct this quick visual detection and leveling assessment before moving on to any corrective work. Using a leg leveler can simplify adjustments on uneven floors. Properly evaluating load capacity helps prevent over‑stress and ensures long‑term stability. Additionally, consider the material durability of the cabinet to ensure it can withstand the adjustments without damage. For a more permanent solution, you can apply a thin layer of self‑leveling compound to even out minor floor irregularities.
Gather Tools for Cabinet Leveling
Before you start leveling, gather the essential tools: a spirit or laser level for checking alignment, adjustable leg levelers (like Hafele Axilo) for height tweaks, a stud finder to locate secure mounting points, and a screwdriver or wrench to tighten the levelers. Keep a tape measure and pencil handy for quick reference measurements and marks. Store these items together in a dedicated tool storage bin so you won’t lose anything mid‑job. Use a wrench set or screwdriver to turn the leg leveler screws, and a ladder if you need rear‑leg access. A stud finder helps you locate studs for future mounting, but the leg leveler does the heavy lifting for floor‑slope adjustments. Work efficiently, tighten each leveler, and re‑check with the level before moving on. The laser’s 360° beam provides a consistent reference line across the floor, ensuring all corners are aligned to the same height. For added safety, consider using toggle anchors when the cabinet must be secured directly to drywall without studs. Metal cabinets offer fire resistance that protects both contents and surrounding areas. Proper anchoring also helps meet building code requirements for stability.
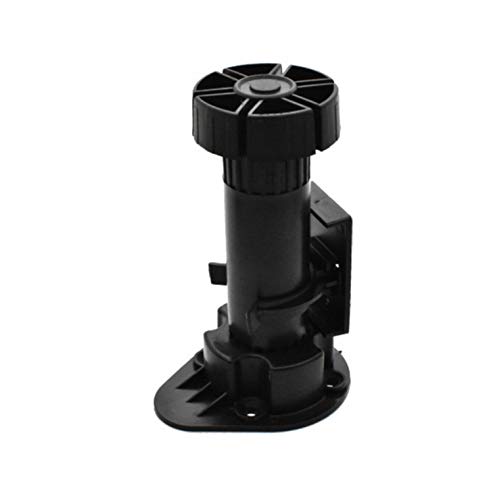
Accessories for DIY furniture, cabinets ect, Widely Applied to a humid environment room like kitchen, bathroom, to prevent ground water corrosion cabinet

【Adjustable Leveling Feet】- The adjustable height is 0-2 inches, which can meet your various needs. In addition, the base with a plastic protective cover can protect the floor and prevent moisture from entering the feet.

!!If you find any parts missing after receiving the goods, please email us and we will respond within 24 hours and give you a satisfactory answer.
Mark Studs and Set Reference Line for Leveling
When you locate the studs, start by measuring from one end of the bottom plate in 16‑inch increments and mark each spot with an X on the side where the wood will land. Use a tape and hook the edge, then square a line across the plate with a speed square. Transfer those X marks up the wall so they line up vertically; this is your stud marking. Next, determine the cabinet’s top‑to‑cleat distance. Set a level, draw a horizontal reference line on the wall at that height, and extend it the full installation length. Verify the line stays level before you begin anchoring. The reference line guides the cleat placement, ensuring the cabinet will sit perfectly straight. Mark each stud location with an X to maintain consistent spacing. Use toggle bolts when the cabinet exceeds the weight limit of standard drywall anchors. Stud detectors can speed up locating the studs and reduce measurement errors. Regularly dust the cabinet surfaces to prevent buildup that could affect alignment.
Position the First Cabinet and Hook to Wall Cleat
With the reference line marked, lift the cabinet and bring it up to the wall cleat, making sure the top edge clears the cleat enough to slide down smoothly. Hold the cabinet steady, then tilt it slightly so the cabinet cleat meets the wall cleat at the proper angle. Check that the clearance space above the cleat is sufficient for the cabinet to pass without catching. Gently lower the unit; the angled edges will guide the cleats into interlock. As the cabinet descends, watch for even cleat alignment—any mis‑fit will cause a tilt. Once the cleats fully engage, the cabinet should sit flush against the wall, ready for level checks and final fastening. Accurate stud location ensures the screws anchor into solid wood. Use a wall stud finder to confirm the studs are properly located before drilling. Install floor anchors to prevent movement and secure the cabinet to the floor. Consider the traffic flow in the room to avoid obstructing pathways when the door swings.

【Heavy Duty & Invisible Z Hanger】: This z hanger have 4 mounts to ensure your artwork on the wall more steady ( Up to 60 pounds ). And the hardware remains are concealed completely. Make your favorite decoration more beautiful, no blemish

1.97" wide and 3mm thickness aircraft grade aluminum.

Invisible Mount: The mounting brackets stays hidden for a sleek, floating look. Each 41-inch interlocking Z clip locks your mirrors, cabinets, or artwork firmly in place while keeping the hardware out of sight
Adjust Individual Legs for Front‑to‑Back Level
If the floor isn’t perfectly level, start by positioning the cabinet at the lowest spot, then use a spirit level on the top surface to gauge the front‑to‑back tilt. Next, focus on leg height adjustments. Twist each front leg clockwise until the bubble moves toward center, then fine‑tune by small counter‑clockwise turns. Use a screwdriver if the legs resist; the gear mechanism eases turning under load. Check the back legs; they should stay unchanged if the back already aligns. After each tweak, re‑place the level and verify that the bubble is centered for a true front‑to‑back alignment. When the bubble steadies, perform leg‑height fine‑tuning on any leg that still shows a slight deviation, ensuring the cabinet sits plumb across its entire length. The quick‑clip system allows the toe‑kick skin to be removed without nails, simplifying adjustments. Proper leveling prevents structural stress that can damage joints over time. Adding child‑proof locks to the cabinet doors further enhances safety for curious toddlers. Regularly inspect hinge screws for looseness, as tightening screws can prevent misalignment caused by cabinet movement.

HEAVY DUTY ZINC PLATED STEEL CONSTRUCTION – Furniture levelers are built from precision-machined steel to support up to 600 lb per set, ensuring rugged durability for demanding furniture and equipment to cabinets, shelving units, tables, workbenches

✔8Pack- Heavy Duty & Large Furniture Leg Levelers- Allow easy leveling of furniture at home, office, restaurant, school or café, to match in same height. They allow raising your furniture, and help slide your furniture at ease !

Heavy Duty & Large Furniture Leg Levelers- Allow easy leveling of furniture at home, office, restaurant, school or café, to match in same height. They allow raising your furniture, and help slide your furniture at ease !
How to Check and Level an Entire Row of Cabinets?
How do you guarantee a whole row of cabinets sits perfectly level? First, locate the floor’s highest point. Run a standard level across the row, checking multiple spots to catch any floor slope. Mark that point as your baseline. Next, set a laser level or a long spirit level along the cabinet tops. When the bubble centers, the row is horizontal; if it’s off‑center, note the low spots. Insert shims where the floor is lower, adjusting shim placement until the level reads even at every point. Re‑check the level after each shim adjustment, confirming front and back levelers meet the laser line simultaneously. Finally, verify door and drawer operation before moving on. The wall hang phenomenon causes the rear of a cabinet to overshoot its intended mark when the front is lifted. Use a laser level to quickly identify uneven sections across multiple cabinets. Proper anti‑tip kits can further stabilize the row against tipping forces. Consider the cabinet’s material thickness to ensure it can support the added shim adjustments without warping.

Multi-Size Options Wobble Wedge | Experience the convenience of choosing from a range of sizes to fix and level tilting or wobbly furnitures. Our high-quality rubber furniture levelers come in various dimensions, provides an ultimate grip and prevents scratches ensuring a perfect fit for any application

INVISIBLE PROTECTION & VERSATILITY | Transparent wedges blend discreetly while guarding wood, tile, and ceramic floors against scratches. Absorb pipe vibrations and silence rattles – ideal for plumbing fixes and tilting toilets.

Perfect for any toolbox - 3 Sizes to meet all of your individual needs. Easy carry storage tote bag & 2 High Quality Pry Tools included! Great for multiple jobs and applications such as, Precise Alignment and Leveling. Air lift non-marking shim for window, door, cabinet installations, appliances, HVAC, plumbing.
Secure Levelled Cabinets to Wall Studs
Ever wondered how to keep your leveled cabinets firmly attached to the wall? First, use a stud finder to locate studs above and below each cabinet, then mark a level line across the bottom. Confirm stud depth before you drill. Mount wall‑anchoring brackets directly into the studs, keeping them level and aligned. If you prefer a temporary ledger, drill 2 ½‑inch washer‑head screws through the drywall into the studs; this gives you a solid guide while you hang the cabinet. Drive screws through the cabinet back holes into the studs, using countersunk pilot holes for a clean fit. Anchor at the top, bottom, and multiple back points, spacing screws per the manufacturer’s instructions. If studs are spaced far apart, add a ¾‑inch plywood backer or a 2×4 block to guarantee continuous support. This method guarantees sturdy wall‑anchoring and prevents reliance on drywall alone. Wall blocking provides a reliable wood surface for cabinet back‑screws. Properly bolting cabinets to the floor also helps meet building code requirements. Using a high‑quality lock on the cabinet door adds an extra layer of security against unauthorized access.

Accurate and Rapid: The wall stud finder adopts an intelligent micro-sensor chip with the highest sensitivity which can accurately and quickly find edges and center of metal, studs, joists, pipes, and live AC wire behind walls, floors, and ceilings. Fast detection saves users time and effort, making task completion easier. It must be ultimate gifts for professionals, homeowner,s and DIY enthusiasts

Center-find technology to easily find the center of the stud
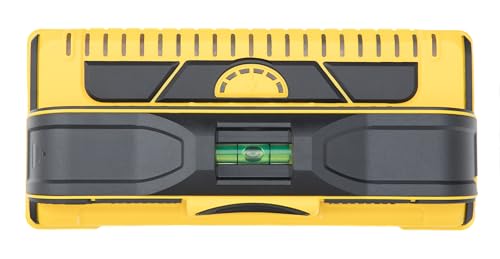
Higher accuracy, better technology: with 13 patented sensors, the M210 detects studs more accurately

