Clear a 3‑foot area, wear gloves, goggles and a dust mask, then sweep the floor. Mark the anchor spots, use a rotary hammer with a carbide bit to drill holes ½‑inch deeper than the wedge‑anchor length, and vacuum out dust. Insert the anchors, torque them to spec, and shim the toe‑kick ladder while applying a thin bead of adhesive for a level base. Fasten the cabinet with 4‑inch screws, check plumb and swing clearance, and you’ll uncover the next steps for load‑capacity verification and code compliance.
Prepare the Workspace and Gather Tools for Anchoring Cabinets
How do you set the stage for a secure cabinet installation? First, clear the area around the cabinet to create a 3‑foot clearance radius. Sweep the concrete floor, vacuum dust, and wipe the surface and cabinet base with a damp cloth and degreaser. Dry everything completely, then inspect for cracks or uneven spots that need repair. For workspace safety, wear gloves, goggles, and a dust mask. Next, run a Tool checklist: hammer drill with carbide bits, vacuum and wire brush, wrench or socket set, construction adhesive, level, tape measure, and safety gear. Verify each item is functional before you begin. This preparation eliminates hazards and guarantees a smooth, accurate anchoring process. Use a rotary hammer drill with the hammer‑drill setting to ensure proper hole depth and prevent anchor drop‑through. Additionally, confirm that the wall type can support the load by checking for stud placement before drilling. Proper anchoring also helps meet building code requirements for stability. Selecting a cabinet with a high load capacity ensures it will safely hold heavy items without risk of collapse.

PROFESSIONAL CARBIDE DRILL BIT SET:This masonry drill bit set includes 12PCS carbide drill bit, suitable for cement, brick, ceramic, tile, wood, plastic, marble, etc
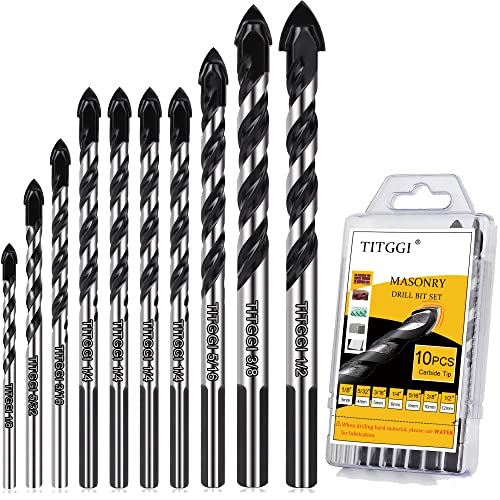
HIGH QUALITY DRILL BIT SET; TITGGI Masonry drill bit set, industrial strength carbide drill bit tip, excellent abrasion resistance, make the drilling much more easier. this cement drill bits can easily penetrate various material (glass, ceramic, cement, wood, brick, travertine, hard plastic, etc.)

2 cutter carbide tip of masonry drill bit set maximizes carbide surface contact for longer bit life.
Mark and Measure Anchor Spots on the Concrete Floor
Before you start drilling, straighten each anchor bolt with a nylon‑faced hammer and a nut on the threads, then plumb it to the floor to avoid misalignment and edge breakout. Next, position the cabinet or sill plate directly over the bolts, aligning the end flush with the concrete pad edge and leaving a 7/16‑inch overhang. Tap the plate to imprint the exact bolt locations, flip it, and verify the marks line up perfectly. Using a combination square, set the distance from the concrete edge to the outer bolt edge, then transfer that measurement onto the sill plate. Scribe side lines on each bolt, locate the center line between them, and extend it across the plate. Finally, spray or pencil the intersections for clear bolt alignment and bolt threading reference. Use a slightly larger drill bit to accommodate tolerance and ensure the bolt sits flush after drilling. Properly anchoring a cabinet to the floor prevents lateral movement that could compromise stability. Anchoring to code ensures the installation meets safety standards. Adding a proper weight distribution plan during installation further reduces the risk of tip‑over.
Drill Precise Anchor Holes for Concrete Cabinet Anchors
Where do you start? First, confirm drill bit selection. Match the bit diameter exactly to the wedge‑anchor size—use a ½‑inch carbide‑tipped masonry bit for a ½‑inch anchor, or a 5/32‑inch bit for a 3/16‑inch screw. Choose an SDS‑plus 2‑cutter bit for concrete, and keep spares handy because masonry bits wear fast.
Set up a hammer drill, start at low speed, and hold the bit perpendicular to the marked spot. Perform hole depth calculations: drill ½‑inch deeper than the anchor length, and guarantee the total depth exceeds the embedment depth by at least one anchor diameter (minimum 2.5‑inch embedment). Keep the hole at least two anchor dimensions away from the slab bottom. While drilling, use a dry vac to clear dust, then wipe the cavity before inserting the anchor. Verify the hole is snug, then proceed to the next step. SDS drill provides roughly 50 % faster drilling than a standard Combi drill. Remember to check moisture levels before drilling to prevent future corrosion. Proper floor stability is essential to maintain the integrity of the anchoring system. Stud wall alignment ensures the cabinet is securely fastened to the structural framing.
Install the Toe‑Kick Ladder With Adhesive and Shims for a Stable Anchor Base
If you’ve already drilled the anchor holes, the next step is to install the toe‑kick ladder using adhesive and shims to create a level, stable base. First, remove the protective film from the stainless‑steel toe kick and dry‑fit it against the cabinet to confirm alignment. Choose your adhesive selection—liquid PL, silicone, or 3M VHB tape—based on the substrate and moisture conditions. Apply a thin, even bead of adhesive to the back, then place tapered wood shims for shims optimization, adjusting until the height is within 1/32 inch of the target. Press the ladder firmly, verify level with a spirit level, and secure edges with painter’s tape. Allow the adhesive curing period (24 hours) before handling further. Ensure the toe‑kick is properly secured to the concrete slab with ¼‑in. Tapcon screws before adding shims. Even slight floor unevenness can be compensated by adding additional shims under the cabinet’s base corners. Proper anchoring also helps meet building code requirements for workplace safety. Uneven floors can cause misalignment and stress on cabinet joints.

MATERIAL: The toe kick cover is made of stainless steel in brushed nickel finish, which is rustproof, scratch and corrosion resistant, long lasting and easy to clean

Material: The toe kick cover is made of stainless steel in brushed black finish, which is rustproof, scratch and corrosion resistant, long lasting and easy to clean

MATERIAL: The toe kick cover is made of stainless steel in brushed nickel finish, which is rustproof, scratch and corrosion resistant, long lasting and easy to clean
Fasten and Anchor the Cabinet to the Floor and Neighboring Units
Once you’ve set the toe‑kick ladder and confirmed the floor is clean and level, you’ll anchor the cabinet securely to the floor and to any neighboring units. First, verify material compatibility: use concrete anchors on concrete, wood screws on wood, and self‑tapping screws on metal. Drill pilot holes just under the screw diameter, then attach the L‑track or 2×4 blocking with construction adhesive and tapcons for solid load distribution. Slip the cabinet over the frame, shim as needed, and fasten with 4‑inch screws through the end panels. For neighbor alignment, clamp adjacent cabinets flush, drill pilot holes through both face frames, and secure with matching screws. Tighten all connections, test for wobble, and adjust shims to maintain plumb and anchoring safety. Check stud locations before beginning to ensure the wall attachment points are properly aligned. Proper sealing of the surrounding garage can also help prevent moisture damage to the cabinet’s fasteners and vapor‑barrier integrity. Consider the traffic flow when deciding the swing direction of the cabinet doors to maximize usable space. Ensure the cabinet’s load‑capacity does not exceed the floor’s structural rating to avoid sagging.

Compatible with: The (5"L X 5"W X 0.8"H) shed concrete anchor kit for most Arrow Shed storage building, fits for square corner sheds.

New Upgrade: The side panel of this garage storage cabinet has holes and push handles, which can increase storage capacity, make it more square and equipped with wheels, allowing you to transport it smoothly and conveniently in the work space.what's more,It has two locks,more safer.

【450LBS ANTI TIP FURNITURE ANCHORS】 Reinforced steel baby proofing anchors secure dressers, cabinets, and bookcases up to 450lbs – prevents tipping when children climb or pets jump. Essential anti tip furniture anchors for nursery and living room safety

