First, gather satin‑finish cabinet paint, primer, sandpaper (120‑600 grit), TSP cleaner, brushes, a mini roller, drop cloths, and safety gear. Remove doors, drawers, and all hardware, labeling each piece and storing screws in zip‑lock bags. Set up a ventilated, dust‑free tent with fans and a drop cloth, then wipe every surface with TSP, rinse, and dry. Sand all areas to the grain, vacuum dust, and apply a thin primer coat, letting it dry at least an hour. Roll paint on flat panels and brush edges, keeping coats thin; sand lightly with 220‑grit after each coat dries, then add a second thin coat. Wait 1½ weeks for full cure before re‑installing hardware, and you’ll uncover more detailed tips ahead.
Gather Materials for Cabinet Paint
Before you start, gather every essential item so the project runs smoothly. Lay out high‑quality cabinet paint, preferably a satin finish, and a compatible primer; keep a backup shellac‑based primer for tricky surfaces. Pack sandpaper (120‑600 grit), sanding sponges, and tack cloth to prep each panel. Include TSP solution or degreaser, Scotch‑Bright pads, wood filler, putty knife, caulk, and a caulk gun for repairs. Ready your angled brush, foam or velour roller, and a stir stick; a paint tray and drop cloths protect the floor. Keep painter’s tape, zip‑lock bags for hardware, and cardboard barriers for spray work. Guarantee proper ventilation safety by opening windows, using fans, and wearing a respirator if needed. Verify color matching before mixing paint. The cabinet’s heavy grime buildup required a thorough scrub before priming. A well‑ventilated space helps prevent paint fumes from lingering. Apply a rust‑inhibiting primer to extend the life of the finish.

Ready to use, pre-mixed door and trim paint offers a fresh new look on interior or exterior metal, wood and fiberglass

Works on virtually any surface including wood, plastic, metal, fiberglass, concrete, wicker, vinyl and more

Use for a variety of indoor and outdoor project surfaces including wood, metal, plaster, masonry or unglazed ceramic
Remove Doors, Drawers, and Hardware Safely
When you start removing cabinet doors, drawers, and hardware, support each piece before you unscrew or pry anything to keep it from dropping. First, locate the framing screws; use a Phillips head screwdriver or a high‑torque drill with ergonomic grip to extract them while holding the door steady. If brackets or clips hold the door, gently pry them with a flat‑head screwdriver or pry tool, moving slowly to protect the surface. For KraftMaid doors, press the clip‑release lever and pull the door forward—no tools needed. To remove drawers, pull them out fully, find the two release tabs, and lift the drawer toward you. Finally, unscrew face‑mounted hardware with a Phillips driver, keeping safety fixtures in mind and maintaining proper tool ergonomics throughout. The Shor mount system allows tool‑free door removal and attachment. If the hinge screws keep stripping, consider using a wooden dowel to fill the stripped hole before re‑inserting the screw. Follow the guide’s parallel drilling technique to ensure both holes line up perfectly.
Set Up a Dust‑Free Painting Station
If you want a dust‑free painting station, start by choosing a well‑ventilated space away from open windows and high‑traffic zones, then set up an exhaust fan at the top to create positive pressure and push air downward, ensuring that dust can’t drift in while you work. Lay a tarpaulin or plastic sheet across the floor, extending beyond the work area, and tape the edges to seal gaps. Hang a second, lower fan to circulate air inside the tent‑like enclosure, completing the ventilation setup. Position the exhaust to expel contaminants outward, not back into the room. Keep brushes, paints, and cleaners in labeled bins or shelves to avoid scattering. Run the fans during and after each coat, then wipe down surfaces with a damp cloth before the next session. Use a collapsible spray booth to further contain overspray and dust. Consider the load capacity of the cabinet material when selecting a sturdy work surface for heavier paint containers. Regularly check for loose hinges to prevent damage during the painting process. Adding a pre‑paint cleaning step helps remove oils and residues that could affect adhesion.

【Spray Booths】Dikutar spray paint tent offers a safety and hygiene space for users to refine furniture and crafts with a paint sprayer, airbrush or aerosol cans. Keeps dust and dirt from drying paint. Get you rid of the trouble of cleaning up the spills when you finish jobs.

Pop Up Design, No Setup Needed: This paint booth pops open automatically right out of the storage bag—no time-consuming assembly. As a compact portable paint booth, it’s ready to use in seconds, and when you’re done, folding this spray paint tent back into the bag takes just minutes, saving you hassle.

DITCH THE CARDBOARD BOX: This paint booth is great for spraying small to medium sized projects with spray cans or paint sprayers like the Finish Max or Super Finish Max. COLORS MAY VARY.
Clean Surfaces Before Cabinet Paint
Your dust‑free station is set, so now focus on stripping the cabinets of any grease, dirt, or residue. Choose a dust choice that won’t scratch the finish—microfiber or tack cloth works best. Start with a trisodium phosphate (TSP) solution: mix according to label, apply with a sponge, let it sit a minute, then rinse thoroughly to neutralize pH and guarantee paint adhesion. If you prefer a greener option, use a biodegradable TSP substitute. For stubborn spots, spray a kitchen‑safe degreaser like Krud Kutter, scrub with an elbow‑grease‑powered sponge, and wipe with a damp rag. Follow every cleaning step with a final wipe‑down using a clean, dry microfiber cloth to guarantee the surface is completely free of dust and grease before priming. Vacuum the cabinet interiors with a wet‑dry vacuum to remove hidden debris before applying any cleaning solution. Using a low‑VOC paint can further reduce harmful emissions during the project. Consider the cabinet’s drawer depth when planning your paint layout to ensure all hardware remains accessible after the finish dries.
Sand Cabinets for Better Paint Adhesion
Start by removing doors, drawers, and hardware, then label each piece so you can reassemble later. First, wipe any grease or grime; a clean surface is essential for effective sand prep. Use a hand‑held 220‑grit sanding sponge to scuff the factory finish, moving parallel to the wood grain with light pressure. For flat panels, switch to an orbital sander set to 150‑180 grit, then finish with 220 grit for optimal adhesion. After each pass, vacuum or wipe away dust to maintain dust control and prevent debris from embedding in the next layer. Work systematically, small sections at a time, and keep the sanding area well‑ventilated. This progressive sanding creates a uniform, slightly rough surface that bonds primer and paint securely. Use a 150‑grit sandpaper on the palm sander for the cabinet boxes to remove the shine without gouging the surface. Understanding the cabinet’s load capacity helps prevent over‑loading during the painting process.
Prime Cabinets Before Painting
Before you apply paint, you must prime the cabinets to guarantee the finish adheres and lasts. Start by removing doors, drawer fronts, and hardware. Clean every surface with Krud Kutter or TSP, wipe with a damp sponge, then let it dry completely. Lightly sand with 100‑150 grit, wipe dust with a tack cloth, and patch any holes. Choose a primer that matches your material: BIN Shellac for glue‑like adhesion, KILZ 3 PREMIUM for mildew resistance, Fresh Start High‑Hiding for stain coverage, or Zinsser B‑I‑N for tough laminates. Apply a uniform coat using a brush in corners and a foam roller on flat areas, working inside out. Allow at least a one‑hour drying time before handling. One coat usually suffices; add a second coat only on raw MDF. Use a high‑bond primer for extra durability on greasy surfaces. For high‑traffic environments, consider a finish like powder coating for superior scratch and moisture resistance. Selecting a reputable maker such as Steelcase can ensure you get high‑quality cabinets that hold up to the priming process.

Seals & Stabilizes: Designed to seal and stabilize damaged surfaces, this high adhesion primer forms a durable membrane that prevents peeling and flaking, ensuring a smooth foundation for new paint or wall coverings

Primer is perfect for small shops and DIY car enthusiasts

European style multi-function 3 in 1 direct-to-metal primer
Paint Cabinets With Brush & Roller
When you move on to painting, grab a 3/8‑inch microfiber mini roller for the flat panels and an angled brush for the edges and corners. First, load the roller evenly from the cut pail, tapping off excess to keep roller textures smooth. Start in the middle of each door, push paint toward the edges, and avoid pooling. Use the angled brush to cut in around hinges, corners, and contoured areas, then feather the brush edges into the rolled zones for a seamless blend. Maintain consistent pressure to preserve color matching across panels. Work one door at a time, keeping the brush and roller clean between surfaces. This hybrid technique delivers a professional, uniform finish without a sprayer. Degreasing the surfaces beforehand ensures the paint adheres properly. Installing tamper‑proof screws on the cabinet hinges further protects the finished work from accidental damage. Storage capacity is a key factor when selecting a cabinet, as it determines how much you can organize within the space. Properly anchor the cabinet to the floor prevents tipping and maintains safety during use.

PAINT ROLLER SET: Super-Micro roller frame, 2 pcs microfiber mini roller covers with 3/8" nap, the painting tool works great on smooth to semi smooth surfaces like drywall.

High quality material, Shedless, Lint Free

Complete Painting Kit: The YiBaiBrush Paint Roller Covers set includes 24 premium 4 inch small microfiber paint roller covers, a 4-inch paint roller frame, and a high-quality 1 inch paint brush for painting supplies. This comprehensive DIY kit is perfect for both touch-ups and large projects in your home interior
Lightly Sand Between Paint Coats
If you wait until each coat is fully dry, a quick sand with fine‑grit paper will smooth out dust nibs and improve adhesion, giving the cabinet a glass‑like finish. Choose 220‑grit for latex or acrylic, 320‑grit for oil‑based or high‑gloss. Wrap the sandpaper around a block, apply light, even pressure, and move in circular or grain‑following strokes. Keep the motion gentle; you’re scuffing, not stripping. Periodically feel the surface with your hand to confirm smoothness. Once the whole area is lightly sanded, perform dust removal: wipe with a damp tack cloth or vacuum with a soft brush attachment, then give a final dry‑cloth wipe. Guarantee no residue remains before the next coat. For best results, consider using a heat gun to remove stubborn old finish before sanding. Always double‑check that the workspace is well‑ventilated, especially when using solvent‑based paints.

Assortment Pack: This sanding sponge set includes 24 pieces with grits 80/120/180/240/320/400/500-600/800-1000/1200-1500/2000/2500/3000,each of 2, covering coarse material removal (80 grit) to ultra-fine polishing (3000 grit). Perfect for wood furniture refinishing, auto bodywork, and delicate surface prep—all in one convenient kit, each measuring 3.93 x 2.75 x 0.19 inches

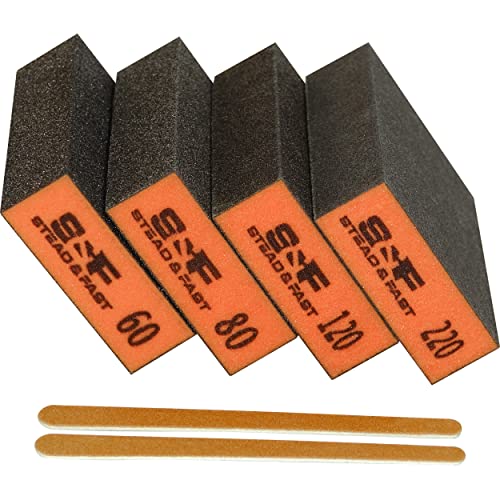
【ASSORTED GRIT SANDING BLOCKS】 8 sand blocks, 4 sizes from coarse to ultra-fine sand, 60/80/120/220 grit, 2 blocks for each grit. There are four different colors, grey (corresponding to grit size - 220), blue (120), green (80), and orange (60), with different numbers of grains for different colors.
Premium european high density foam - robust and durable foam sanding blocks for hand sanding
Apply Second Cabinet Paint Coat
Ready to give your cabinet a flawless finish? First, verify the initial coat is completely dry; any tackiness will ruin the paint finish. Set up ventilation control by opening windows or using a fan to keep air moving and dust out. Grab a high‑quality brush for edges and a foam roller for flat panels. Load the brush lightly, then stroke evenly along frames, feathering into wet paint. Roll larger areas in one direction, applying a thin, uniform layer. Keep the coat light to avoid runs and brush marks. Let the second coat dry for at least 12 hours, or overnight, before touching. This step finalizes the smooth, durable surface you need for a professional look. Allow primer to sit overnight between coats. Dust removal helps prevent particles from embedding in the fresh paint. Ensure the workspace is well‑ventilated to reduce fumes and maintain a consistent temperature for optimal drying. Consider the fire resistance of the cabinet material when choosing a paint, to ensure safety and longevity.
Reinstall Hardware After Cabinet Paint Curing
Even after the paint feels dry, you must wait at least 1.5 weeks before reinstalling doors and hardware, because the cure process continues beneath the surface. Follow the cure timing strictly; premature reinstallation risks smudges and compromised finish. First, clean all hardware. Soak knobs, pulls, and hinges in warm soapy water for 10–20 minutes, brush crevices, then dry with a lint‑free cloth. Label each piece with painter’s tape to avoid mix‑ups. Next, test‑fit each component, holding it in place to verify straight, centered positioning. Use a template or jig for consistent spacing. When satisfied, insert screws and tighten gently—never overtighten—to protect the fresh paint. Open and close doors repeatedly to confirm smooth operation before moving on. Foam pads were used as protective sleeves for the doors and drawers during the installation.

