First, secure the cabinet on a stable surface and put on safety glasses and gloves. Remove the drawer, then locate and unscrew the two or three retaining screws with a Phillips screwdriver, using a magnetic tip if possible. Pull the lock housing outward while keeping the drawer open for clear sightlines. Insert the control key fully, align it to the prescribed position, and gently pull the core straight out without turning. After the core’s out, disengage any internal rods, then re‑assemble and test the drawer. Continue for detailed steps and troubleshooting tips.
Unlock Cabinet to Begin Removing Lock
If you own the cabinet and have misplaced the key, start by confirming your ownership and then gather the tools you’ll need—typically a screwdriver, a small hammer, and a set of pliers—so you can safely begin the opening process before attempting to remove the lock. Verify that the cabinet sits on a stable surface and that nothing inside could shift when you apply force; this is essential for cabinet safety. Next, explore key alternatives: a lock‑smith’s master key, a manufacturer‑issued replacement, or a professional service that can rekey the lock. Use a flat‑head screwdriver to pry the latch gently, keeping pressure even to avoid cracking the wood. If the latch yields, you’ll have a clear path to the lock’s retaining screws, setting the stage for safe removal. Older Hudson locks can often be bypassed with a simple flat pick, making the initial opening step easier. Consider the security level of your cabinet when choosing a replacement lock to ensure adequate protection. Parallel lock replacement can significantly reduce downtime and labor costs. Selecting the proper lock type ensures compatibility with the cabinet’s existing mounting holes.
Gather Tools and Protect the Cabinet for Lock Removal
Before you start removing the lock, gather all essential tools—control key, small pick, replacement core, lock code reader, and pliers—while donning work gloves, safety glasses, and a drop cloth to protect both the cabinet’s surface and your workspace. Choose each item deliberately; tool selection matters because a mismatched pick can slip, and the wrong pliers can damage the lock rod. Lay the drop cloth on a flat bench, then apply painter’s tape around the lock area for surface protection. Place foam padding inside adjacent drawers and a rubber mat under the cabinet to catch dropped parts. Secure neighboring drawers with masking tape, and cover exposed panels with plastic sheeting to keep dust out while you work. This preparation minimizes scratches, dents, and accidental engagement of the lock mechanism. The operating key will align wafers when inserted, ensuring smooth plug removal. Following the manufacturer’s lock disengagement procedure helps avoid internal damage. Parallel token output can significantly speed up the replacement process. Understanding the cam lock mechanism further aids in troubleshooting common lock issues.
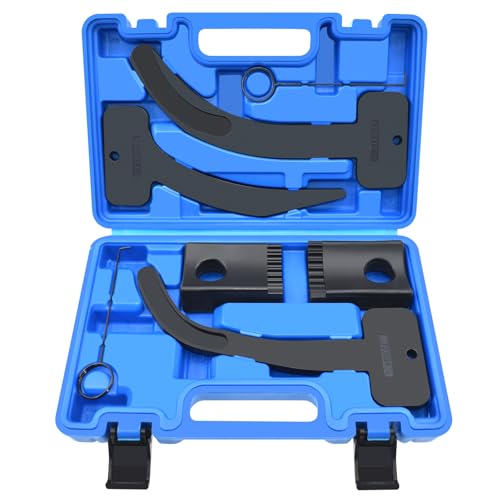
Our products are engineered with market-exclusive glass fiber-reinforced nylon composite, delivering superior durability that resists breakage. As the professional manufacturer of this innovative design in the market, we prioritize precision and longevity to meet demanding automotive repair needs.

Yuesstloo camshaft holding tool kit can help vehicle maintenance effectively and is easy to use, simplify your timing chain work. You can use it to accurately position and alignment for Ford 3.5L and 3.7L camshafts at the TDC to perform repairs during removal and installation of the timing chain.
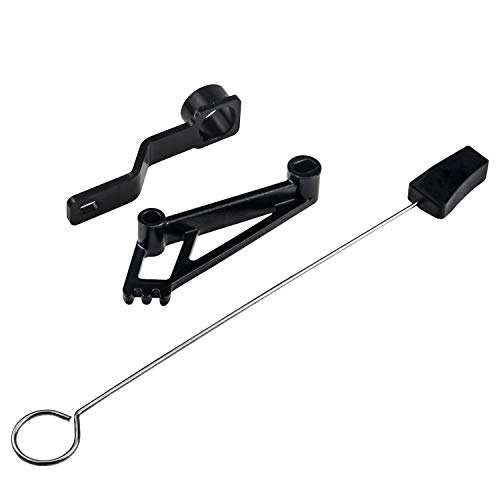
Fitment: Cam Tool Complete Combo Set Compatible for timing chain or cam phaser work for your Ford 4.6L/5.4L 3V V8 V10 Engines. Fits for Mustang, F-Series, Rotunda, Expedition, Lincoln Navigator, Explorer, Mark LT, Mountaineer, F-Series trucks and Tool set covers 1 cylinder head application.
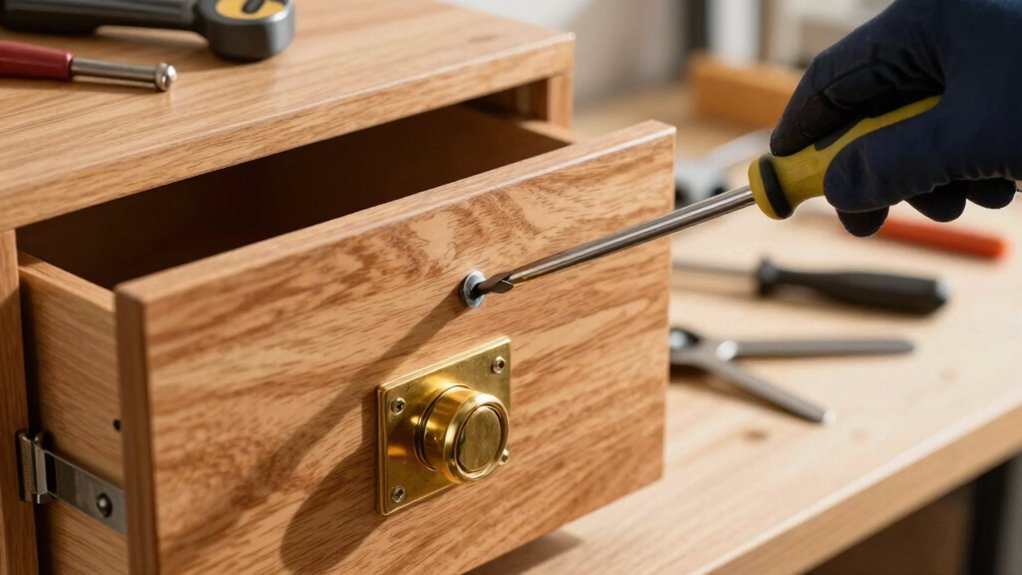
Remove the Lock Housing Using the Screw‑Based Method
Usually, you’ll start by locating the two or three screws that hold the lock housing to the cabinet frame. Use a screwdriver that matches the head type; a Phillips or flathead fits snugly and avoids stripping. Apply gentle screw torque counter‑clockwise; if a screw feels tight, spray a light lubricant first. A magnetic screwdriver provides magnetic retrieval, catching any falling screw and keeping it within reach. Once the screws loosen, pull the housing outward while the drawer stays open for clear sightlines. If a screw resists, re‑apply torque gradually—don’t rush. After the last screw releases, lift the housing cleanly, ensuring no clips or nuts remain attached. This method preserves the cabinet and prevents loss of hardware. The control key allows the core to be removed without unlocking the entire lock. Properly align the lock before removal ensures the cabinet’s structural integrity.

Starts and drives screws with one hand when working in hard-to-reach spaces

STRENGTH AND DURABILITY: Made of heat-treated alloy steel

The industry's finest screw-holding device, Available for either slotted or Philips screws
Pull Out the Lock Core With the Control Key
Slip the control key fully into the unlocked lock, then simply pull the core straight out—no turning needed—because the key’s unique groove depresses the retaining wafer and releases the core for quick removal. You’ve already removed the normal operating key and verified the cabinet is unlocked; now align the lock, if needed, to the one‑o’clock position for Steelcase models. Insert the control key completely; the key insertion depresses the last retaining pin, disengaging the unlocking mechanism. Grasp the core’s edge and execute a core pull, sliding it out in one smooth motion. Hold the core steady with a finger to avoid dropping it. Use only a genuine control key from a reputable supplier; forcing the core or using improvised tools can damage the housing. After removal, test the drawer to confirm the lock was fully disengaged. Core removal key is also known as the pull key. Selecting a lock with a high security rating ensures better protection against tampering. Consider durability when choosing a lock to ensure long‑term reliability. Understanding the security level of a cam lock helps match it to the value of the contents.
Compatible Manufacturers & Series: AKA: CMHON - Used for locks with HON 101E - 225E lock cores..The Control Key (also called a Pull Key, Change Key, or Core Removal Tool) is used only to remove and install lock cores — it doesn’t lock or unlock the door.

Control Key Function: This key does not lock or unlock your lock like a regular key

Compatible Manufacturers & Series:.The Control Key (also called a Pull Key, Change Key, or Core Removal Tool) is used only to remove and install lock cores — it doesn’t lock or unlock the door.
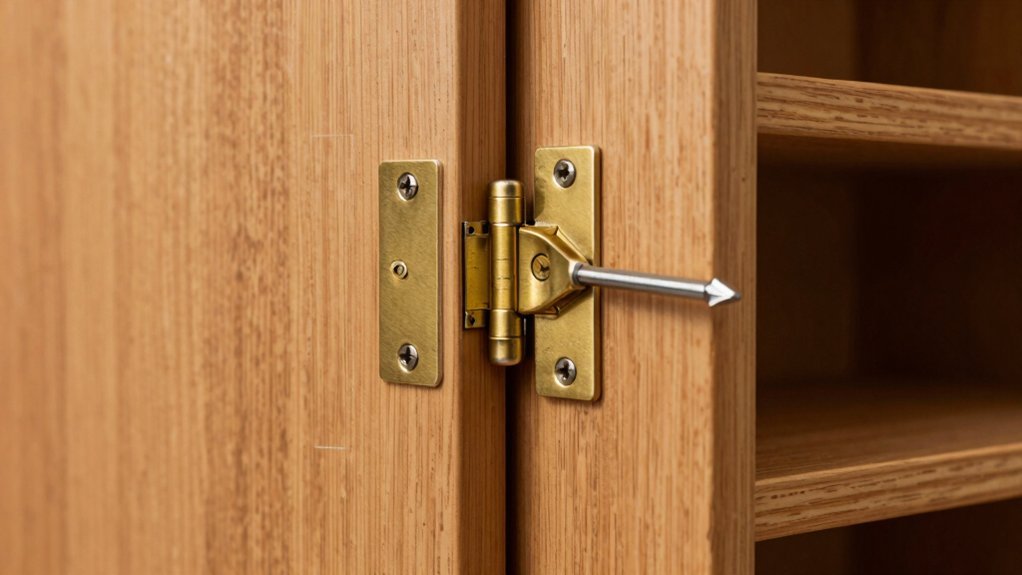
Detach Internal Rods Safely While Removing Lock
Pull the top drawers or shelves aside to expose the lock housing and the internal rods, then secure the cabinet on a flat surface. Turn the lock to the unfasten position to slacken tension, then gently lift the locking arm. Use a flat‑head screwdriver to separate each rod end from the lock core slots, supporting the rods to avoid bending. Perform a quick rod inspection for wear, rust, or bent ends; clean contact points if needed. Apply torque control when unscrewing any retaining screws, using the proper screwdriver to prevent over‑tightening. Tape rod ends temporarily to keep them from snagging, and verify each rod is fully disengaged before moving on. Ensure the lock is a push‑in style before beginning removal. Use a level to confirm the cabinet is properly aligned before reinstalling any components. Follow the step‑by‑step guide to ensure each hinge is correctly positioned and securely fastened. Consider the tamper‑resistant design of the cabinet when selecting a replacement lock.

2-PIECE SLOTTED DRIVER SET: Includes 3/16-Inch and 1/4-Inch Slotted Screw Holding Drivers

With dimensions of 3.94 × 3.15 × 0.71 inches, this wide flat flat head screwdriver is lightweight and easy to carry, blade tip width 10 mm thickness 2 mm, please check the size you need before purchasing

Dual material handle provides a more comfortable grip and higher performance
Re‑assemble Cabinet After Lock Removal and Test
After you’ve safely detached the internal rods, reinstall the lock cylinder by aligning it with the knock‑out hole, securing it with the appropriate C‑clip or screws, and holding it in place with your finger while you seat it fully. Then turn the control key right to lock the cylinder into its housing. Reattach the linkage piece, making sure it meshes with the cam for proper lock alignment. Slide the top drawer back into its tracks, confirming drawer synchronization with lower drawers. Tighten all screws, re‑install any removed panels, and verify that each drawer engages the locking mechanism. Insert the key, lock and open repeatedly, and watch for smooth operation. Finally, inspect for gaps, test simultaneous drawer lock, and repeat cycles to confirm reliable security. Brand’s pull key is required to turn the control key right and secure the cylinder. Using a paperclip can help manipulate a jammed lock without damaging the cabinet. Choosing a high‑security lock ensures resistance to picking and drilling, aligning with best practices for cabinet protection. When selecting a replacement, verify the lock’s bolt diameter matches the original to maintain proper alignment.

Replacement Kit: File cabinet locks replacement for toolbox. Includes 6 pieces of lock kit which includes nyloc nut, spare offset plate, stop washer, non-slip hex, lock plate, plate cover, lock body and keyed alike.

High Quality Material: This desk drawer lock is made of zinc alloy with screws M4 x 16mm. Soild Construction - Constructed of steel components. Our drawer locks are long-term use and strong

★DIMENSION DETAILS: Note--Measure your door's backset, cross bore and thickness to ensure you find the right fit. Pertinel 1-1/8" cam locks fit on door panels less than 7/8" (21mm) thickness, and the mounting hole diameter is 0.7’’(18mm). Each cam lock is equiped with 2 keys and 3 plates. Length of three plates (2 offsets and 1 hook) are 1.41"(36mm), 1.85”(47mm) and 1.85”(47mm) (See diagram for a more detailed picture). 2pcs keyed alike cam locks include 2 pcs of 1-1/8" locks, 6 locking plates and 4 keys.