Cut the plywood panels to the exact dimensions, then lay the back panel flat and attach the side panels with loose bolts, making sure the edges flush. Check squareness by measuring opposite diagonals; adjust with clamps or shims if needed. Secure the top panel by inserting threaded studs through the side holes, tightening nuts to torque specs, and set leveling feet. Install the bottom shelf on pins, then mount caster wheels, hiding bolt heads with caps. Follow these steps, and you’ll finish the cabinet in minutes, with more details ahead.
Tools & Materials Needed for Uline Cabinet
Gather your tools and materials before you start, then you’ll move through the assembly without hesitation. For a Uline storage cabinet, a standard claw hammer satisfies the hammer selection requirement; you’ll use it to tap back panels and secure shelves without marring the 16‑gauge steel. The screwdriver type you need is a flathead, which fits the pre‑drilled slots for loosening initial fittings and adjusting side‑panel bolts. Included hardware covers threaded studs, bolts, nuts, leveling feet, handles, and hinges, so you won’t need extra items. Optional accessories such as 4‑inch locking casters or dollies can be added later, but the core toolkit remains just the hammer, flathead screwdriver, and the supplied hardware. Follow the methodical steps, and the cabinet will lock together efficiently. Position the back panel with the bottom flanges facing up before beginning the assembly. Ensure the cabinet’s load capacity matches your storage needs to avoid over‑stress. Regularly dust and wipe the assembled cabinet with a mild cleaner to prevent surface wear and maintain its appearance. Properly anchoring the cabinet to a wall using stud detection can further enhance safety and stability.

NARROW CABINET TIP: Permits screwdriver blade access for recessed fasteners and hard-to-reach places
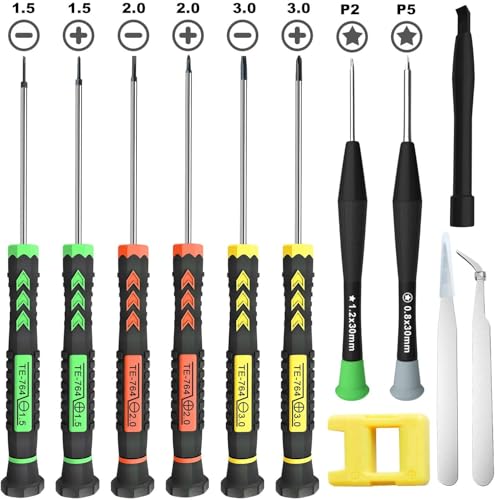
[Package Includes] – 1 x 3.0 Flathead Screwdriver, 1 x 2.0 Flathead Screwdriver, 1 x 1.5 Flathead Screwdriver, 1 x 3.0 Phillips Screwdriver, 1 x 2.0 Phillips Screwdriver, 1 x 1.5 Phillips Screwdriver, 1 x Pentalobe 2 Screwdriver, 1 x Pentalobe 5 Screwdriver, 1 x Helper Stick, 2 x Tweezers, 1 x Magnetizer & Demagnetizer Tool
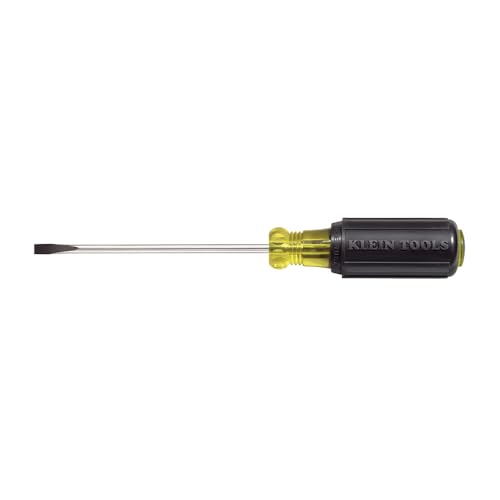
Narrow cabinet tip permits blade access where space is limited
Cut Plywood to Exact Cabinet Dimensions
How do you make guarantee each plywood piece matches the cabinet blueprint? Start by squaring one end of the sheet. Use a track saw or circular saw with a guide, press a large square against the edge, and draw a reference line. Cut all parts slightly oversized, then set your edge guide for final cuts, applying Kerf compensation to avoid short pieces. Measure corner‑to‑corner, mark the shorter dimension, and cut to the exact length. Switch to the freshly cut edge as a reference for rip widths, subtracting the kerf and accounting for the finishing edge. Follow the squared end for uniform dimensions, and keep a foam board under the sheet to reduce tearout. This methodical sequence guarantees every panel meets the calculated panel dimensions. Consistent width is achieved by resetting the rip guide to the exact final width and trimming each piece using the oversized edge as a reference. Properly aligning the cut line with the reference edge ensures repeatable accuracy across all panels. Movable furniture often serves both functional and aesthetic purposes in interior design. Load capacity should be verified before assembly to ensure the cabinet can safely support its intended contents.
Assemble Back and Side Panels First
Ready to start the frame? Lay the back panel on a protected, flat surface with the bottom flanges up. This guarantees panel leveling and prevents finish damage. Position the left side panel so its flange wraps the back panel’s edge, then insert the bolts but keep them loose for s validation. Check that the lances on both panels point upward; this orientation is vital for later shelf brackets. Attach the right side panel using the same method, mirroring the left side’s bolt placement. Verify that all three panels sit flush, confirming s validation before any tightening. Keep bolts loose until the top and bottom are added, preserving flexibility for final alignment adjustments. Ensure the cabinets are approximately 6 ft tall to fit the garage ceiling height. Flat‑pack packaging often includes all necessary hardware and a detailed instruction sheet to guide you through each step. Using a torque wrench helps achieve proper tightness without over‑tightening. Typical assembly time usually ranges from 30 minutes to two hours, depending on the cabinet’s complexity and the assembler’s experience.
Check Frame Squareness Before Adding Top
Before you bolt the top, make sure the frame is square; otherwise the whole cabinet will rack and the shelves won’t sit level. Grab a tape measure and take a diagonal measurement from one corner to the opposite corner, then repeat on the adjacent side. If the two readings match, the frame is square; any discrepancy means you need to adjust. Use clamps to pull the sides together, then re‑measure. If the frame twists, insert shims under the offending edges until the diagonals equalize. A framing square can double‑check gaps along adjacent sides. Once both diagonals read identically, lock the frame in place before proceeding to the next step. Proper squareness also enhances structural integrity of the cabinet. Ensuring levelness prevents wobble when the cabinet is loaded. Accurate interior dimension recording helps you plan shelf placement and maximize usable space. Tightening loose screws can prevent future misalignment.

MULTI-FUNCTIONAL FRAMING SQUARE: Double laser etched markings for enhanced visibility for quick measurements
Stair Gauge: This stair gauge is compatible with speed square, framing or carpentry square, revolutionizing the way you approach stair stringer marking and repetitive right-angle measurements

INCLUDES: (1) L-Shaped Rafter/Framing Square w/ Rafter Instructions
Install Top Panel and Secure All Fasteners
Once the frame is square, position the top panel so its outer flanges wrap snugly around the back and side panels, then drop the threaded studs through the side‑panel holes and line up the screw holes on the panel with the upper edges of the left and right side panels. Slide the bolt panel into place, ensuring fastener alignment before you begin tightening. Place nuts loosely on each stud and finger‑tighten them to hold the panel. Follow the torque sequence: start at the center, work outward, and finish with the outermost bolts. Use the supplied 3/8‑inch bolts and self‑tapping screws as required, inserting them through the top panel into the side‑panel connection parts. After the unit stands upright, give each fastener a final, even torque to lock the top panel securely. Ensure the support strips are oriented the same way before tightening. Parallel tasks can reduce overall assembly time by allowing you to pre‑drill holes in the side panels while the top panel is being positioned. Verify that the leveling feet are correctly adjusted to keep the cabinet stable on uneven floors. Proper surface preparation helps prevent paint chipping and ensures a smooth finish.
Add Bottom Shelf and Lock It in Place
If you’ve already squared the frame and secured the top panel, the next step is to install the bottom shelf and lock it in place. First, measure the interior width and depth, then cut the shelf 1 mm shorter for clearance. Mark the desired height from the bottom, ensuring the line is level across the front and back. Verify all dimensions twice before drilling. Using a drill, create pin holes at a consistent height—typically 6 in from the bottom—through the front and back supports. Insert the shelf pins, then slide the shelf onto them. Press the shelf firmly until it seats fully, then engage the lockin hardware to secure it. Double‑check that the shelf sits flush and the lock is tight before moving on. The Ryobi battery‑operated saw’s trigger safety feature helps prevent accidental cuts while trimming the shelf to size. Properly aligning the drawer slides ensures smooth operation and prevents future binding.
Fit Caster Wheels and Hide Screw Heads
After you’ve secured the bottom shelf, turn your attention to the casters: remove any existing leveling feet, then align the caster plates with the pre‑drilled holes on the cabinet’s underside, enlarging those holes with a 5/16‑inch drill bit if needed. Verify bolt size—usually 5/16 × 3/4—and insert rivet nuts where backside access is impossible. Thread the caster bolts through the plates, using a ratchet wrench to tighten each until you achieve perfect caster alignment. With the casters firmly attached, apply screw concealment by snapping matching cabinet plugs or caps over each bolt head. Finally, test the brakes, confirm the cabinet rolls evenly, and guarantee all fasteners are snug before moving the unit into service. The cabinets were purchased for under $5 each, making this upgrade extremely cost‑effective. Smooth‑rolling casters distribute weight evenly, reducing strain on the floor and improving maneuverability. Selecting high‑quality bumper pads can further protect the cabinet doors from impacts and reduce noise during movement. Properly tightening each bolt ensures stability and prevents wobble during use.

QUIET MOVEMENT:Carbon steel frame, 1.5 inch polyurethane(PU)wheel,360 degrees swivel caster wheels, double ball bearing wheels, easy to push, do not hurt the ground, no scratch the hard wood floor. each caster can carry 110Lbs, These casters are suitable for different occasions

STANDARD AMERICAN SIZE 5/16" -18UNC x 1": Please measure the stem size of your old thread dual locking caster wheel with Brakes before purchasing. Our cart wheels screw size is 5/16" -18x1" (Screw Diameter 5/16", Screw Length 1"). The castor wheels are quickly attached to medium and large equipment like workbench, trolley, carts.
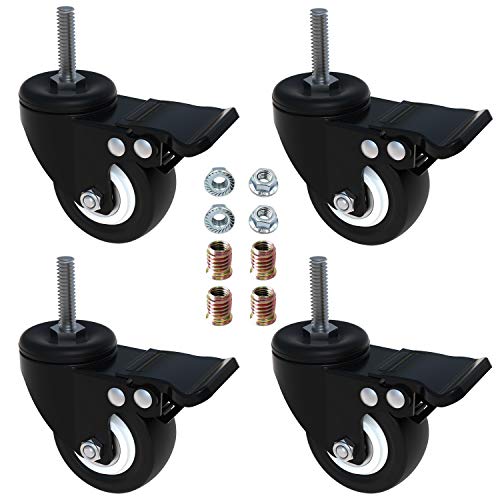
QUIET MOVEMENT:Carbon steel frame, 2 inch wheel, 360 degrees swivel caster wheels, double ball bearing wheels, easy to push, do not hurt the ground, no scratch the hard wood floor. each caster can carry 110Lbs, These casters are suitable for different occasions
Troubleshooting Common Uline Cabinet Issues
When a Uline cabinet misbehaves, start by confirming its lock status and level; a mis‑locked or unlevel unit often triggers drawer sticking, electronic lock failures, and LED warnings. First, verify the unit is released; then push each drawer fully in and insert a thin rigid tool between the drawer front and side to hear the lock bar drop. Next, perform LED diagnostics: a flashing yellow LED five times after operation signals low battery—replace it, then re‑enter the master code and toggle the knob to release and lock. Observe green for successful operation and red for errors. Guarantee the cabinet sits level; an uneven base frequently causes the same symptoms. Check for obstructions before attempting any repair. If problems persist, contact Uline support at 1‑800‑295‑5510. Durable lock mechanisms are essential for long‑term security.

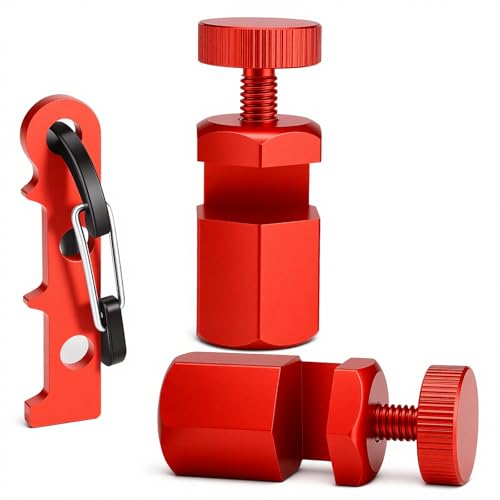
SECURE FILE CABINET DOORS AND DRAWERS: This drawer and cabinet lock makes it easy to secure your drawers, important files, and small items; the drawer lock is keyed differently with a Yale Y-11 keyway
SECURE CABINET DOORS AND DRAWERS – This U 9945 lock can be used to secure cabinet doors, drawers and much morewith the securing hex nut.

Products Secure Storage: This lock provide reliable security for cabinets, toolboxes, desk drawers, trailers, RVs, and mailboxes.

