Fasten each shelf directly to the back panel with screws, then slip a thin plywood or metal channel over the back edge for hidden stiffness. If the span exceeds 24 in or you expect over 200 lb, drill a pilot hole at the midpoint, insert a no‑drill anchor, and secure a solid wood or metal center support. Add snap‑fit edge‑lip strips or shims to keep the face flush, and use heavy‑duty brackets matched to your wall type. This process eliminates sag, maximizes load capacity, and keeps material waste low—continue for deeper details.
Select the Best Shelf‑Reinforcement Technique
Most effective reinforcement starts with screwing each shelf directly into the back panel; this simple step locks the shelf’s length, eliminates bowing, and adds the greatest rigidity with minimal material. Next, you evaluate material selection: choose a thin backer board or a metal channel tapped over the back edge, both of which provide hidden stiffness without extra thickness. Conduct a cost analysis to compare plywood versus metal; plywood is cheaper but may need additional glue ledger strips, while metal channels cost more yet reduce labor. After securing the back panel, install a center support if the span exceeds 24 in, using a solid wood or metal divider that balances load. This process‑driven sequence maximizes strength, minimizes waste, and keeps expenses transparent. Adding a central leg to each shelf further distributes weight and prevents flex. Understanding bracket spacing is essential for maintaining uniform load distribution across longer spans. Choosing the appropriate grade of cabinet ensures the reinforcement aligns with the intended load capacity and durability requirements. Consider the material durability of the backer board to ensure long‑term stability.

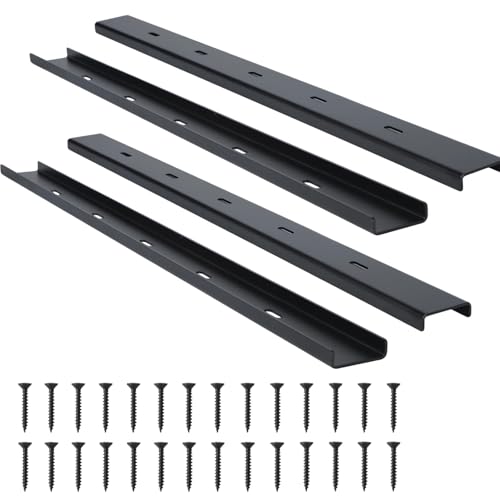
Convenient Package: there comes with 2 pieces of C channel steel support, enough quantity allows you to tackle bigger projects or have spare pieces for future use; It's recommended for 1-1.5 inch thick wood
{Perfect Size}: 4 Pack. Cute Size: 36 x 2 x 1/2 inch (L x W x D). The right size, combined with a perfect multi-quantity kit, makes it ideal for DIY projects of all kinds.

Powder Coated for indoor and outdoor use and will not rust.
Add Edge‑Lip Strips for Thickness and Rigidity
How do you boost shelf thickness and rigidity without adding bulk? Choose a material that fits the load and environment, then follow a streamlined installation method. For upper cabinets, snap‑fit polypropylene or rigid vinyl strips fit 1.25‑inch channels; they snap in place, eliminating fasteners. Lower cabinets demand wider hardwood edging—1.5 inches minimum—so pre‑drilled holes with supplied fasteners secure the strip quickly. If you need a permanent bond, apply adhesive along the front edge of solid wood banding, then clamp until cure. For speed, use packing tape to wrap edges tightly, pulling for a snug joint. Each option balances material choice and installation method, delivering added thickness and rigidity while keeping the shelf profile slim. Use a glue‑line rip blade for smooth, burn‑free cuts on maple and cherry when preparing the hardwood edging. Selecting the right load capacity ensures the reinforced shelf can support heavy items without sagging. Durable material selection also impacts long‑term performance and resistance to wear. Consider the security rating of cabinet locks when choosing reinforcement methods to maintain overall cabinet integrity.
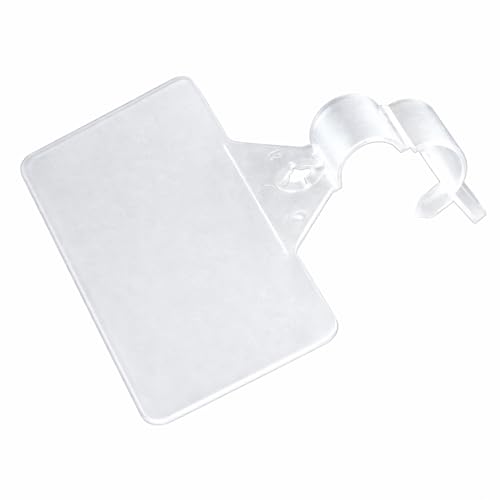
Convenient Design - Our plastic secure lock label holders are designed to fit well on wire style shelves and will work with any shelf design that has a bar up to 3/8" in diameter to hold our label holders. They are extremely durable as they're made of strong plastic, making them reusable and long lasting.

Snap Button Tape: Our Trim snap button tape comes tightly and neatly packaged for your convenience. From here, you can freely and easily cut whatever length you want for your projects. Sturdy and long-lasting, you won’t find better quality fastening closure trims at this affordable price anywhere else
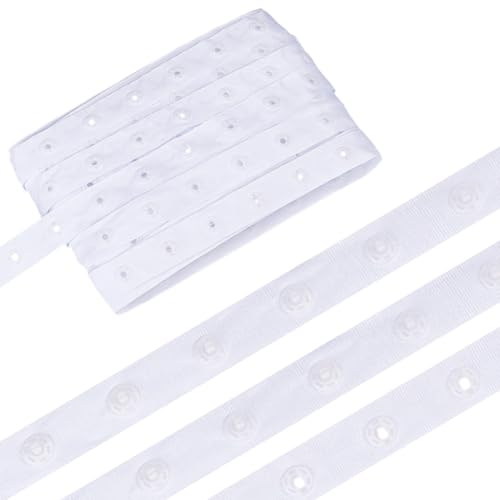
Classic White Color: These snap buttons come in a clean, bright white color, making them perfect for light-colored fabrics, DIY projects, or any sewing needs where a neutral tone is desired. They blend seamlessly with white clothing, bags, or crafts.
Build a Shelf‑Reinforcement Torsion Box
When you need a lightweight yet ultra‑stiff shelf, build a torsion box: two ¼‑inch plywood skins sandwich a grid of ribs that lock the layers apart, creating a wing‑like structure that resists sag and warping over long spans. Cut the plywood into 1‑inch strips for ribs, then rip the outer frame to match the shelf dimensions. Use a stop block to cross‑cut all pieces uniformly, saving time on material handling. Apply Tightbond III liberally to each rib edge, then clamp the first skin with finish nails and brads while the glue sets. Flip the panel, repeat the adhesive step for the second skin, and secure the assembly with screws through the stretcher for final hardware selection. The result is a rigid, lightweight shelf ready for heavy loads. The shelf’s thickness is 1 ¾ inches and it spans nearly six feet, providing minimal deflection under heavy loads. Small storage cabinets often benefit from such reinforcement to maximize usable space while maintaining a sleek appearance. Selecting a material with high fire resistance can further enhance safety in both residential and commercial settings.
Install a Center Support for Long Spans
Install a center support by first locating the exact mid‑point of the span, then drilling a pilot hole through the cabinet side and inserting a no‑drill anchor before securing the support with a screw. Measure the span; if it exceeds 29 inches or will bear over 200 lb, a center brace is mandatory. Use a wall anchor rated for the load, align the brace flush with the shelf’s dado, and press it into the pilot hole. Tighten the screw until the brace bites firmly; avoid overtightening, which can split the veneer plywood. Verify alignment with a level, then test by applying incremental weight. This process eliminates sag, distributes stress evenly, and maximizes capacity without custom fabrication. Pisters can be mounted using drywall anchors for added stability. Consider the load‑capacity guideline when planning shelf reinforcement. Selecting a lock with a high key control rating helps prevent unauthorized duplication. If the floor is uneven, use a spirit level to detect high and low spots before installing the support.

These pegs are used by many furniture manufacturers to support cabinet shelves

【Pack of 20】you will get shelf support pegs with a specification of 5 millimeters inches; The quantity is sufficient to meet your daily use and replacement needs

[Package] 50 x shelf support pegs, 1 x plastic box.
Upgrade Brackets and Screws for a Solid Wall Mount
After securing the center support, the next step is to upgrade the brackets and screws for a solid‑wall mount. Choose heavy‑duty brackets that match the template size and include diagonal supports; they boost load distribution and reduce stress on any single point. Verify material compatibility between the bracket and wall (brick, block, or timber) before drilling. Use 10 mm plastic plugs for masonry, tap them to seat fully, then insert chunky fixing screws with the proper head design. Align each bracket with a level, center the screws in the slotted holes, and tighten with an impact driver and socket adapter for speed. If you hit a stud, switch to long wood screws for extra holding power. This systematic approach guarantees secure, even load distribution across the wall. Use more than two brackets for particularly heavy items. Properly positioning the hinge plates on the cabinet door ensures smooth operation and consistent alignment after installation. When installing drawer slides, double‑check that the slide’s over‑travel capacity matches the drawer depth to prevent binding. Secure anchoring is essential to prevent cabinet tip‑over during heavy use.

【Standard 90° bending】In order to ensure that each shelf bracket can be at 90° to the maximum extent possible, we add a rigorous picking process before the shelf brackets are packaged. The standardized 90-degree design is so important that it’ s the objective factor in ensuring that items remain level and do not tip over after being placed on the board(board is not included).
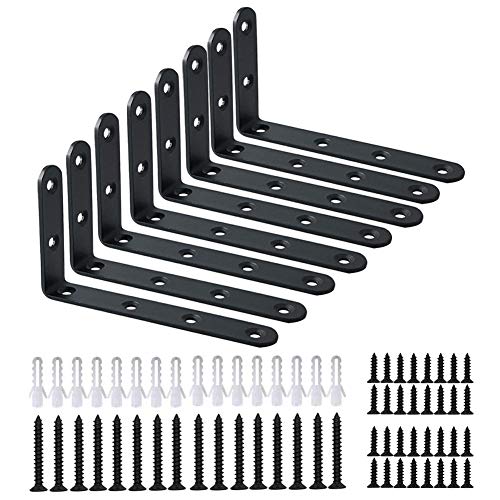
BRACKET MADE OF PREMIUM STEEL TO SUPPORT HEAVY WEIGHT. Our shelf bracket is made of heavy duty steel and could maxium support weight of 35lb for a pair of this L bracket. Our black corner braces come with a L pattern and could work perfectly for installing shelves, furniture and wall shelves, and so on.

【Size & Package】Measures 18" x 11-3/4" x 1" , these L shelf brackets fit nominal 18" - 22" deep lumber boards. The package contains 8-pack brackets, an installation manual, all required screws, drywall anchors and a spirit level
Replace Weak Core With Solid Wood and Glue Joints
Why settle for a flimsy core when a solid wood strip can instantly boost shelf rigidity? Begin with core replacement: cut a 3/4‑inch plywood strip to the cabinet’s full interior height and depth. Clamp the shelf flat with C‑clamps at the middle and ends, verify flatness using a straightedge, then apply wood glue to the strip before positioning it. Drill pilot holes every 6‑8 in, insert 1‑1¼ in wood screws, and tighten to pull the glued joint together. Maintain clamping pressure while the adhesive cures, ensuring glue joint optimization. The strip channels weight directly into the cabinet structure, eliminating stress on the span’s weakest points and delivering a durable, sag‑free shelf. Use shims to ensure the strip sits flush against the face‑frame. Regularly dust and wipe surfaces to prevent debris from compromising the joint. Parallel drilling can speed up the pilot‑hole process and improve alignment. Properly measure shelf depth before cutting to avoid over‑hang and maintain structural integrity.

