First, identify whether your cabinet uses a mechanical cam lock (like HON F26 or Anderson Hickey 2194) and note the keying type (KD, KA, or KAK). Gather a Phillips screwdriver, the correct control key, a retaining clip, and a spacer if the knockout is oversized. Remove the top drawer, unscrew the lock housing, and pry out the old cylinder while it’s in the unlocked position. Insert the new cylinder, bend the linkage’s square end upward, seat the retaining clip flush, and tighten the bolt. Test the key’s turn‑and‑click, make certain the locking bar drops cleanly into each drawer’s cutout, then reassemble the drawers. Continue for and you’ll uncover deeper troubleshooting tips.
Cabinet Lock Replacement: Identify Lock Type
When you start replacing a filing‑cabinet lock, first determine whether it’s mechanical or electronic. Mechanical locks include tubular cylinders, cam locks, sliding‑teeth, and lock bars; electronic locks rely on keypads or electromechanical actuation and may be keyed or keyless. For cam identification, inspect the back of the lock for a rotating bar that latches the drawer interior; common models are HON F26 (2190), Anderson Hickey 2194, and HON 2185‑KD for F24/F28 cabinets. Note the keying options: KD denotes key‑differentiated, KA indicates key‑alike, and KAK a higher‑security variant. Compare the suspect lock to a known working unit, verify model numbers and series (F26, F24, F28), and confirm whether the lock is a traditional cam or a hybrid electronic‑mechanical assembly before proceeding. Stocking a complete lock kit can replacement‑time and reduce the need for individual part searches. Understanding the parallelism of diffusion LLMs can also help you choose the right lock for high‑traffic environments. Selecting the appropriate security level ensures the lock meets both durability and budget requirements.

Cam locks for furniture are crafted from durable alloy steel with nickel plating, ensuring rust and corrosion resistance for long-term use in humid or high-temperature environments. Before purchasing, measure your pre-drilled hole’s diameter, depth, and connecting hole length to ensure compatibility

Material: Nickel plated zinc alloy cam lock. Zinc plated cam dowel with a plastic expansion head.

MATERIAL: These Cam Locks are crafted from premium alloy steel and nickel plating, provides excellent rust and corrosion protection, our cam connectors for furniture is a standard of high quality.
Gather the Required Tools for Your Lock
After confirming the lock type, gather the tools you’ll need for the core swap: a Phillips or flat‑head screwdriver, the appropriate change key, a pull (or control) key, a retaining clip or nut, a hole spacer if the knockout is oversized, and the linkage piece with its screwdriver for bending. Tool selection focuses on hand‑held items; no power tools are required. Guarantee material compatibility by matching the screwdriver tip to the screw heads on your cabinet and verifying that the change key aligns with the lock series (e.g., HON, Steelcase). The pull key must fit the core’s control slot, and the retaining clip should match the cylinder’s thread profile. Choose a spacer sized to fill any excess gap, preventing movement and maintaining alignment during operation. Secure the retaining clip by holding the cylinder with one hand while sliding the clip over it. Ensure the load capacity of the cabinet can support the added weight of the new lock components. Proper torque is essential to avoid stripping the screw heads during installation. Accurate measurement is critical to align the lock precisely with the cabinet door.

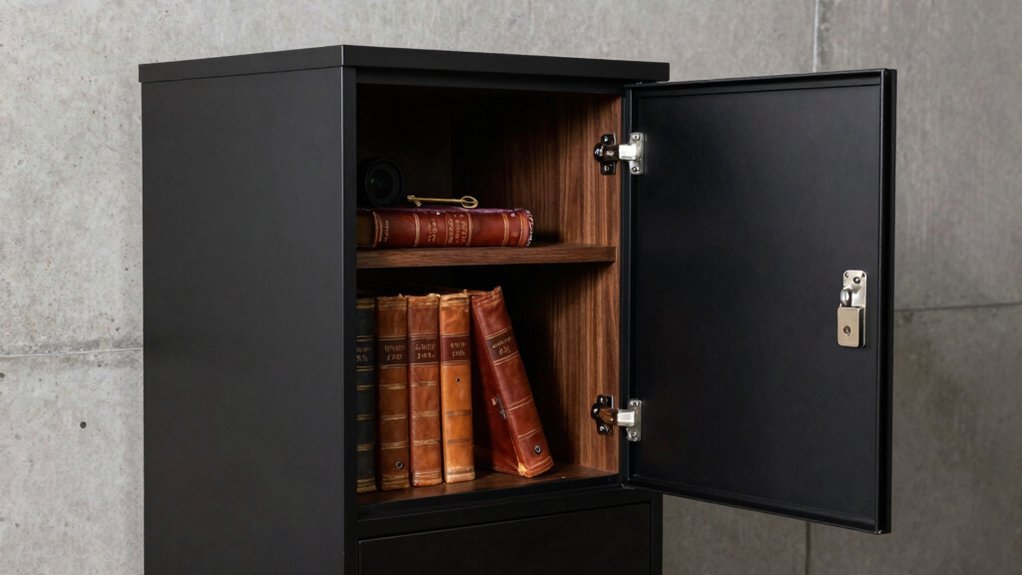
Large Storage for Multiple- Uses Assembled dimension 36"H x 31.5"W x 15.7"D, the cabinet provides a very wide secure storage space, can be used in home, office, garage, basement, school, workshop, warehouse or other place.

The industry's finest screw-holding device, Available for either slotted or Philips screws

Includes a 3/16-Inch and 1/4-Inch slotted screw holding drivers designed to hold screws for stainless steel applications.
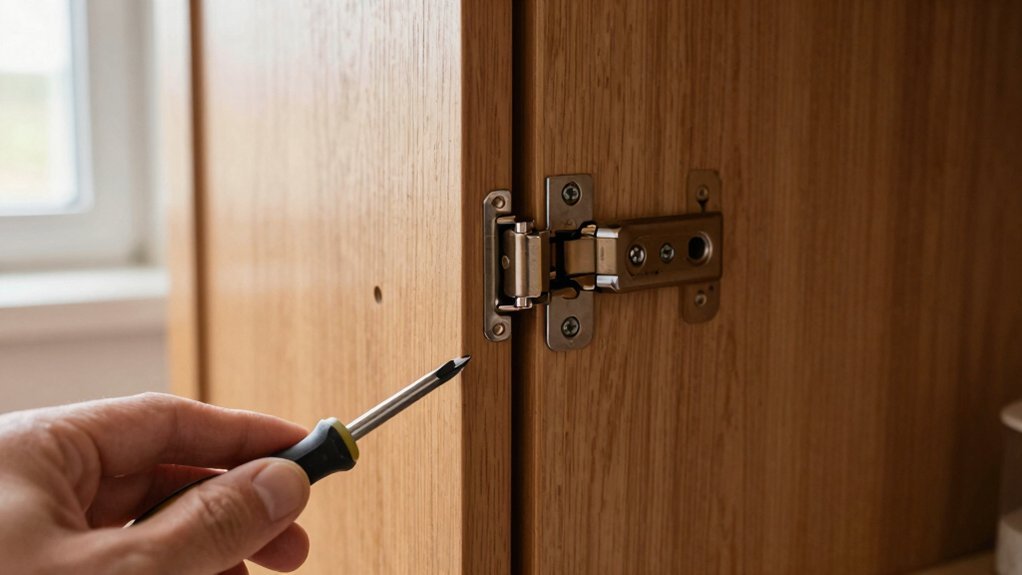
Remove the Existing Lock Safely
If you start by exposing the lock housing—usually by removing the top drawer or shelf—you’ll see the two or three Phillips‑head screws that secure the lock to the cabinet. Use a Phillips screwdriver that fits snugly; this guarantees screw safety and protects the surrounding lock aesthetics. Unscrew each fastener completely, keeping the heads in a small container to avoid loss. Once the screws are out, slide a cloth between the lock and the cabinet, then gently pry with pliers, applying minimal force to prevent dents. Turn the lock to the unlocked position with the control key before pulling the core straight out. If the lock resists, tap lightly with a hammer, never using brute force, to maintain both screw safety and lock aesthetics. Remove the top two shelves from the cabinet before beginning the process. Selecting a lock with a high security rating ensures better protection for valuable items. Consider using a paperclip lock to manipulate simple locks when a key is unavailable. For faster repairs, you can also reference a lock replacement guide that outlines each step in detail.
A screw with excellent holding power for aligning drawer fronts.

【Preferred Material】This LONTAN #8X1/inch screw is made of carbon steel with a galvanized surface, which makes it more corrosion and rust resistant, strong and durable.It is the perfect solution to your need for high quality screws

【M4 Screw Assortment】This set includes 120PCS M4 screws, available in M4×25/30/35/40/45/50mm sizes. Each size is adequately supplied, ensuring you have the right length for any task. which are the common sizes used at home for cabinet drawer cupboard and closet. Notes: if the screws are too long to lock tightly, we suggest you use some washers through the screws to make it lock well.
Align and Secure the New Lock Cylinder
Although the new lock cylinder fits snugly into the knockout hole, you must first guarantee the bolt faces upward; rotate the key a quarter turn to verify correct positioning, then slide the retaining clip flush against the cabinet wall while stabilizing the cylinder, and finally insert the linkage piece—pointed end into the bolt’s pre‑drilled hole and square end into the sidewall mechanism—bending the square end upward with a flathead screwdriver to lock everything in place. While holding the cylinder steady, apply a modest bolt torque to seat the bolt securely without stripping threads. Wear safety gear, especially eye protection, when using the screwdriver to bend the square end. Make sure the retaining clip sits flush; any protrusion can cause drawer interference. Verify that the linkage pivots correctly and that the square end remains bent upward, securing the mechanical link. Replacing the lock prevents future access issues caused by forgotten passwords. Use proper hand to avoid injury while tightening the bolt. Combination locks offer a key‑less alternative that can be useful in shared office environments. The adjustable shelf design of many IKEA cabinets allows for customized storage configurations.
SECURE CABINET DOORS AND DRAWERS – This U 9945 lock can be used to secure cabinet doors, drawers and much morewith the securing hex nut.

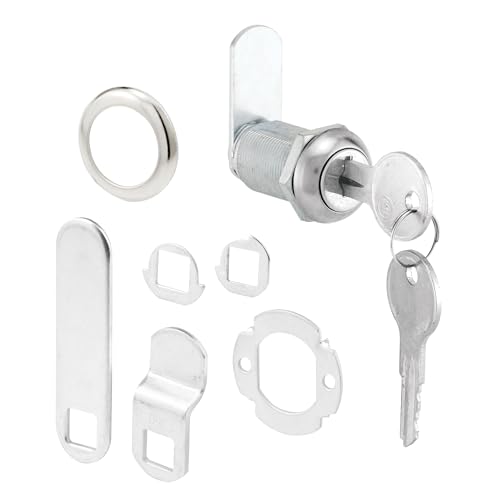
Replacement Kit: File cabinet locks replacement for toolbox. Includes 6 pieces of lock kit which includes nyloc nut, spare offset plate, stop washer, non-slip hex, lock plate, plate cover, lock body and keyed alike.

High Quality Material: This desk drawer lock is made of zinc alloy with screws M4 x 16mm. Soild Construction - Constructed of steel components. Our drawer locks are long-term use and strong
Test the New Lock and Troubleshoot Issues
Now that the cylinder is securely seated, you’ll want to verify the lock’s operation before relying on it. Insert the new key fully, turn it left slightly, and feel for smooth insertion; any resistance indicates mis‑alignment or debris. Confirm key alignment by checking that the keyway seats the pins cleanly. Next, turn the key right; listen for a click and test the latch by opening the drawer. If the latch binds, clean the keyhole with compressed air and a fine brush, then apply a thin film of lock lubrication—prefer graphite, not oil. Repeat the turn‑and‑click cycle several times to guarantee consistent engagement. If the cylinder spins freely or the key jams, reseat the cylinder, verify spindle compatibility, and re‑test after cleaning. The brand‑specific hardware from Office Furniture Resources ensures proper fit and function. For added peace of mind, consider the security rating of the lock to match your cabinet’s vulnerability level. Durable metal construction further enhances the lock’s resistance to tampering and wear. Choosing a lock with a high bolt strength rating can significantly improve resistance against forced entry.

Durable Construction – The 16mm (5/8") Cam lock are constructed of zinc alloy and are chrome plates. WOOCH cabinet locks ensure better antioxidant, waterproof and rustproof performance, resisting corrosion and wear for long-term use.

✿High Security Cabinet Cam Lock: Cylinder length: 7/8 inch / 22mm, maximum installation thickness: 3/4 inch / 20mm, thread diameter: 3/4 inch / 19mm. This desk drawer lock is equipped with a 1.9 inch / 48mm hook cam & 1.9 inch / 48mm long offset cam.
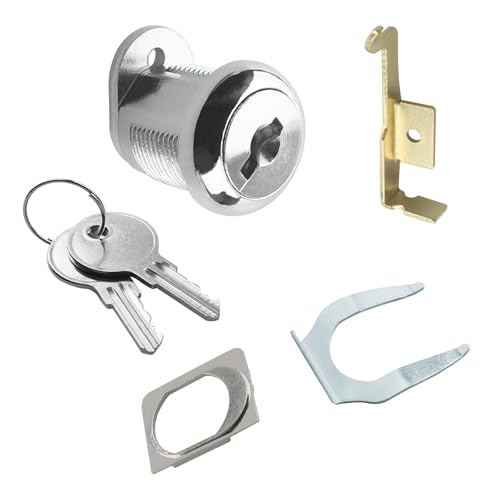
[Widely Compatible] Vertical File Cabinet Lock Kit Compatible with HON F24 and F28 series filing cabinets. This F24 kit fits the following hole dimensions: HON hole dimensions are 5/8 inch horizontal and 3/4 inch vertical
Reassemble the Cabinet and Verify All Drawers Lock
Before you start reassembling, remove all drawers so you can access the locking mechanism freely and verify that the new lock’s key inserts and turns smoothly. Begin by checking cabinet level; a tilted frame will cause drawer alignment problems. Use a thin rigid object to gently free a stuck locking bar, then insert the first drawer fully. Perform lock testing by turning the key; the bar should drop into the cutout without binding. Close the drawer, release, and guarantee smooth motion. Add each subsequent drawer one at a time, repeating the lock testing cycle and confirming the bar engages correctly. After all drawers are in place, verify that each drawer locks simultaneously, that the bar moves freely up and down, and that the cabinet remains level with no gaps. Ensure drawers are fully pushed in before proceeding. Choosing the proper drill bit helps create clean holes that align with the handle’s mounting plates. Understanding the cam lock mechanism can also aid in troubleshooting any unexpected resistance. Remember to tighten mounting screws evenly to prevent misalignment.