First, check the hinge screws and loosen the vertical‑adjustment screws on the top and bottom hinges; this lets the door slide up, down, left, or right. Tighten the back screw a quarter‑turn counter‑clockwise to stop rubbing neighboring cabinets, then use the side screw to fine‑tune left‑right alignment. If the holes are stripped, fill them with wood filler or Bondo, sand smooth, and reinforce the plate with a dab of CA glue and PL Premium adhesive. Finally, close the door and test the reveal gaps; the next steps will show you how to perfect the adjustment.
Identify the Cause of a Misaligned Cabinet Door
When a cabinet door looks crooked, the first thing to check is whether the hinge adjustments were completed after installation. You’ll find that rushed installs often leave hinge screws untouched, so the door sits off‑center even before the cabinet settles. Next, inspect the cabinet box. An out‑of‑level or out‑of‑square box—common on uneven floors—means shimming uneven floors is essential, and hinge tweaks won’t solve the problem. Look for signs of moisture warping near sinks or dishwashers; high humidity can twist wood, causing the door face to bend. If the box is racked, re‑level it with shims before tightening hinges. Addressing the root cause first prevents endless adjustments later. Using the correct Posy Drive bit ensures precise hinge adjustments without damaging the screw heads. Selecting the appropriate material durability helps ensure the cabinet maintains its alignment over time. Understanding the differences between concealed European and other hinge types can further guide proper alignment techniques. Choosing the right self‑closing hinge can also reduce the need for frequent realignment.
Locate the Screw That Controls Vertical Door Movement
After you’ve identified why the door is misaligned, the next step is to find the vertical‑adjustment screws. Open the cabinet and look at the hinge bodies on the upper and lower mounts. You’ll see a small screw centered on each hinge, separate from the front side‑to‑side screw and the back depth screw. These are the vertical‑adjustment screws that control vertical clearance. Use a Phillips screwdriver to loosen them just enough to allow movement; you’ll feel the hinge lift or drop when you push the door up or down. If the hinge feels stiff, apply a drop of hinge lubrication before turning the screws. Once you’ve located both screws, you’re ready to adjust the door height. The center screw can be loosened to enable the door to slide back and forth for precise alignment. For a smoother operation, consider using a lubricant spray on the hinge pivots before adjusting.
Adjust the Back Screw to Prevent Rubbing Neighboring Cabinets
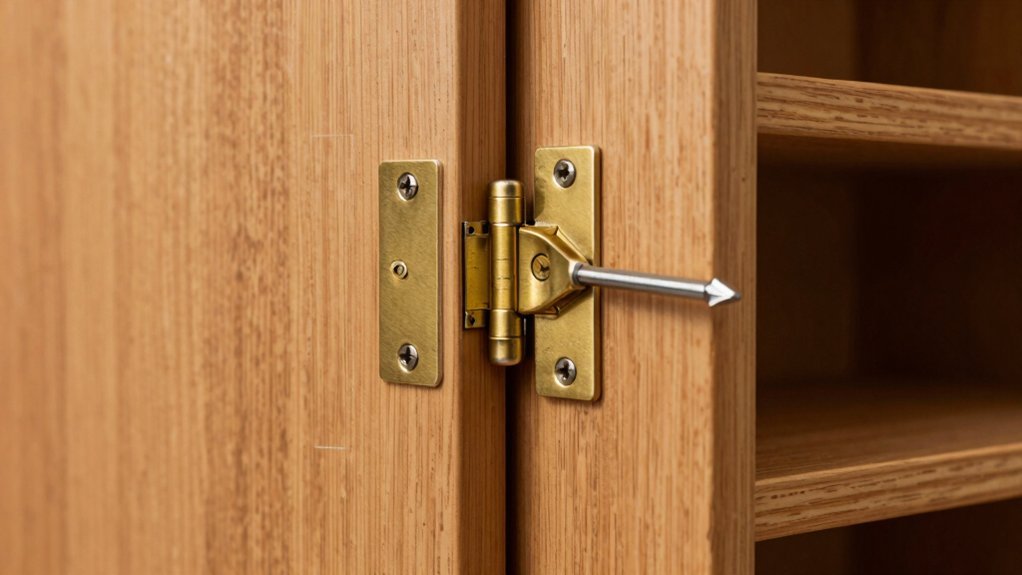
If the cabinet door scrapes the neighboring unit, the back screw on the concealed hinge is the key to fixing it. Open the door, locate the rear screw behind the square hole, and insert a Phillips driver. Turn it counter‑clockwise a quarter‑turn, then close the door to check the gap. Repeat until the edge no longer contacts the adjacent cabinet. When the door sits evenly, tighten the screw just enough to hold the position, applying proper hinge alignment torque to avoid over‑tightening. Lightly coat the threads with door screw lubrication before the final turn; this prevents binding and makes future adjustments smoother. Test both top and bottom hinges, matching the spacing on each side for consistent clearance. Adjust the back screw to set the door‑to‑cabinet clearance before fine‑tuning vertical position. Properly aligning the hinge ensures smooth operation and prevents wear over time. Adding a pilot hole before installing the hinge plate can help maintain accurate placement and reduce the risk of wood splitting. Check for level after each adjustment to confirm the door is plumb and evenly aligned.

Applicable product models:If the number on the black plastic back of your blum hinge is 30.310-11.02, then this is the cabinet door hinge you should replace.(The following are some of the other possible numbers that blum hinges has stamped on these hinges over the years: 120, 32.160, 30.310, PA66, 32.260.)

1.【Combination List】6 pcs cabinet hinge repair plate set includes: 4 pcs large hinge repair plates (3.54*3.54 inches), 2 pcs small hinge repair plates (3.54*2 inches), 36 pcs self-tapping fixing screws.

8mm Diameter Plastic Dowel Inserts for Cabinet Hinges
Loosen and Lift the Door to Fix Sagging or Dropped Door Issues
Even a slightly sagging cabinet door can be corrected by loosening the hinge screws just enough to lift the door and then retightening them in the proper position. Open the door fully, grab a screwdriver, and inspect the top hinge for looseness—this is often the cause of door sagging. Loosen the top and bottom hinge screws counter‑clockwise only a turn or two; don’t strip the holes. With the door still closed, push it upward and backward while you hold it, then lift it fully on the loosened hinges. Check the gap for evenness and adjust the top of the door left if it leans right. Tighten the top hinge first, followed by the bottom, keeping the door lifted. Test the swing, and if it stays level, you’ve achieved a quick hinge fix. Use toothpick reinforcement to fill stripped screw holes before re‑drilling for a permanent solution. For precise vertical alignment, refer to the adjustment screw guide in the European hinge manual. Selecting the proper hinge size is essential to maintain stability and prevent future sagging. Regularly inspecting the hinges can prevent corrosion from weakening the hardware.
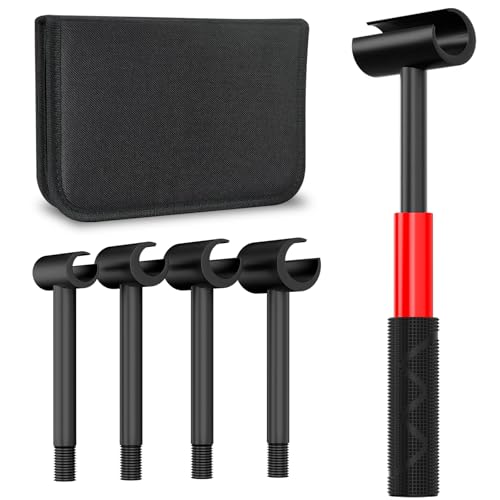
Multiple sizes: The hinge wrench kit comes with 4 replaceable heads in different sizes (0.55in/14mm, 0.7in/18mm, 0.9in/23mm and 0.98in/25mm), and the door hinge adjuster handle is 6.49in/16cm long
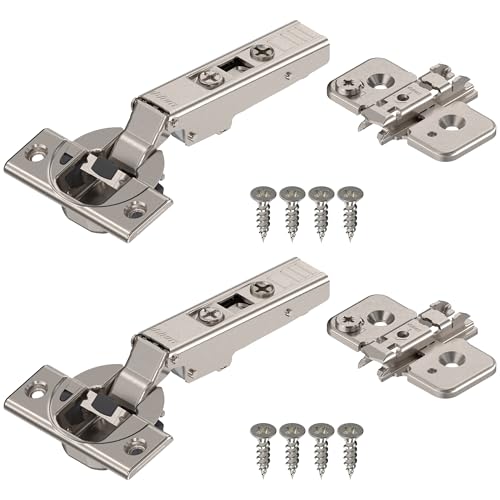
1 Kit Includes = 2 plates + 2 hinges + screws for hassle-free installation; fits door thickness from 16 mm (5/8”) to 26 mm (1”). Blum logo cover caps shown in some images are decorative and not included in this kit.

10 Kits Includes = 20 hinges + screws; fits door and frame thicknesses of 19 mm (3/4”); for square edge doors. Blum logo cover caps shown in some images are decorative and not included in this kit.
Use the Side Screw for Precise Left‑Right Door Alignment
When the cabinet door sits too far left or right, you can fine‑tune its position with the side screw on each hinge; this small adjustment on the hinge’s horizontal arm lets you shift the door horizontally without disturbing the overall alignment. Open the door, locate the door screw on the arm nearest the panel, and use a screwdriver to turn it clockwise to move the edge rightward or counter‑clockwise to pull it leftward. Make quarter‑turn adjustments, then close the door to check door alignment and cabinet symmetry. Repeat the process on the top and bottom hinges, ensuring both sides match. Verify even gaps and smooth operation before finalizing the precision adjustment. Magnetic cabinet locks can also be installed after alignment to secure the door in place. For a durable fix, consider using longer replacement screws to reinforce the hinge mounting area.
Swap Out Stripped Screws for Bigger, Longer Ones
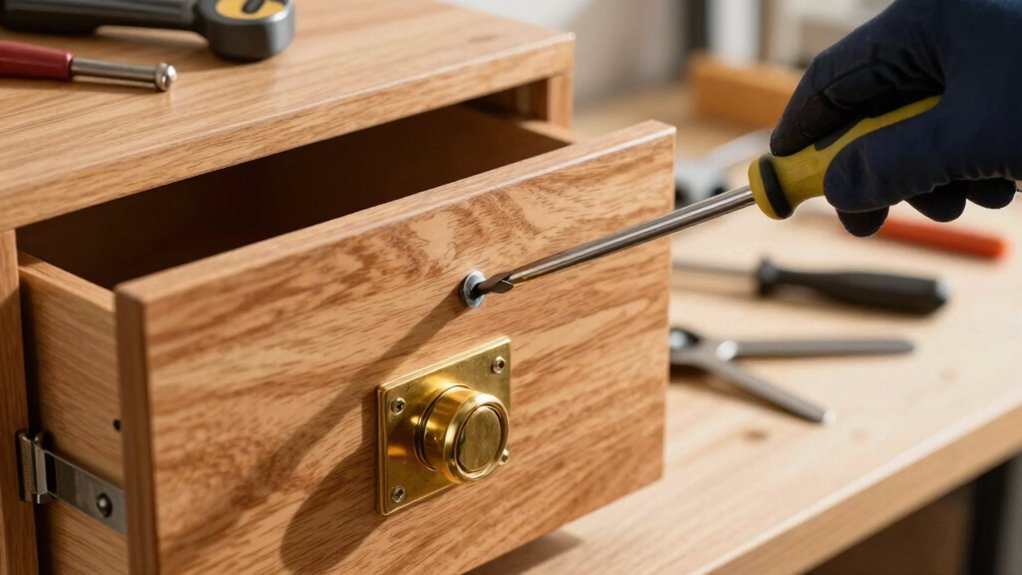
After tightening the side screws for fine‑tuning, you may find that the original screws have stripped their holes, leaving the hinge insecure. Remove the door, clear debris, and test‑fit a larger screw. Choose a screw with a thicker diameter and longer length that matches the hole depth, marking the drill bit to avoid over‑drilling. If the wood won’t grip, enlarge the hole slightly with the appropriate drill bit. Apply a dab of wood glue to the threads for extra screw reinforcement, then drive the screw slowly with the correct screwdriver, using an angled holder for tight spots. Tighten until the hinge sits flush, then add a few drops of hinge lubrication to keep movement smooth. This quick fix restores stability without fillers. Plastic molly anchors provide a durable alternative when wood alone cannot hold the screw. Using a drill stop ensures consistent depth and prevents damage to the surrounding material. Properly anchoring the cabinet to the wall with stud brackets can prevent future stress on the hinges. Parallel alignment is essential for smooth operation.


Flat Head - Phillips Screws

【QUANTITY】FIXLINK fast self-tapping wood screws diameter: #6, length: 1/2 inch, quantity: 135PCS; We have checked all wood screws, and the number of wood screws you will receive upon purchase will not be insufficient
Repair Hinge Holes With Wood Filler or Bondo
If the hinge’s screw holes are too damaged for a simple screw swap, you can rebuild them with wood filler or Bondo. First, clean the mortise, then apply a thin layer of wood filler using a putty knife. For deep holes, add multiple coats, sanding with 120‑ or 180‑grit paper after each 15‑minute dry interval. To avoid cracking, use the Wood‑insert technique: cut a matching scrap piece, glue it with Titebond 2, and nail it flush. When you need extra strength, Bondo offers superior Bondo durability; test it on scrap wood, then fill the hole, let it cure, and sand smooth. Finally, fill any gaps around the insert, sand, prime, and paint for a seamless finish. Ensure the shim’s thin end fits snugly in the cutout before gluing. Proper screw torque is essential to prevent the hinge from loosening again. Consider using a pilot hole to guide the screw and reduce stress on the repaired area.

Fix Stripped Wood Screw Holes in Seconds: Gulfmew wood anchor for screws is designed to quickly and easily repair stripped screw holes in wood, door hinge, fittings, fixtures, modern and antique furniture, door locks, anywhere a wood screw hole need repair

Wood Material: our hinge filler plates are made of quality wood, which will not break easily when you drill holes in them, strong enough for you to use in daily life, and you will be satisfied by our product

Package Includes: you will receive 16 pieces of wooden hinge repair plates and 32 pieces of double sided tapes in a package, which can be applied for you to use, easy and convenient
Secure Hinge PLate With PL Premium Adhesive and CA Glue
Need a hinge plate to stay put without endless clamping? First, roughen the cabinet surface and the plate. Apply a thin line of CA glue to the screw holes or plate edges; it gives instant tack so you can position the plate correctly in seconds. Immediately follow with a bead of PL Premium adhesive along the plate’s perimeter. Press the plate onto the wood within 15 minutes to capture the CA’s hold, then keep light pressure for the next 30 minutes while the polyurethane begins to set. The PL Premium forms a solid, moisture‑resistant bond that bridges gaps and provides adhesive reinforcement, while the CA penetrates the grain for extra strength. Allow a full 24‑hour cure before using the hinge. For optimal results, ensure the holes are aligned using a drill guide before applying any adhesive. When replacing a metal cabinet lock, always verify the lock’s bolt diameter matches the existing hole to prevent misalignment. Choosing the right hinge material can also affect durability and style, as stainless steel hinges offer corrosion resistance for high‑humidity kitchens.

【High Quality Stainless Steel】Cabinet Hinges Repair Plate is made by high quality brushed stainless steel material which is rust resistant, attractive and durable.The items can help repair damaged hinges on the surface and convert the original fixed stress point into a force-bearing area to make it stronger.

【12x Hinge Repair Kit】 -- Small size:1.85x3.54 Inch / 47x90mm. You will get 12 pieces cabinet hinge fixing plate, including 6 pcs hinge cup plate, and 6pcs hinge base plate.Each hinge plate is wrapped with 6 screws.

1.【Set】6pcs cabinet hinges repair plate set includes, 6pcs small hinges repair fixing plates (3.54*2 inches), comes with 36 characters self-tapping fixing screws.
Test Door Close After Each Adjustment to Ensure Even Reveal Gaps
When you finish turning a hinge screw, close the door and check the reveal gaps right away; this quick test tells you whether the adjustment helped or made things worse, letting you pinpoint the exact screw that still needs tweaking and keeping the gaps even across the top and bottom edges. Perform door testing after each two‑turn increment and compare the top and bottom gaps. If the top gap is wider, turn the bottom hinge clockwise; if the bottom gap is larger, adjust the top hinge counter‑clockwise. Listen for rubbing or squeaking—those sounds often mean you need a bit more hinge lubrication. Verify that the door closes smoothly without binding, then repeat the test until both gaps match and the door stays shut. Adjust the back screw left to allow the door to move outward slightly, ensuring proper alignment without excessive tension. Properly selecting a hinge with adequate load capacity helps prevent sagging over time.
Final Checklist: Tighten Hinges, Verify Stability, Clean Up
Before you step away, tighten every hinge screw, verify the door’s stability, and clean up any wood filler or lubricant you used. Choose the right screwdriver—properly sized for each screw head—to maximize torque (Tool selection). Loosen adjustment screws, set the door with the timing technique, then re‑tighten front and rear screws until gaps are even and no rubbing occurs. Test the door by lifting, releasing, and cycling it several times; wiggle hinge plates to confirm they’re secure. Remove excess wood filler, sand the cured surface flat, and wipe away any grease. Finally, inspect the repair plate and filler it still holds under the door’s weight. Your cabinet is now ready for everyday use. The CA glue method achieved a breaking strength of 30 lb, exceeding the factory control by 1.5×.