Pick a vertical‑storage type that fits each room: floor‑to‑ceiling units for closets, wall‑mounted shelves in kitchens, and over‑door organizers for closets. Set top shelves 12 inches below the ceiling (84 in for 96‑in ceilings) and keep everyday items between 90 cm and 160 cm for easy reach. Use stackable bins, pull‑out drawers, and lazy‑Susan carousels to fill deep corners, and add DIY dividers or neodymium‑magnet racks for smooth retrieval. If you keep going, you’ll uncover more tricks to squeeze every inch out of your cabinets.
Choose the Right Vertical‑Storage Solution for Each Room
Choosing the right vertical‑storage solution for each room starts with matching the unit’s function to the space’s layout. In the bedroom, you’ll want sleek cabinets or open shelves that complement the bed’s position; a floor‑to‑ceiling unit can double as a closet divider, while a Kallax footboard adds storage without crowding the floor. For the kitchen, prioritize wall‑mounted or floating shelves that hold spice bottles and mugs; bracketed shelves support heavier pans, and over‑door racks free cabinet space. In closets, over‑door organizers and stackable bins keep shoes and accessories off the floor, while floating shelves create multiple layers. Choose materials that resist moisture and wear, ensuring material durability across each room selection. Adding floating shelves high on walls can further maximize vertical space for books and kitchen items. Consider the load capacity of each cabinet to safely store heavier items without compromising stability. When selecting an installer, verify they have experience with cabinet mounting to guarantee a secure and level fit. Properly measuring shelf spacing before installation helps avoid costly adjustments later.
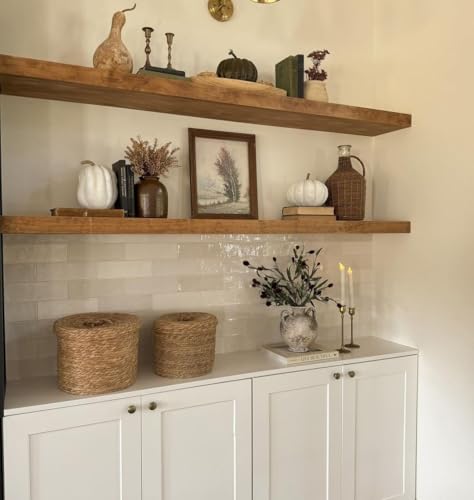
【Real wood 】These floating shelves for wall is made of 100% natural solid wood with a non-toxic and harmless varnish coating. This 36 inch floating shelves has its own wooden node and grain.The texture is very clear,The smooth surface is easy to clean.
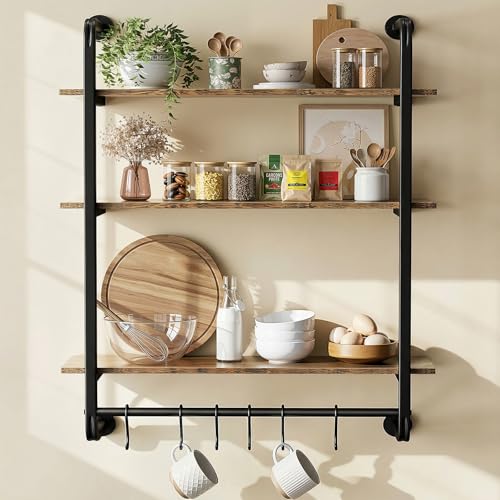
𝗥𝗲𝘁𝗿𝗼 𝗜𝗻𝗱𝘂𝘀𝘁𝗿𝗶𝗮𝗹 𝗦𝘁𝘆𝗹𝗲: Kssiaz 3-tier industrial pipe shelving has a unique water pipe designgive your home a vintage feel. Great for displaying souvenirs, collections, photos, books, trophies, food containers and tableware. As a bookshelf in the farmhouse or living room or as wine rack in the bar, any other where you want to install.
Adjust Shelf Heights and Extend Cabinets for Maximum Vertical Storage
When you adjust shelf heights and extend cabinets, you release the full vertical potential of any room. Start with the ceiling height: a 96‑inch ceiling lets a wall‑mounted unit top out at 84 inches, leaving a 12‑inch buffer above and below. For floor‑mounted pieces, aim for an 89‑inch top shelf to accommodate double hanging storage and the base. Position everyday items between 90 cm and 160 cm for natural reach, placing frequently used items at waist height to improve shelf ergonomics. Keep shelves 12–15 inches apart for folded goods. Use pin jigs and drilled hole rows to fine‑tune heights as needs change. Add cabinet extensions to fill the remaining vertical gap, creating floor‑to‑ceiling units that eliminate wasted space and boost overall capacity. Ensure that the total load does not exceed the cabinet’s weight capacity to maintain structural safety. Properly installing drawer slides guarantees smooth operation and maximizes the usable space of each drawer. Selecting the right shelf material can significantly affect durability and load distribution.

Elegant Design: Enhance your living spaces with delta's black 5-tier, set of 10 wall shelf brackets, offering a clean and minimalistic design that seamlessly fits into any decor style. Add your own wood shelf for a sophisticated, modern shelving system.

Real Hidden Brackests: These black shelf brackets have no lips and can be truly hidden. The base can be blocked by the plank, creating an amazing floating illusion. Compared with other floating shelf brackets, this bracket is easier to install

Sturdy Shelf Pilaster: Our metal shelf standards with silver coated finish, the high quality alloy steel has excellent oxidation resistance and rust resistance, stable and sturdy than normal shelf storage. The super long metal shelving design allows you to put more items
Pack Cabinets Vertically for Easy Retrieval and Space Efficiency
A single vertical stack can triple a cabinet’s capacity, so start by placing the tallest, most frequently used items at the back and layering smaller bins or containers in front. Use stackable pantry bins to double space for shoes, bathroom supplies, or dry goods. Acrylic sets keep toilet paper upright, while OXO containers store dish tabs without clutter. Add vertical dividers to keep bakeware upright and prevent tumbling. Install mezzanine shelving inside deep cabinets to create a second tier for smaller containers. A vertical pantry layout lets you see every item at a glance, reducing search time. Pull‑out drawers and narrow vertical units further streamline access, turning every inch into usable storage. Consider converting the cabinet into a compact office organizer to keep documents and tech within arm’s reach. Adjustable shelving offers customizable organization that adapts to evolving storage needs. Selecting a cabinet with a sliding door mechanism can also maximize floor space while maintaining easy access.
How to Turn Awkward Kitchen Corners Into Handy Vertical Storage?
Stacking items vertically works great, but those awkward kitchen corners still waste space. First, replace a blind corner with a diagonal‑corner cabinet; its angled shelves let you see every item and add corner lighting to brighten the niche. Next, install a rotating carousel (lazy Susan) inside the angled frame; the circular shelves rotate, giving full access to spices and cans while shelf lighting highlights each tier. If you prefer a pivoting solution, fit a fold‑out corner shelf that swings open, turning the blind spot into a vertical rack for cookware. Finally, add under‑cabinet corner space with pull‑out drawers below the countertop, using shelf lighting to make deep items easy to locate. Half‑Moon Lazy Susan offers an inexpensive option for blind corners, providing limited access to the back of the cabinet while sacrificing some usable storage in the visible portion. Consider using modular shelving to adapt the interior layout as your storage needs evolve. Choose hinges with a full overlay design to maximize door coverage and maintain a seamless look. Space‑saving corner cabinets are especially popular in small‑kitchen designs because they maximize usable area without compromising style.

[ Please Note ] - The lazy susan is large enough for 8 cans of coke (refer to the 2rd image). Please read the lazy susan dimensions and measure your tabletop or closet space before ordering in case it doesn't fit. Overall Size - 10" x 1.4". Available Size - 9.1"

【HEIGHT ADJUSTMENT】This Lazy Susan Spice Rack Organizer has 4 height settings, 9''/23 cm, 10.2''/26 cm, 11.4''/29 cm, 12.6''/32 cm, you need to adjust the 3 metal nodes to do it to meet your different needs,and can be used to store spices at different heights and any items you need to store.

Amazing Quality: Leeden Lazy Susan Organizer is made of durable and shatter-resistant plastic, BPA-free and Chlorine-free. This sturdy plastic bin makes it easier to organize your Lazy Susan cabinet, kitchen countertop corner, and counter table. DO NOT PLACE IN DISHWASHER
DIY Pull‑Out Racks and Dividers That Make Retrieval a Breeze
Pull‑out racks and dividers turn a chaotic cabinet into an organized workstation, letting you grab what you need without rummaging. First, measure the interior depth, subtract 1 in. for slide hardware, and mark mounting positions 1 ¼ in. from the board bottom and ¾ in. from the drawer box bottom. Use ¾ in. spacers to offset face‑frame intrusion, then attach a level mounting board with spacer blocks for upper levels. Build drawer boxes from ¾ in. plywood sides and ¼ in. bottoms, reinforcing the bottom with ½ in. plywood for later dividers. Pocket‑hole screws and wood glue secure joints; edge‑band front edges for durability. Install drawer dividers on the reinforced bottom, then slide the racks out using the pre‑mounted hardware for smooth, friction‑free retrieval. Adjustable shelving allows you to reconfigure storage as your needs evolve. Choosing the right magnet type, such as a neodymium strip, ensures the racks stay securely closed without sacrificing ease of access. Smooth glide mechanisms reduce effort and wear, extending the lifespan of the pull‑out system.

LYNK PROFESSIONAL, THERE IS NO SUBSTITUTE! FEEL LIKE A PROFESSIONAL COOK WITH EVERYTHING AT YOUR FINGERTIPS – our spice rack with our patented PROGLIDE PLUS 2 heavy-duty ball bearing glides adjust to perfectly fit the various depths of upper cabinets giving you easy access, vertical storage, and organization for all your bottles and jars

Heavy Duty Mateial: Dual pull out trash cna are made of heavy duty structural steel with surface nano-painting technology, which is more resistant to corrosion and rust than normal painting technology, and lasts longer. The under cabient trash can pull out have enhanced weight capacity, which can withstand up to 120 pounds, no need to worry about bending the slides! Note: Not Included Can. The screws connecting the cabinet door are 12mm screws, please measure the thickness of the cabinet door first to avoid poking through the cabinet door!
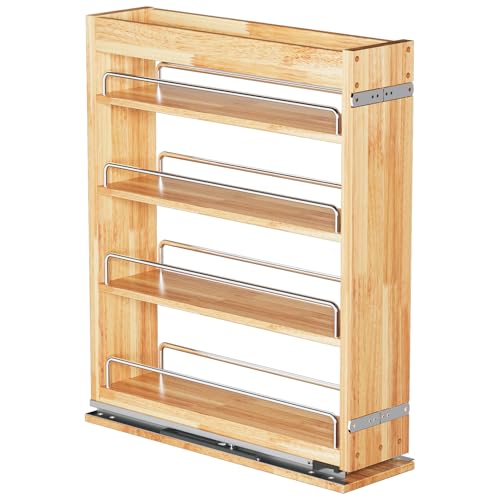
4 Tier Slim pull out spice organization for cabinet: The slide out design of OCG 4 tier pull out slim spice organization can easily reach for items in narrow spaces. The textured oak material makes OCG pull out spice racks for inside cabinets beautiful and durable.

