Measure your cabinet’s width, depth, and height, then match the bin count to your family’s trash volume—single or double for small homes, triple/quad for larger households. Choose a pull‑out or tilt‑out unit with tight‑sealing lids and soft‑close slides to control odors and reduce noise, and pick a material (steel for durability, resin for moisture resistance, or wood for style) that fits your budget and décor. Verify hardware tolerances and warranty coverage, and you’ll see how a well‑chosen cabinet can keep your space compliant, efficient, and cost‑friendly.
How to Choose the Right Trash‑Container for Your Space
When you assess your household needs, match the bin count to the family size and waste volume: a single or double bin works for small homes, while larger families or high‑trash generators benefit from triple or quad bins. Choose an odor bin with a tight‑sealing lid for kitchens; the lid provides odor‑control and keeps pests out. In bathrooms, a compact lidded bin maintains hygiene without sacrificing space. For garages, select a heavy‑duty metal bin that resists tampering and weather, adding animal‑proof features if needed. Prioritize dual‑compartment designs to separate recyclables, and opt for stainless steel or stone finishes for easy cleaning and durability. Guarantee each container sits on a flat surface, uses sturdy liners, and includes handles or wheels for efficient service, keeping costs low and compliance high. Consider the cabinet’s load capacity to ensure it can support the weight of full bins without warping. Understanding door types helps you align the cabinet’s functionality with your interior design goals. Properly assessing material strength prevents structural failure under heavy loads.
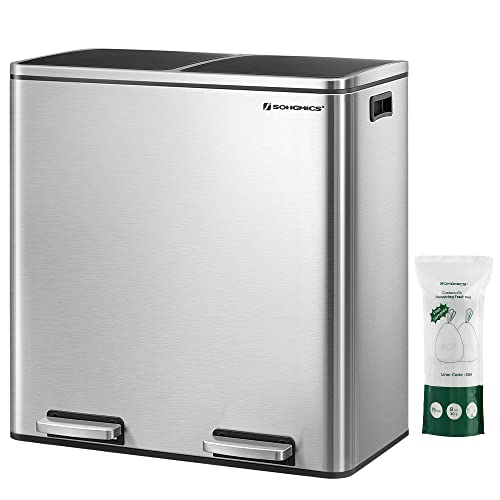
[A Boon for Your Kitchen] Your garbage can doesn’t have to look like garbage; with silver and black colors and a simple silhouette, this step trash can will be an eye-catcher in your kitchen

Introducing the Garvee Stainless Steel Double Trash Can, a sleek and practical solution for efficient waste and recycling management in your kitchen. This dual bin system combines style, durability, and functionality to keep your space clean and organized.
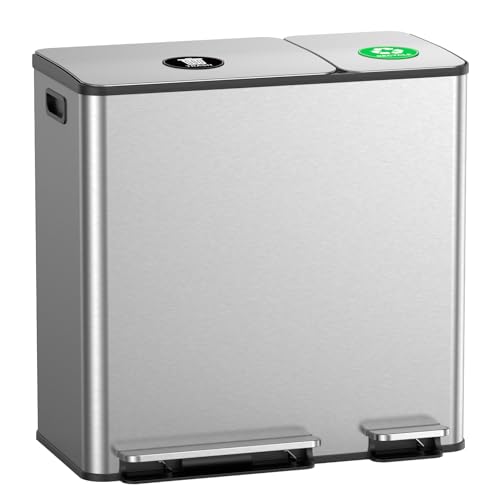
13+6 Gallon Dual Compartment for Large Families: The total 19-gallon capacity is split into a 13-gallon trash can (ideal for large pizza boxes and family-sized food containers) and a 6-gallon recycling bin (fit for paper, plastic, or glass). Perfect for busy households to simplify waste sorting and avoid frequent emptying. 2 free magnetic stickers enable easy trash/recycling identification
Measure Your Space for the Perfect Trash‑Container Fit
After picking the right bin type, you need to verify that it actually fits your cabinet. Start by measuring space placement: tape from the cabinet’s face to the opposite side for width, then from the opening back to the interior wall for cabinet depth, and finally the full vertical distance for height. Record each dimension in inches to match product specs and avoid gaps. Next, conduct obstruction mapping. Check sink dimensions and pipe clearance, noting any drainage or disposal units that cut into the interior. Measure hinge interference to confirm the pull‑out mechanism won’t snag. Include any support beams, shelves, or brackets in your calculations. By aligning these measurements with the container’s footprint, you guarantee a compliant, cost‑efficient fit without costly rework. Additionally, use a laser measuring tool to quickly capture interior dimensions with high accuracy. Properly anchoring the cabinet to wall wall using studs ensures it stays secure under load. Reinforcing the cabinet shelves with metal brackets can further prevent sagging under heavy trash containers.
Choose Pull‑Out, Tilt‑Out, or Freestanding Trash‑Containers
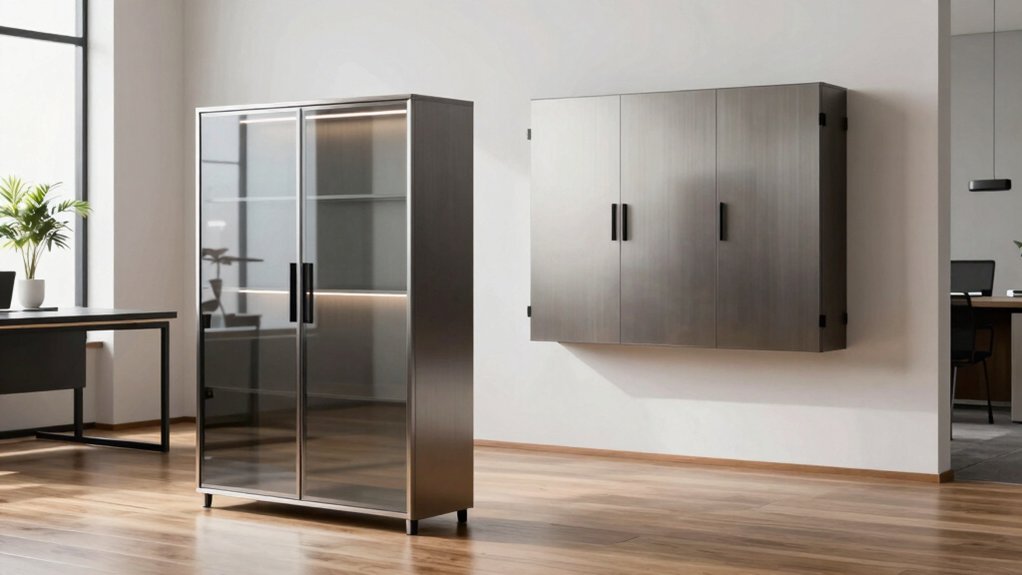
Which option best balances space, odor control, and safety? Pull‑out cabinets seal bins behind doors, delivering top‑tier odor control and child‑pet safety while reclaiming floor area. Their enclosed design supports multiple compartments for recycling and fits custom sizes, so you can match kitchen dimensions without sacrificing efficiency. Tilt‑out units provide front‑access lids—flip‑top, automatic, or push‑open—allowing quick disposal during sink tasks and seamless cabinet aesthetics. They occupy less cabinet depth than pull‑outs but still conceal waste, reducing noise and visual clutter. Freestanding containers sit on the floor, exposing odors and increasing clutter risk; they also consume valuable space and lack the safety of concealed units. Choose pull‑out for maximum space savings, odor containment, and noise reduction, or tilt‑out for flexible lid options and easy access, always opting for eco‑friendly materials to meet compliance and cost‑efficiency goals. The pull‑out drawer also maximizes vertical cabinet space by storing multiple trash bags in a single unit. Additionally, selecting a cabinet with adjustable shelving allows you to customize storage for different bin sizes and recycling needs. Durable metal hinges further enhance the longevity of the cabinet doors. Consider traffic flow when deciding door swing direction to ensure smooth movement and avoid obstructions.

Heavy Duty Mateial: Dual pull out trash cna are made of heavy duty structural steel with surface nano-painting technology, which is more resistant to corrosion and rust than normal painting technology, and lasts longer. The under cabient trash can pull out have enhanced weight capacity, which can withstand up to 120 pounds, no need to worry about bending the slides! Note: Not Included Can. The screws connecting the cabinet door are 12mm screws, please measure the thickness of the cabinet door first to avoid poking through the cabinet door!
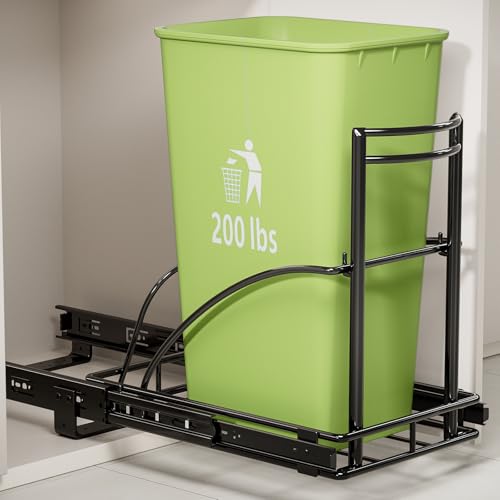
Before You Buy, Please DOUBLE CHECK Size Fit - 𝗔𝗻𝘆 𝘀𝗶𝘇𝗲 𝗱𝗼𝘂𝗯𝘁? 𝗜’𝗺 𝗵𝗲𝗿𝗲 𝘁𝗼 𝗵𝗲𝗹𝗽. Minimum Cabinet Space: 13"W x 19"D x 17"H. Make sure your cabinet space is big enough for the reinforced pull out trash can slider. Check for pipes, garbage disposal or hinges under the sink; measure inside-cabinet width, depth, and height; and also confirm your bin fits the holder frame.

Heavy Ducty Material: The pull out trash can under cabinet is made of heavy duty structural steel with surface nano-painting technology, which is more resistant to corrosion and rust than normal painting technology, and lasts longer. The under cabinet trash can pull out have enhanced weight capacity, which can withstand up to 100 pounds, no need to worry about bending the slides! Note: Not Included Can. The screws connecting the cabinet door are 12mm screws, please measure the thickness of the cabinet door first to avoid poking through the cabinet door!
Evaluate Materials: Wood, Steel, or Resin
If you need a storage cabinet that meets HOA rules, resists weather, and stays within budget, compare wood, steel, and resin on durability, maintenance, and eco‑impact. Wood offers aesthetic appeal and customizable shelving, but its material cost can rise with treatment, and moisture or pest damage reduces climate suitability for humid zones. Steel delivers the highest durability, handling up to 1,000 lb without warping; its material cost is moderate, and stainless finishes guarantee rust resistance, making it climate‑suitable for extreme temperature swings and heavy‑duty garages. Resin balances cost and resilience, lasting 15–20 years with minimal upkeep; its recyclable plastics keep material cost low and its moisture‑proof nature excels in salty or rainy climates. Choose the material that aligns with your budget, local climate, and HOA compliance. Freestanding trash can offers a reliable, easy‑to‑clean alternative to pull‑out cabinets. Understanding load‑bearing capacity helps ensure the cabinet meets your storage demands. Consider the environmental impact of each material when making your final decision. Metal cabinets benefit from powder‑coated finishes that enhance UV resistance and reduce corrosion.

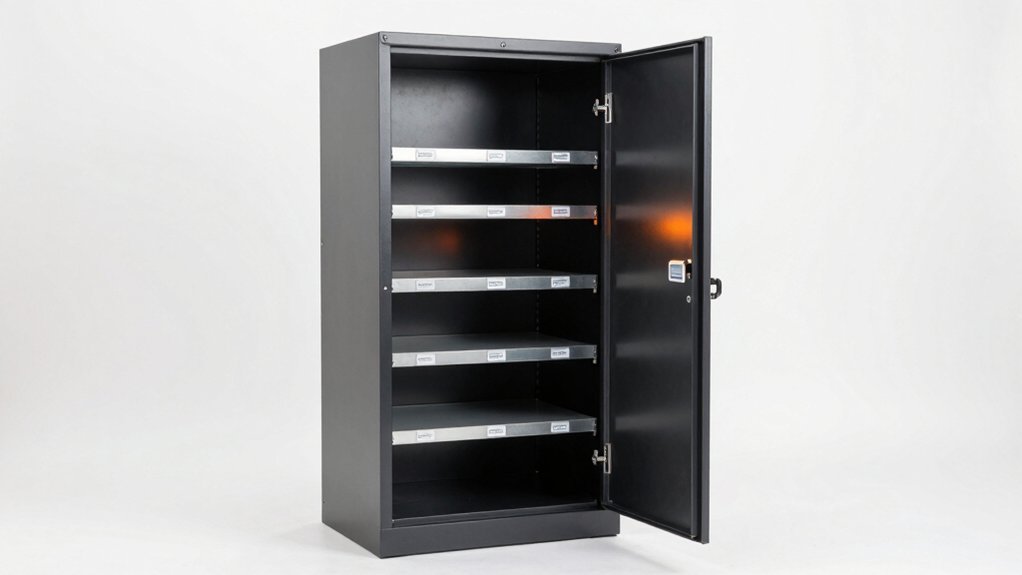
『HIGH QUALITY MATERIAL』:Whole-in-one reinforced heavy duty metal frame, load capacity up to 180lbs per shelf solid and strong.Environmental protection powder, scratch resistance and rust-resistance.Our metal storage cabinets are made of heavy gauge cold-rolled steel plate, sturdy and durable

High-Quality Metal: Letaya metal storage cabinet with whole-in-one reinforced heavy gauge steel deluxe welded frame, 2 locking doors are also strengthened by with additional steel bars, whole steel frame thickness up to 0.8 mm, rugged and not easily deformed, plate adopted environmentally powder coated finish, Moisture proof,capacity to resist corrosion and rust,Can be used for a long time

【Integrated Frame】: Black storage cabinet with doors is made of 0.88mm thick cold-rolled steel and can hold 180 pounds per layer, up to a maximum of 900 lbs. It's a 72 X 32 X 16 inch heavy duty storage cabinet with upgraded powder, which is more durable, longer use time.
Prioritize Soft‑Open/Soft‑Close Mechanisms for Heavy Trash‑Containers
Choosing a material that meets HOA standards and withstands your climate is only half the battle; the next step is ensuring the cabinet’s operation stays smooth and safe under heavy loads. Prioritize soft‑open/soft‑close mechanisms because they deliver noise reduction and protect hardware when you pull out a fully loaded container. Look for full‑extension ball bearing slides rated at 100 lb weight capacity; they distribute load evenly, prevent tilting, and keep the door from slamming. Rev‑A‑Motion™ slides add consistent glide and can be mounted with minimal brackets, cutting installation time and labor costs. Polymer bases and brushed aluminum frames resist moisture and fingerprints, lowering maintenance expenses while maintaining compliance with safety standards. This approach maximizes durability, minimizes disturbance, and stays within budget. The soft‑glow sliding mechanism provides a quiet operation that complements the ball‑bearing slides. Concealed hinges offer a sleek aesthetic while maintaining structural integrity. A typical storage cabinet can be assembled in 30 minutes if all tools are at hand and the assembler follows the steps methodically. Selecting hinges with high tensile strength ensures long‑term performance under repeated heavy usage.

Door Mount Pull Out Trash Can: YJHome pull out trash can under cabinet keep your kitchen waste trash can hidden in kitchen cabinets or under the sink while saving valuable space. Note: Without Trash Can, Without Cabinet.The screws connecting the cabinet door are 12mm screws, please measure the thickness of the cabinet door first to avoid poking through the cabinet door!
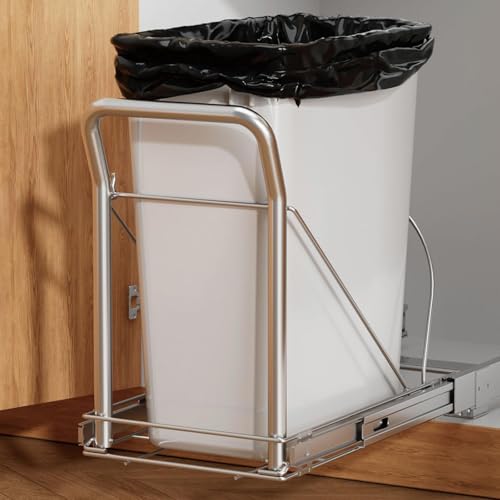
High-Quality Materials: The under cabinet trash can pull out rack is made from thick, high-quality carbon steel. It features a corrosion-resistant, chrome-plated finish, making it resistant to rust even in damp environments. The pull out handle is made from stainless steel, enhancing durability and providing convenient access.(Not Included Trash Can).

Soft-Close Slide Rails: The sliding mechanism of the pull out trash can under the cabinet utilizes commercial-grade, damped soft-close bearing tracks. It operates smoothly and quietly, eliminating any harsh noises. This allows you to enjoy your music while cooking, making garbage disposal and recycling effortless and simple. The tensile force of the damping slide rail is directly proportional to the recovery force. The greater the tensile force, the greater the recovery force.
Check Durability and Warranty of Soft‑Close Systems
While evaluating soft‑close cabinets, focus on durability and warranty to guarantee long‑term value. Check that the hinges use integrated dampers and hydraulic systems, because they reduce stress on joints and frames, extending the mechanism lifespan. Look for high‑quality drawer slides that handle heavy loads without misalignment, and verify that the manufacturer provides clear warranty coverage on those components. Reputable brands test hydraulic durability and back it with extended guarantees, signaling lower future repair costs. Inspect adjustment screws and test motion after installation to confirm proper alignment. Regularly clean slides and dust dampers to maintain performance, but expect minimal upkeep if the system is built to spec. This approach keeps compliance tight and budget efficient. Ensure the cabinets are stacked within the recommended stacking height to maintain structural integrity. Wider doors often require additional hinges to support the extra weight and prevent sagging. Choosing a lock with a high‑strength deadbolt can further enhance overall security for the cabinet.
Should You Go Single or Double Bin? Here’s How to Decide
When space is limited and you need a straightforward solution, a single‑bin cabinet often wins on cost and ease of installation. You’ll fit it in a 12‑15 inch cavity, keep waste odor control simple, and enjoy quick bin accessibility without a second door. Freestanding cans require no cabinet modification, making them a quick‑install alternative. Double‑bin cabinets demand at least 18 inches width and a 21‑inch depth, but they give you recycling convenience and separate trash from recyclables in one unit. If your kitchen handles 13‑20 gallon loads, a dual setup can reduce trips to the curb and keep odors sealed with soft‑close lids. Consider your family’s sorting habits, the budget for extra hardware, and the space you can allocate before deciding whether one bin or two best meets your compliance and cost‑efficiency goals. For tighter spaces, a compact cabinet design can maximize vertical storage without sacrificing accessibility. Choosing the appropriate material, such as metal construction for durability, can further enhance the cabinet’s lifespan in high‑traffic areas.
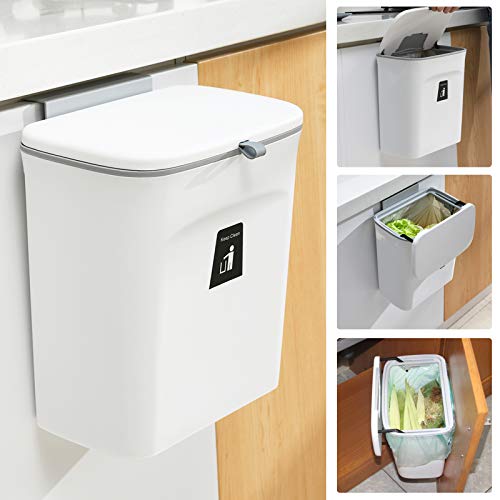
Lid Can Effective Prevent Odor From Escaping:" Indoor hanging compost bin with lid designed specifically as a hidden non smelling, super easy access for load and unload; The compost bucket is the odorless storage for kitchen waste in your home, no charcoal filter costs


Rev-A-Shelf Pullout Waste Container: Keep your kitchen waste and recycling container hidden but easily accessible with this single 35-quart pullout waste container system
Assess Installation Complexity and Required Hardware
If you want a hassle‑free fit, start by measuring the cabinet’s width, depth, and height to match the kit, then tape the bin footprint on the floor to confirm door clearance. Next, conduct a complexity assessment: verify face‑frame protrusion, back‑wall thickness, and slide clearance. Use a drill/driver with a 1/8‑inch bit for pre‑drilling, a level, square, and pencil for reference lines. Gather installation hardware—#8 × 3/4‑inch screws, 4‑1/2‑inch long screws, shims, a 3/4‑inch spacer block, and a screwdriver. Mount slides with ±1 mm tolerance, test glide ten times, then secure the base frame, checking diagonals within 2 mm. Pre‑drill door brackets with a 3/32‑inch bit, use double‑stick tape, and confirm all levers engage before final inspection. The drawer box requires an extra 3 in of space for the glides to ride.
Match Aesthetic Finish to Your Kitchen or Outdoor Décor
Choosing a finish that mirrors your kitchen or outdoor décor guarantees visual harmony and avoids the chaos of clashing tones. You should evaluate existing hardware, wall colors, and flooring to select a finish that creates finish harmony across the space. If your kitchen features sage and cream cabinets, opt for brushed bronze hardware; for moss‑green and light wood, choose warm bronze or white bronze brushed. In outdoor décor, match natural wood tones with similar wood finishes on the cabinet to echo the patio or garden palette. Matte textures conceal fingerprints and lower cleaning costs, while lacquer adds durable color pop without extra upkeep. Align the cabinet’s finish with faucets, light fixtures, and surrounding elements to meet compliance standards, stay within budget, and maintain a cohesive aesthetic.