Gather a Phillips screwdriver, pull key, and the matching 1200‑Series lock kit. Pull the drawer out, release any side‑rail tabs, and lift it enough to expose the lock housing. Insert the pull key, turn ~30° clockwise, then pull the old core straight out while keeping the key in. Align the new core, push it into the housing until it clicks, and tighten the nut. Re‑attach the linkage, secure the housing screws, and test the drawer’s travel. Continue for detailed troubleshooting tips.
Gather Tools & the Correct Cabinet Lock Kit
When you begin replacing a metal cabinet lock, first gather the essential tools and the correct lock‑kit for the job. Your tool checklist includes a Phillips head screwdriver for housing screws, a standard screwdriver to bend the linkage piece, and a change or pull key for core removal and installation. Optional retaining‑clip pliers help secure the cylinder, and a drill may be necessary if the old lock is integrated into the handle. Verify kit compatibility: a 1200 Series handle kit fits standard office, combination, and wardrobe cabinets, providing all required hardware and a slip‑on design after old handle removal. Match the lock core manufacturer (HON, Wesko, etc.) and confirm the replacement core fits the cabinet type—file, lateral, vertical, pedestal, or storage—before proceeding. Remove the top two shelves from the cabinet to gain clear access to the lock housing. Adding a lock also helps comply with safety regulations and reduces the risk of unauthorized access. Choosing a lock with a tamper‑resistant design can further deter forced entry. Durability testing ensures the new lock will withstand frequent use.

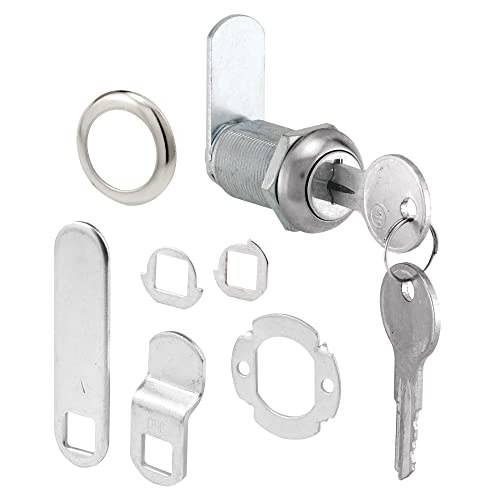
Replacement Kit: File cabinet locks replacement for toolbox. Includes 6 pieces of lock kit which includes nyloc nut, spare offset plate, stop washer, non-slip hex, lock plate, plate cover, lock body and keyed alike.

Security of keys and locks:File Cabinet Lock features a highly secure mechanical lock design that prevents unauthorized access,ensure the security and convenience of the cabinet.This design meets both safety needs and provides a convenient operating experience.

PREMIUM QUALITY: Cam locks are precision cast from upgraded chrome-plated zinc alloy material, chrome-plated surface, waterproof and rust-proof, durable and durable, it is the best lock replacement kit for cabinets, mailboxes, RV compartments, toolbox locks.
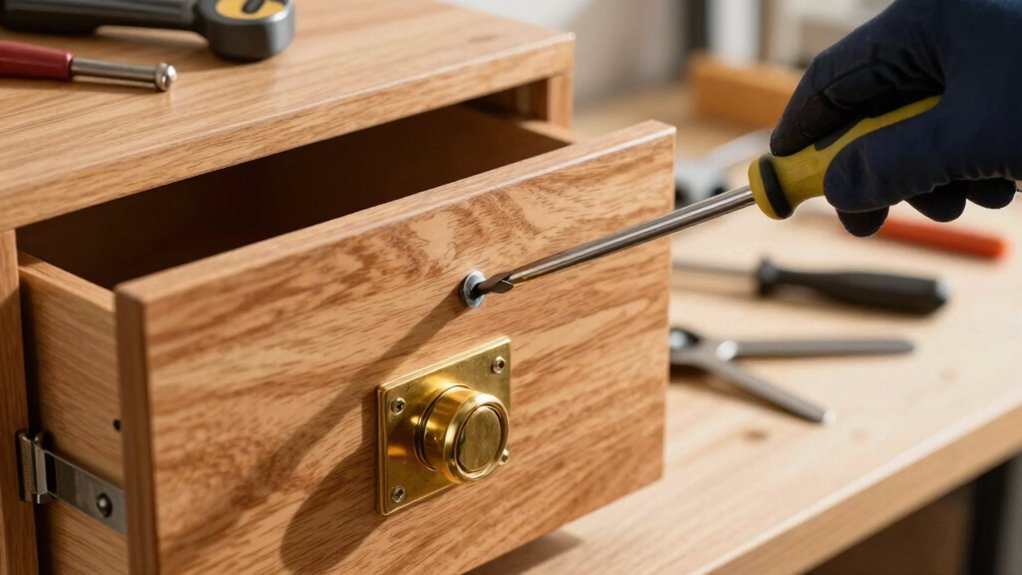
Remove the Drawer to Access the Existing Lock Housing
After gathering the tools and lock kit, pull the drawer out to expose the lock housing. Begin with a full extension; the drawer should stop against its rear bumper. For side‑rail units, press the plastic tabs inward while you pull, then lift the metal levers near the tracks. Roller‑track drawers require you to pull until the rollers meet the track end, lift the front edge, and slide it out. Screw‑secured drawers need the bottom panel removed first; unscrew the mounting bolts, set them aside, and lift the drawer. Throughout, keep the motion steady and maintain a 15° downward tilt if the drawer feels heavy. This drawer removal positions you directly at the lock housing, ready for the next step. The drawer’s ball bearing glides allow it to slide out smoothly. Parallel token output can significantly speed up the replacement process. Understanding the cam lock mechanism helps ensure proper alignment during installation. Properly securing the lock with a magnetic latch ensures the cabinet remains closed when not in use.
Extract the Old Lock Core With a Pull Key
If you’ve already positioned the drawer, insert the core key fully into the lock’s keyway, align it precisely, then turn it about one‑eighth turn (≈30° clockwise) until you hear a small click that retracts the core’s lug and aligns the pins to the upper shear line. After the click, grip the flat surfaces of the core, avoiding the detent springs, and pull straight back. The lug retraction releases the core, allowing it to slide out smoothly. Keep the key inserted while you pull, then withdraw it once the core clears the housing. If the core resists, verify that the keyway is fully aligned and that you’re applying steady, linear force. This method extracts the old lock core cleanly, preparing the cavity for the new assembly. Installation tools may be required if the core is tightly seated. Always double‑check that the cabinet is empty and the firearm is unloaded before beginning the lock replacement process. Safety precautions should be observed throughout. Properly aligning the magnetic catch ensures a secure closure and prevents future misalignment. Wear protective gloves to reduce the risk of hand injuries while handling metal components.
Insert the New Lock Core
Insert the new lock core by first seating the control key fully into its keyway, then give a slight one‑eighth‑turn clockwise to engage the latch. Verify core compatibility with the housing dimensions before you start; the new core must match the old length and diameter. With the cabinet unlocked, clean the slot of debris, then align the key and the core’s flat surfaces. Push the core straight into the housing, maintaining key alignment, until you feel a definitive click. Hold the core edge with a finger while the key remains seated to prevent rotation. After the core seats, keep the control key in place, turn it to a neutral position, and confirm the latch engages smoothly. This guarantees a secure, properly aligned installation. Core removal key also releases the last pin inside the core, allowing it to be pulled straight out. High‑quality lock selection is essential for long‑term durability and resistance to tampering. Use a cylinder alignment tool to ensure the core sits flush with the cabinet face.

SECURE FILE CABINET DOORS AND DRAWERS – This drawer and cabinet lock makes it easy to secure your drawers, important files, and small items; the drawer lock is keyed differently with a Yale Y-11 keyway

SECURE FILE CABINET DOORS AND DRAWERS – This drawer and cabinet lock makes it easy to secure your drawers, important files, and small items; the drawer lock is keyed alike with a Yale Y-11 keyway
SECURE CABINET DOORS AND DRAWERS – This U 9945 lock can be used to secure cabinet doors, drawers and much morewith the securing hex nut.
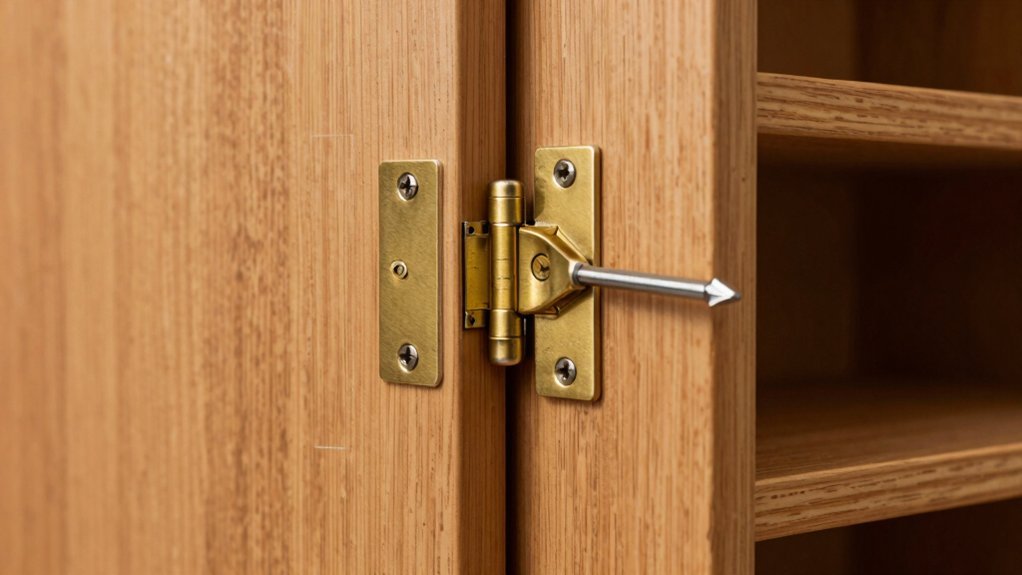
Secure the New Housing and Hook Up the Linkage
Secure the new lock housing by sliding the lock body through the prepared aperture until it sits flush against the cabinet surface, then align it with the frame or drawer front, attach the interior washer or plate, and hand‑tighten the nut before using a wrench to snug it evenly while confirming the housing stays level and gap‑free. Next, drive the mounting screws through the housing flange, tightening them in a criss‑cross pattern to maintain housing alignment without warping. Insert the pointed end of the linkage into the pre‑drilled bolt hole, pivot it down, and match the square end to the lock slot, ensuring proper linkage tension. Clip the retaining piece against the wall, bend the square end upward for grip, and verify the linkage engages the drawer mechanism before proceeding. The lock bar must be cut to the exact distance between the strike plate and cylinder to ensure proper fit. Accurate measurement is essential to prevent misalignment and ensure smooth operation. Choosing a lock with a high security level helps protect valuable contents from tampering. Consider the material durability of the cabinet to ensure the lock installation remains stable over time.

【Complete Coverage】60-piece baby proofing kit vs. typical 20-30 piece sets — includes 12 invisible cabinet locks for baby proofing cabinets, 14 corner protectors child proof, 14 3-prong plug covers baby proofing, 6 child proof door lock straps, 2 metal furniture anchors + key, covering 95% of household hazards in one box.

All-in-one Child proofing Kit: Ensure the safety of your kids (up to 5 years) at home, with the easy to install 4-in-one, baby proofing kit. It includes 6 adjustable safety latches, 8 invisible cabinet locks, 16 plug covers for electrical outlets, and 10 clear corner bumpers making it a perfect for new parents and baby shower gifting
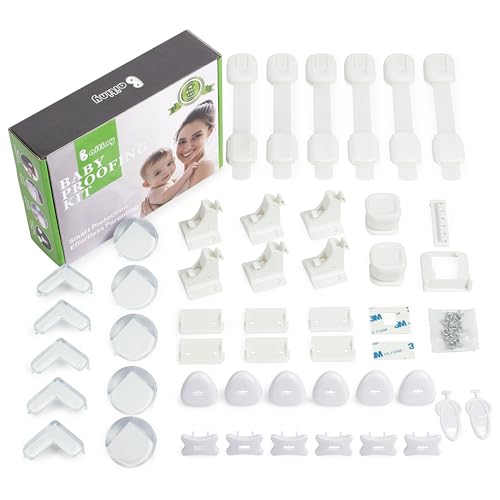
All-in-One Baby Proofing Kit — 44 Pieces Cover Every Hazard in Your Home Unlike standard 20-piece sets that leave cabinets unprotected, this complete baby proofing kit includes 6 magnetic cabinet locks + 2 keys, 6 adjustable baby proof strap locks (7" long), 10 corner protectors, 14 child proof outlet plug covers and keys. One baby proofing kit replaces 4 separate purchases — saving $35+ vs. buying individually.
Test Each Drawer to Confirm Smooth Locking
Before you start loading any items, run an empty‑drawer test to verify that each drawer slides and locks smoothly; this isolates mechanical issues from weight‑related problems and lets you confirm proper alignment and tension before proceeding with full‑capacity use. Pull each drawer out fully, observe the travel, and listen for grinding. If the movement feels rough, clean the tracks with a vacuum, then apply a thin coat of silicone‑based smooth lubrication, avoiding WD‑40. Use a bubble level to check drawer alignment; adjust the slides until the faces sit flush with the cabinet frame. After cleaning and lubricating, re‑insert the drawer and cycle it five times, confirming that the lock engages without hesitation. Repeat for every drawer to guarantee consistent performance. The heavy‑duty R Line uses ergonomic handles with large end caps and optional right‑side drawer lock. Regularly inspect the cabinet for humidity damage to prevent warping or rust. Secure the cabinet with wall anchors to stop tipping. Ensure the cabinet is mounted on a level surface to maintain proper alignment and reduce stress on the lock mechanisms.
What to Do When the Lock Doesn’t Operate Properly?
If the lock still won’t turn after the empty‑drawer test, start by inspecting the key, lock bar, and plastic ribbon for wear, debris, or misalignment. Remove visible particles with a brush or compressed air, then apply a graphite‑based lubricant to the key and pivot points. Verify that the lock bar slides freely along its track; if it sticks, wipe the track and re‑lubricate. Check the plastic ribbon for binding—flip any stuck levers or cams manually and re‑lubricate the interlock area. Make sure the cabinet sits level; uneven legs can misalign components and cause jamming. Perform these lock troubleshooting steps methodically; if the mechanism still fails, consider escalating to more invasive repair methods. The original cabinet was found alongside the road and later repurposed for office use. Material thickness plays a crucial role in overall durability and security. Properly securing valuable tools in a cabinet can also help meet regulatory compliance standards. High‑security electronic locks provide superior resistance to picking and drilling.

PRIMARY USE: Used to keep locks lubricated and working smoothly

Reduces friction: Graphite is a natural lubricant that helps reduce friction between the lock's internal components, making it easier to turn the key and operate the lock mechanism.

4.5 grams powdered graphite lubricant. Please see image for sizing, this is a small tube.
Cabinet Lock Replacement – When a Full Swap Isn’t Needed
Ever wondered why you can replace a cabinet lock without tearing out the entire hardware? You can swap just the lock core when the surrounding housing still fits the cabinet. First, identify the core code on the face and note the manufacturer—HON, Wesko, Hirsh, Anderson Hickey, FireKing, or Medeco are common. Verify core compatibility with your existing housing; most kits cover A‑ZUM ZG, W601‑W650, and Performance Series. Use a hook pick or control key to extract the core, then install the replacement kit, which includes a removal key and two extra keys for key grading. Thread the nut, secure the clip, and test the new key. This approach avoids full lock removal, saves time, and costs only $30‑$35. Online retailers often ship replacement keys within a week.

For files that have HON “One Key” standard locks.


Sold as 1 EA.